I decided to test how well my Ender 3 can print PETG and printed multiple 20mm cubes and even a vase.
In this article, I will share with you my findings, what settings worked as well as which ones didn’t, and more!
I will also include a couple pictures of the models I created so that you can see the print quality I managed to achieve.
If you don’t want to have to go through all the trial and error that we did in order to find the Ideal Settings for creating high-quality prints on your Ender 3, then definitely check out our own Cura Profiles tailored specifically for the Ender 3 Printer Series.
Without any further ado, let’s get started!
Print Temperature
Generally speaking, PETG prints really well between the 220°C and 250°C range. However, the Ender 3 uses a Bowden-type setup which isn’t designed to print over 240°C or 245°C since it could get damaged, so I’d recommend staying in that 220°C to 240°C range.
In my testing, printing at 220°C delivered the overall best print quality.
Ideal PETG printing temperature on the Ender 3:
- 220°C – 240°C (with 220°C yielding slightly better-looking results)
After trying out multiple different printing temperatures on over 20 different prints, I found that in my case, 220°C delivered the best results. 230°C and up would create strings and blobs on the top layers or my models, in fact, you can see it here in the stringing tests I ran (I printed over 10 stringing tests using two different filaments until I got it right):

Right: Same stringing test but printed at 220°C with a great-looking top layer.
Bed Adhesion
Bed adhesion is probably the most important factor to consider when printing since you want your first layer to adhere properly to the print surface in order to avoid warping and to keep the print from detaching.
Factors such as printing temperature, bed temperature, the build surface type you’re using, etc. will influence how well the model stays stuck to the surface.
Bed Temperature
PETG needs to be printed at a fairly high temperature, which means that in order to avoid warping you’ll need to set the bed between 60°C and 70°C (60°C is what’s generally recommended, however I didn’t have great results with it).
Now, here’s something you may not have known, but the higher the bed temperature the stronger the adhesion. In fact, a study was conducted where the results showed that bed adhesion was strongest when going just slightly over the Glass Transition temperature of the plastic, which in the case of PETG is 80°C (essentially, you need to set the bed temperature to a little over 80°C).

Middle: Cube Printed with the bed at 70°C (significant warping).
Right: Cube printed with bed at 85°C (Almost no warping).
I printed a couple different 20mm cubes at 230°C with varying bed temperatures (60°C, 70°C and 85°C), and the bottom corners of the first two cubes warped (60 and 70°C), but at 85°C the adhesion was strong enough so that the warping was nearly eliminated.
So, start with 60°C and if the print warps, then consider increasing the bed temperature to 70°C and if that doesn’t work, try 80°C or 85°C.
Ideal PETG Bed Temperature for Ender 3:
- To achieve the strongest adhesion possible, set the bed slightly above the glass transition temperature of PETG (80°C). 85°C seems to yield the strongest adhesion.
Build Surface
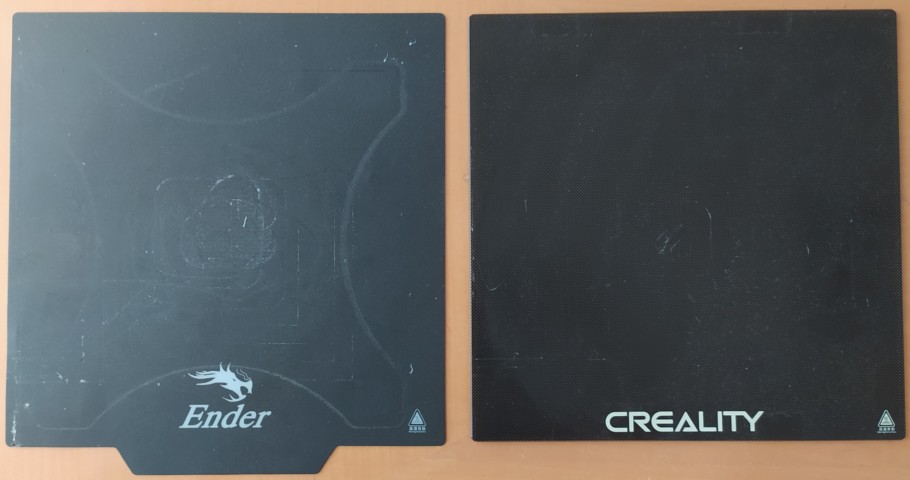
My PETG print tests on the Ender 3 were conducted using the Creality glass bed and even though small objects like the 20mm cube suffered from a little warping, they never detached from the build plate, even no matter the bed temperature.
Many people recommend using Kapton tape or blue painter’s tape since both of them allow PETG to adhere much more strongly.
However, the ideal solution seems to be the build surface that comes included with both the Ender 3 Pro and the V2, not the Ender 3, which is the BuilTak or magnetic build surface, since it provides an excellent surface for PETG to stick to, and removing the prints is also quite simple.
Important Note: Some websites say that PETG may stick so well to a glass bed that removing it might cause the glass to break or even that it might take some chunks of glass with it. I haven’t had that experience at all, in fact, my experience with PETG was that the adhesion wasn’t as strong as with some other materials like PLA, TPU, etc.
Test it out for yourself and see what works. If you find it hard to remove the print, let the bed cool down first (even sticking the bed in the fridge might help it contract which should make removing the PETG easier).
Print using a Skirt, Brim or Raft for PETG?
I wrote an entire article explaining what a skirt, a brim and a raft are and you should definitely check it out since they can really help improve bed adhesion.

When printing the different test cubes, all of them warped when printing with a Skirt, so I tried printing another one using a Brim with the bed at 60°C and not only did it warp, but it actually detached from the build plate (I tried this several times and always ended up with the same result).
The absolute best results I got was printing with a Brim and setting the bed temperature at 85°C since this kept the print stuck to the bed at all times without allowing it to warp even a little.
A raft will increase bed adhesion even further, but make sure to read the article I just linked about rafts, brims and skirts, since a raft will use more material and leave marks on the model.
I generally recommend using a skirt, and if you need better adhesion go with a brim.
Retraction Settings

Retraction is when the extruder pulls the filament back to relieve some pressure inside of the hotend to keep the filament from oozing out, which is essential when trying to avoid stringing. Now, PETG, when in its molten state, is much more viscous than other filaments and requires the proper retraction settings to be enabled if avoiding stringing is a priority to you.
However, PETG does print very similarly to PLA and the retraction settings are often the same, or very similar.
So, if you’re using Cura, the default retraction settings should work just fine, in most cases.
Ideal PETG retraction settings for the Ender 3:
- Retraction Distance: 6.5mm.
- Retraction Speed: 25mm/s.
- Maximum Retraction Count: 10.
- Minimum Extrusion Distance Window: 10mm.
- Combing Mode: ON and set to “Within Infill” (no stringing).
If you want to learn all the ins and outs about retraction on the Ender 3, check out this article we wrote!
Print Speed
PETG doesn’t really need to be printed slower than PLA, so the Default Cura settings for the Ender 3 should work just fine (50mm/s).
If you want to improve the quality of the print you could definitely slow it down as much as you’d like, but between 30mm/s and 50mm/s seems to be the sweet spot.
Ideal PETG Speed Settings for the Ender 3:
- 30mm/s – 50mm/s.
Print Cooling
Like I previously mentioned, you want to achieve a well-adhered first layer and in order to accomplish this the layer fan should be turned off while the first couple layers are being printed.
After this, the fan should be at 100% to increase detail and to reduce stringing.
However, if detail isn’t a priority and strength is more desired, print with the layer fan off for the entire duration of the print. This will ensure a better bonding between the layers and will increase layer strength as well as the overall strength of the model.
Ideal PETG Speed Settings for the Ender 3:
- For detail, the layer fan should be at 100%, except for the first couple of layers to ensure a good first layer adhesion.
- For strength, print the entire model with the layer fan turned off.
Do you need an Enclosure for printing with PETG?
An enclosure isn’t necessary when printing with PETG since it’s a fairly simple material to work with, however, it will definitely help in preventing models from warping or detaching from the build surface because the temperature inside of it stays relatively warm and consistent.
Now, printing with an enclosure generally helps avoid a couple issues and while it may not be a necessity, having an enclosed printer can save you from a couple failed prints.
PETG is simple enough to work with but definitely warps more than PLA, not as much as ABS though, and if you live in a cooler climate then you might want to enclose it to reduce the risk of warping.
Ideal Ender 3 settings for printing with PETG
The settings for printing with PETG are very similar to the ones used to print with PLA, since they are such similar materials. However, there are a couple key differences:
- Printing Temperature: 220-240°C (top layers look better at 220).
- Bed Temperature: 85°C for best adhesion.
- Initial Layer height: 0.2mm for best first layer adhesion.
- Retraction distance: 6.5mm.
- Print Speed: 30mm/s – 50mm/s.
- Fan Speed: 100% for detail, off for strength.
If you don’t want to have to go through all the trial and error that we did in order to find the Ideal Settings for creating high-quality prints on your Ender 3, then definitely check out our own Cura Profiles tailored specifically for the Ender 3 Printer Series.
Conclusion
The main issue I had with PETG was bed adhesion, especially when trying to print with the bed at 60°C, which is generally the recommended temperature I’ve seen online, since prints would warp or even detach from the build plate.
I decided to increase the bed temperature to 70°C but there wasn’t any real change.
Since PETG’s glass transition temperature is 80°C, I decided to try 85°C and this worked like a charm (check the study I linked earlier where the conclusion is that going slightly above the glass transition temperature increases adhesion), both when printing with- and without a brim, but this may be because I’m using a glass bed and not the BuildTak one, maybe with the BuilTak bed you can comfortably print at 60°C.
So, if you’re having bed adhesion issues with PETG, try increasing the bed temperature!
Other than that, the Ender 3 is perfectly capable of printing PETG without any problems and the prints come out looking great, even though I have to say that PLA seems to print better on this machine and achieves a nicer finish, but the PETG prints are still perfectly acceptable.
Check out our recommended products section

We created a recommended products section that will allow you to remove the guesswork and reduce the time spent researching what printer, filament, or upgrades to get, since we know that this can be a very daunting task and which generally leads to a lot of confusion.
We have selected just a handful of 3D printers that we consider to be good for beginners as well as intermediates, and even experts, making the decision easier, and the filaments, as well as the upgrades listed, were all tested by us and carefully selected, so you know that whichever one you choose will work as intended.
Error processing API data.
Thank yo so much!
Thank you. I solved the problem with PETG.
On my Ender 3v2, with glass bed at 70-85 it’s impossible to remove the part, it sticks so well that you can grab the entire printer by the part. How did you solve that?
In my case, the only thing I do is to let it cool down entirely and it usually comes off quite easily.
However, there’s been a couple occasions where I had to put the entire glass bed with the print in the fridge, which helped as well.
I have tried 100 different settings from 100 different sources and countless combinations in between. Something finally clicked when I saw the phrase “to avoid grinding your filament.”
It turns out my, many, previous attempts have completely destroyed the filament that was trying to be forced down the Bowden Tube. Cleared out the piece and these settings work perfectly!