If we think about 3d printing, the first thing that comes to mind is a machine that melts plastic while an extruder moves along 3 orthogonal axes while forming a solid object. It seems very simple, but as start to dig deeper into this technology, we quickly find out that there are countless parameters that determine the way in which this happens.
Depending on the type of model, the retraction settings can make or break your prints. If you own an Ender 3 printer (or any Bowden-type machine) the following retraction settings will definitely prove to be useful:
Being a Bowden-type printer, the Ender 3 requires a longer retraction distance and it is recommended to enable “Combing Mode” and to set it to “Within Infill”. Additionally, set the Retraction Distance to 6mm, Retraction Speed to 20mm/s, Maximum Retraction Count to 5, and Minimum Extrusion Distance Window to 10mm.
If you don’t want to have to go through all the trial and error that we did in order to find the Ideal Settings for creating high-quality prints on your Ender 3, then definitely check out our own Cura Profiles tailored specifically for the Ender 3 Printer Series.
- What is retraction and why is it important in 3d printing?
- Parameters related to retraction
- Recommended retraction settings for an Ender 3 (Pro / v2) printer
- Recommended retraction settings for printing miniatures with an Ender 3 (Prov / v2) printer
- Retraction and stringing calibration tests
- Frequently asked questions (FAQ)
- Conclusion
- Check out our recommended products section
What is retraction and why is it important in 3d printing?
As you may already know, the hotend receives the filament from the extruder, which pushes the material through a toothed wheel. This thrust generates an increase in pressure inside the nozzle. If the temperature is sufficient, and the extruder motor steps are correctly calibrated, the plastic will begin to flow in the exact amount that is required to create the desired model.
The issue with this mechanism is that there is still a remaining pressure inside the barrel after the extruder motor has stopped, which forces the filament to continue flowing through the only free outlet it has (i.e. the nozzle). When printing requires the hotend to move from one point to another without depositing material, it is necessary to relieve that remaining pressure, in order to avoid the plastic from “escaping” during this movement.
The way to achieve this is to reverse the rotation of the extruder stepper motor, such that a few millimeters of filament come out of the hotend and compensate for said pressure. This reversal of rotation is called “retraction” and is a fundamental parameter to achieve printed objects with a good surface finish.
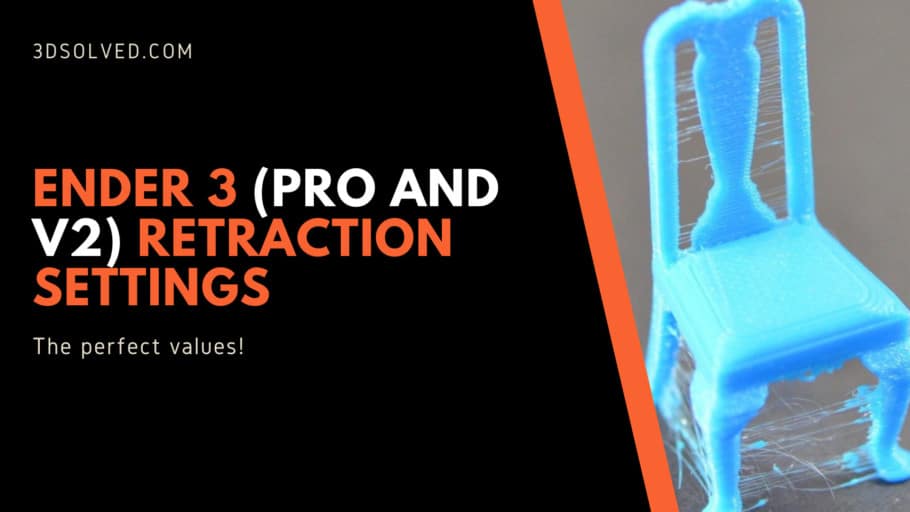
The over-extruded material from the nozzle will become thinner as the hotend moves, leaving a “thread” or “string” between two walls of the part. This is known as “stringing” and can be avoided (or at least minimized) through some printing parameters. You may not previously have heard about this term, but I’m almost sure that you have seen it before. Take a look at the following image of a chair that features a good amount of stringing.

Parameters related to retraction
First, we must make sure that the “enable retraction” box is activated, to access the retraction parameters. From now on, we will focus on Cura settings. You will find equivalent parameters on many slicers.
I should clarify that I’ll use the naming convention from Cura, but the same principles most definitely apply to all slicers.
Retraction Distance
Retraction distance tells the printer how many millimeters of filament to retract when required. Retracting only a very small distance won’t probably solve stringing, whereas exaggerating this value will cause no plastic to be available in the nozzle during the initial moments of the next extrusion.
In order to avoid this, there is the so-called “priming” setting, which returns the filament to the same position it was in before retraction. That is, if 5 mm of filament were retracted, after moving between two points without extruding, 5mm of filament will be pushed back into the nozzle.
Oftentimes, the model at hand requires too many sequential retractions during a very short period of time. If the retraction distance is too high, the gear teeth pushing the filament will start grinding it. If the filament becomes too thin, the gears will not push it but rather slide against it. As a result, no more filament will be extruded, and the print will obviously be completely ruined.
To avoid this, we are going to establish the minimum possible retraction distance that allows us to mitigate the stringing. The 3-6mm range usually works for most Bowden-type 3d printers. You can start with a retraction distance of 3mm and increase it by 1 mm if you consider it necessary.
While Ender3 printers have been on the market for several years now and are known for their reliability, many users choose to modify their settings in order to achieve better printing results. One of the most common modifications is to transform it into a direct extrusion system. While we do not recommend modifying a tested design (unless you are extremely confident of your engineering skills), you can give it a try and draw your own conclusions.
One of the advantages of a direct drive system is a more precise control of retractions. For those types of printers, start with a distance of 0.5mm and increase it in increments of that same value until you get an optimal result.
Maximum Retraction Count
This parameter allows us to define the maximum number of retractions that can be made along the same segment of filament. This way, the filament grinding mentioned above can be avoided. Start by setting this value in the range of 5 to 10. The default for Cura is 100, but it is way too high.
Minimum Extrusion Distance Window
Here you can define the length of the filament segment to which the retractions specified in “Maximum Retraction Count” will be applied. Since the retractions will be between 3 and 6mm, an appropriate value is 10mm. This way, you’ll be sure that the filament will not be damaged by excessive retractions.
Retraction Speed
This specifies how fast the extruder will rotate in reverse. It has to be fast enough to prevent the filament from leaking through the nozzle, but not excessively so since an excessive speed will also require power that the extruder motor will not be able to deliver, causing it to lose steps. A good value to start with is 20mm/s. You can afterwards always can raise this value through a stringing test (links below).
Retraction Prime Speed
This value lets you set the speed by which the material is fed back into the nozzle. This parameter lets you control the way in which the hotend is ready to continue extruding as if nothing had happened.
The retraction speed is divided into two different parameters because of a good reason. When removing the filament, the pressure is higher at the beginning of the retraction than at the end, which relieves the stress on the extruder gear. On the other hand, during priming, the pressure (and therefore the strength in the gear) increases more and more.
For this reason, priming can damage the filament more than retraction. We recommend you to use a speed 5 mm/s lower in this parameter than that the one you set in “Retraction Speed“.
Extra Prime Amount
With this parameter, you can compensate for the amount of material that was lost due to oozing. If you set the retraction distance and speed correctly, you will not need to compensate for anything, so we recommend that you leave this parameter at 0 and perform the calibration tests instead. (links below)
Recommended retraction settings for an Ender 3 (Pro / v2) printer
Due to the fact that Ender 3 printers are definitely one of the most popular printers (if not the most), I’ll get into the specific settings that I recommend and also use on my own machine. Although all printers are somewhat unique, these settings will serve as an excellent starting point.
- Combing Mode: ON and set to “Within Infill“
- Retraction Distance: 6mm
- Retraction Speed: 20mm/s
- Maximum Retraction Count: 5
- Minimum Extrusion Distance Window: 10mm
These settings will prove to be useful for all Bowden-type printers. You can obviously tweak these values and improve them for you specific needs. Printing tests that were designed to specifically reduce stringing will help to accelerate the fine-tuning. I list them all at the end of this article.
You may also be surprised by the fact that printing miniatures require a specific retraction configuration in order to yield the best results. Obviously, I’ll also list them right now!
Recommended retraction settings for printing miniatures with an Ender 3 (Prov / v2) printer
- Combing Mode: ON and set to “Within Infill“
- Retraction Distance: 6mm
- Retraction Speed: 45mm/s
- Maximum Retraction Count: 10
- Minimum Extrusion Distance Window: 10mm
It is interesting to know that the Z-hop, a parameter that raises the Z-axis a short distance before moving without extruding and lowers it again when it reaches the next printing point, considerably increases stringing (regardless of the calibration you previously performed). I strongly recommend that you disable it, especially if you have achieved an optimal parameter setting.
Personally, this video by Makers Muse was invaluable back when I first encountered this issue.
Why is “Enable Combing Mode” recommended?
The problem with stringing is that it leads to the outer surface of your object being unpleasant to look at. If the stringing only occurred inside of the object, we would not be able to be displeased by it. Therefore, retraction only makes sense when the nozzle travels from one point to another thorugh an area that has no print layers underneath. By enabling combing mode, you can order the slicer to only move the hotend within printed areas (whenever it is possible).
There are 4 different options available to choose from, but my favorite is “within infill”. Although it increases printing time, it reduces the number of retractions to the very unavoidable minimum.
Retraction and stringing calibration tests
Temperature Tower
Although we haven’t mentioned it yet, one printing parameter that seriously affects stringing is the hotend temperature. The hotter it is, the easier the filament will flow, which will greatly increase the oozing from the nozzle. Because of this, the first thing you have to do is calibrate the temperature of your printer, until you achieve the best results. To do this, I recommend you print the following test, which consists of a temperature tower that increases by 5 ºC in a well-defined layer interval.

If you click on “Thing files” you will see a G-code file that is already compatible with the Ender3. Do not use your slicer program to generate a G-code as you usually do, as it will not vary the temperature throughout the printing. Using different processes in Cura is an option, but the appended file works perfectly.
Basic Stringing Test
Once the temperature is calibrated, disable retractions in your slicer and print the following file. Take a look at the picture and guess what it tries to asses.

The result will be a piece full of hairs between both cylinders. Re-enable retractions and compare the result with the newly printed part. From there on, increase or decrease the Retraction Speed and Retraction Distance values until both cylinders are correctly printed and there are no hairs between them.
Retraction Calibration Tool
If you are not already amazed about how awesome the 3d printer community is, check out this free online tool that someone created. It allows us to create a G-Code for testing purposes that are compatible with our specific printer. The instructions are very detailed and helpful, but be sure to read them.
Frequently asked questions (FAQ)
Is retraction the same for Bowden and Direct extrusion systems?
Although enabling retraction is useful regardless of the type of printer, Bowden type machines usually require a higher retraction distance compared to direct driver printers.
The reason is the following: 3d printers that use the Bowden system (like the Ender3) place the extruder away from the hotend, and the filament is channeled through a PTFE tube. As the tube has an internal diameter of 2mm and the filament has a diameter of 1.75mm, the looseness between them requires that this difference must be compensated by increasing the retraction distance.
Direct extrusion systems lack this problem, and filament shrinkage tends to not be such a big deal.
Essentially, Bowden systems require a much longer retraction distance.
Is retraction the same for all filament types?
Luckily, PLA is a very stable polymer, so it is possible to adjust our printer to achieve almost no stringing. The same happens with ABS, although it presents other problems such as warping and cracking. Other materials, such as PETG, require a much higher temperature to melt, which favors the formation of strings as it cools down.
Flexible materials, such as TPU, compress during extrusion and stretch during retraction, so it is not very convenient to activate the retraction to print it. In this case, stringing is inevitable.
In addition to retraction settings, humidity in the filament can also increase the probability of stringing, which is why I always recommend storing our spools in an airtight container, with plenty of silica gel bags.
If you don’t want to have to go through all the trial and error that we did in order to find the Ideal Settings for creating high-quality prints on your Ender 3, then definitely check out our own Cura Profiles tailored specifically for the Ender 3 Printer Series.
Conclusion
By now, you have a better understanding of all the retraction settings that are available and how they should be configured differently depending on our printer type (Bowden or Direct Drive). Bowden-type printers, like the Ender 3 (Pro and v2), require longer retraction distances. In summary, you should enable “Combing Mode” and set it to “Within Infill“. The Retraction Distance should be 6mm, the Retraction Speed 20mm/s, the Maximum Retraction Count 5, and the Minimum Extrusion Distance Window 10mm.
Check out our recommended products section

We created a recommended products section that will allow you to remove the guesswork and reduce the time spent researching what printer, filament, or upgrades to get, since we know that this can be a very daunting task and which generally leads to a lot of confusion.
We have selected just a handful of 3D printers that we consider to be good for beginners as well as intermediates, and even experts, making the decision easier, and the filaments, as well as the upgrades listed, were all tested by us and carefully selected, so you know that whichever one you choose will work as intended.
Error processing API data.
Thank you for this post. I’ve seen lots of people posting their personal setup details but nobody has explained the purposes like you have – I really appreciate it!
At the start of your article, you mentioned Retract Speed of 200mm/s. I almost fell off my chair. It should be 20mm/s, as mentioned at the bottom of your article.
You sir are absolutely right, that was a typo! Thanks for noticing, I already corrected the mistake.