Regardless of the printer brand, all 3D printer users have experienced this particular problem at some point. This article analyses the different factors that can cause said issue and the solutions in each case.
How can users fix the layer skip issue? Generally, it is a mechanical problem and it is possible to solve it and even prevent it with a few simple adjustments and good maintenance.
How to tell if the 3D printer is skipping layers?
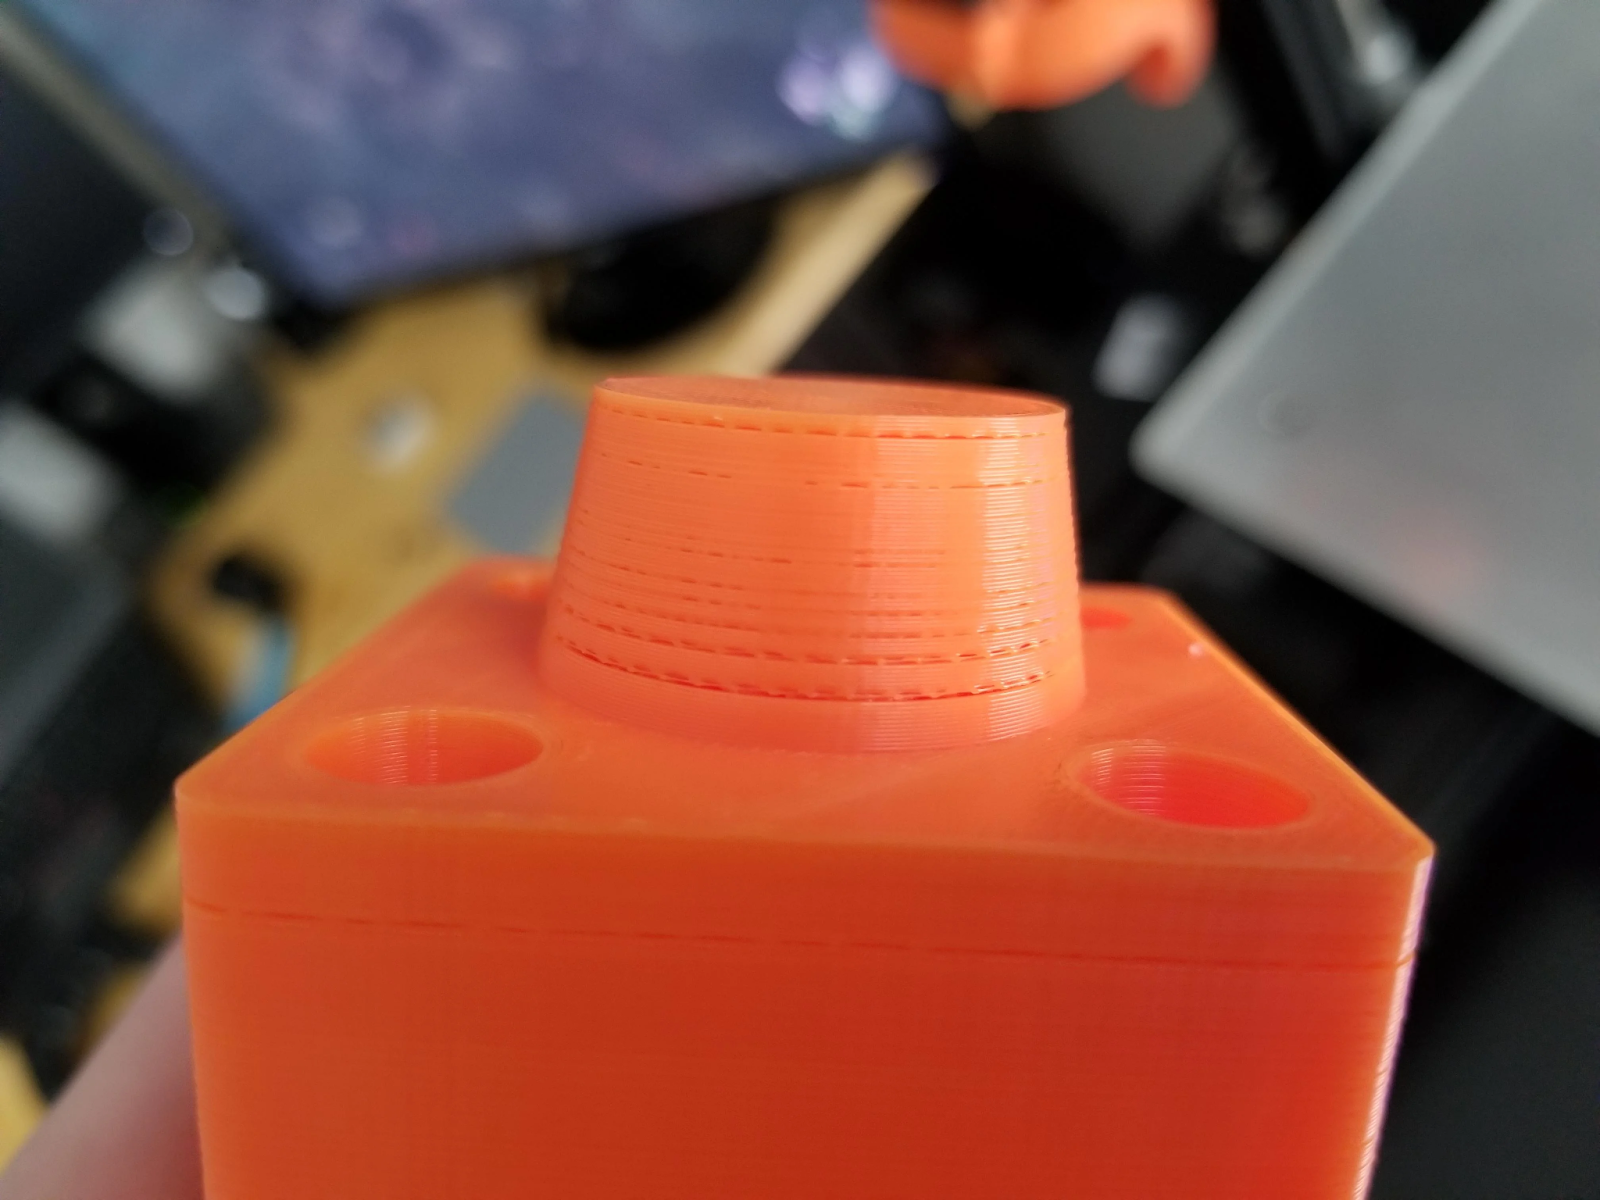
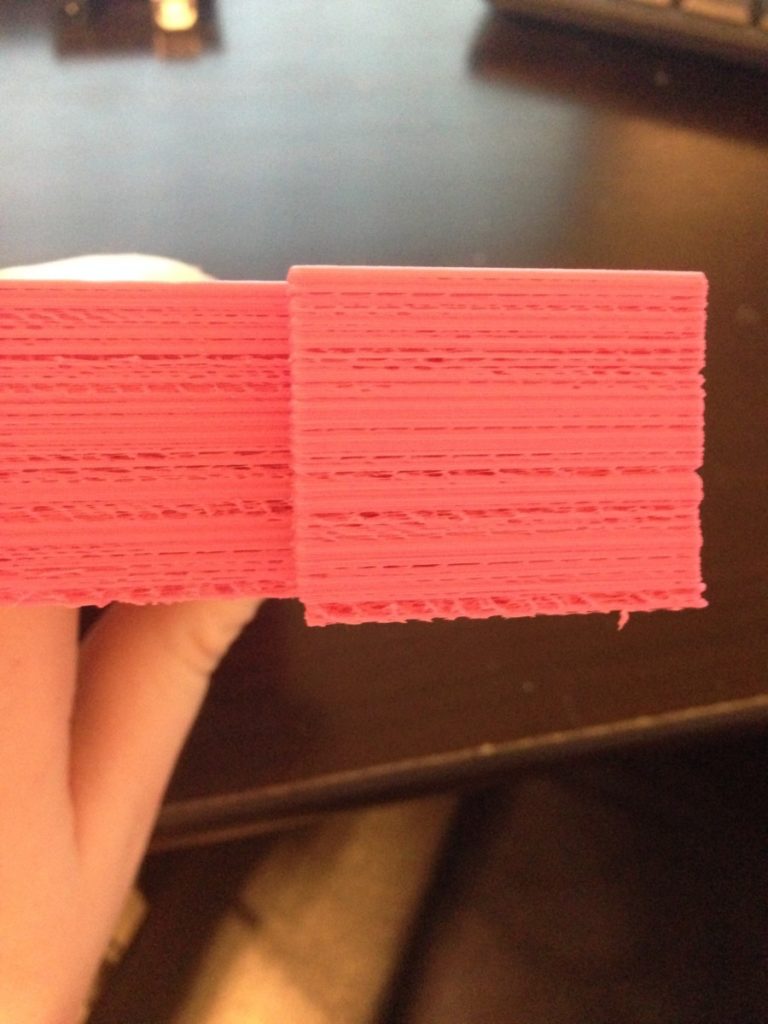
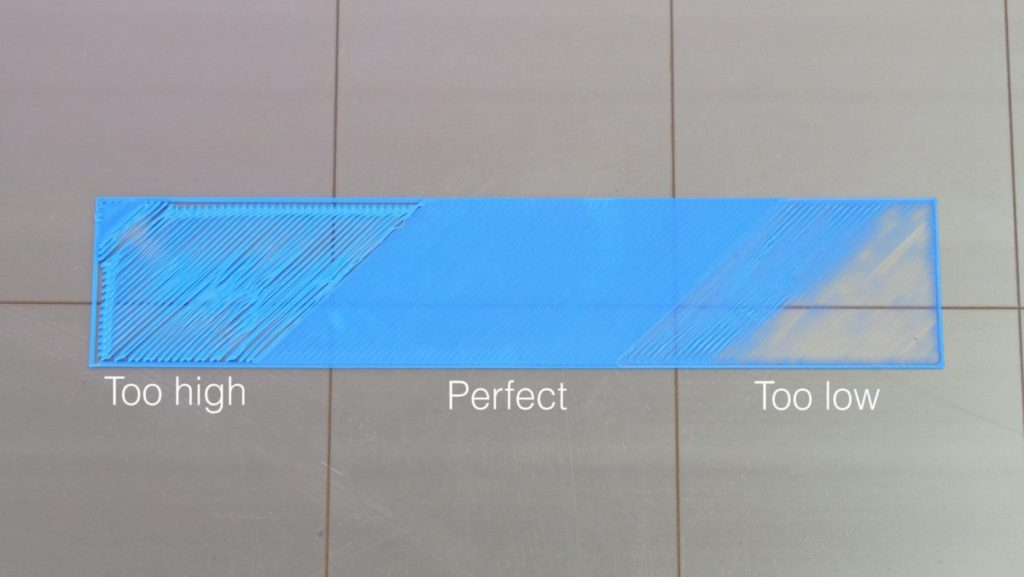
When there are layer skipping issues, some layers with a lack of material or an irregular and scarce flow can be observed in the pieces as seen in the images below. Thus, pieces have a bad and even fragile appearance.
What are the causes and how to solve the problem?
There are many factors that can cause these types of problems. In general, lack of layer or layer skipping is usually because of a mechanical problem. Solutions from the most general to some more specific to fix said issue are described below.
Start with mechanical maintenance
It is important to learn how to perform mechanical maintenance on the printer to prevent future inconveniences and thus also extend the useful life of its elements. Like it occurs with any machine, parts wear down due to frequent usage and some screws loosen, lubricated parts dry out, etc.
Carry out a maintenance service with some simple steps:
Tighten all nuts and screws
Vibrations due to constant movement are the cause of screws and nuts loosening. If the printer screws are not properly tightened, small misalignments can be observed in some axes and in the belts as well, among others misalignments.
How to do it
For this task, Allen keys and pliers or wrenches the size of the nuts are required.
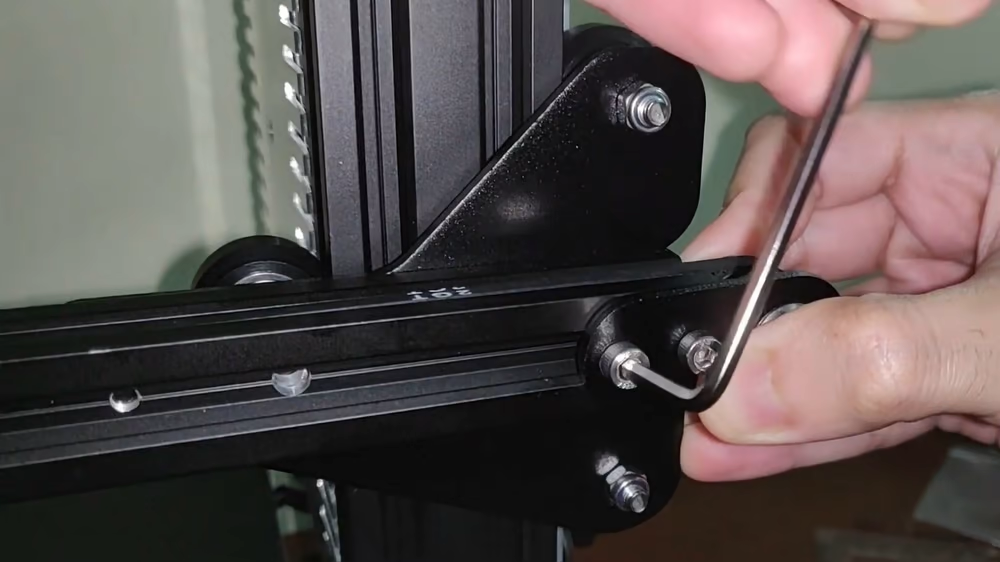
Simply check and tighten all the screws using the appropriate Allen key. If the screw is through and the nut is behind it, hold the nut with pliers or a wrench so that it does not turn falsely when tightening the screw.
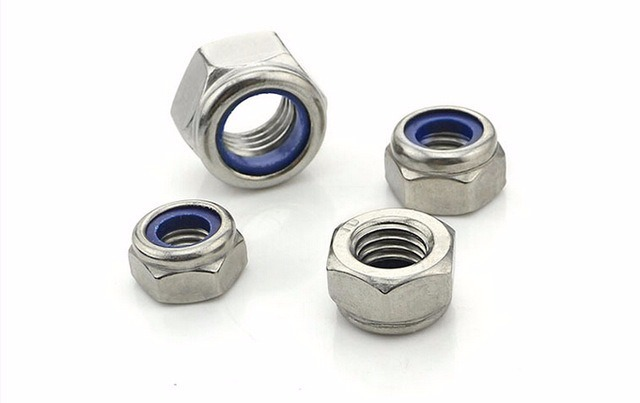
In some cases, it is suitable to change the normal nuts for self-braking nuts. These are made of a material in their inside that works as a brake so that they do not loosen with vibrations.
It is also important to properly tighten the carriage belt. Generally, printers have a manual tightening system. For this, loosen the screws by releasing strap tension. Then, holding the end of the strap by hand, stretch to get good tension and tighten the screws once again.
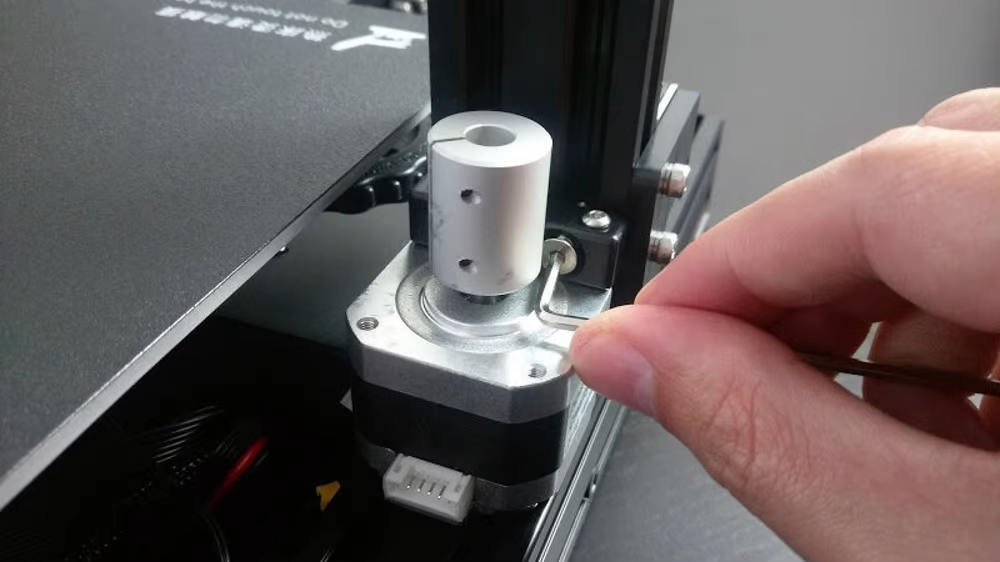
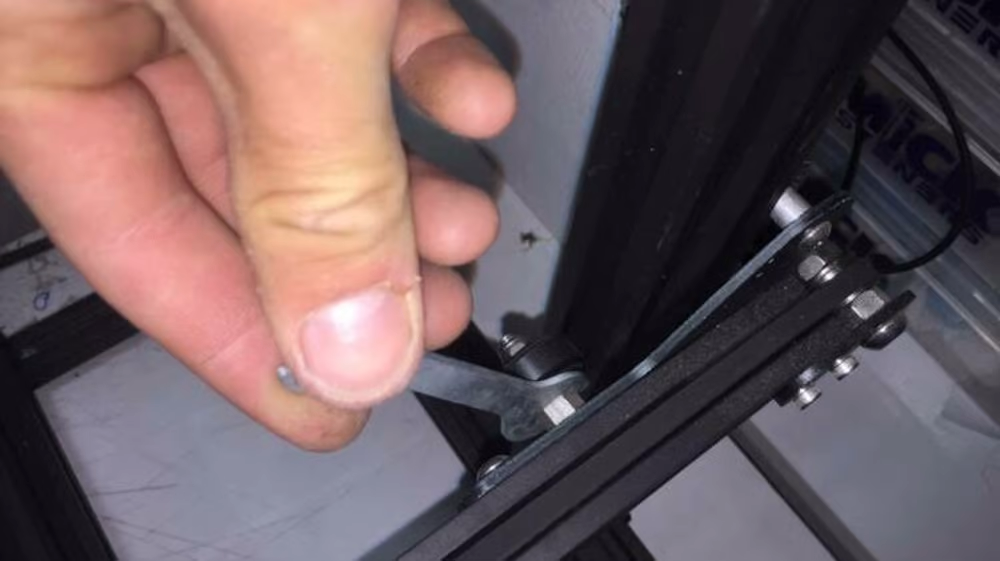
For Ender printers or similar ones, it is also important to tighten the eccentric nuts of the bearings with a wrench as shown below.
Check if Rods and Supports are misaligned
How to do it
In some printers, the movement of the Z-axis is carried out by two motors that work simultaneously with threaded rods. It is important that both ends are at the same height. This can be made by means of measuring each end with a ruler and tightening the heights until they are the same.
With printers such as Enders, this type of misalignment is less likely to occur because the structures at the ends of the carriage create a square.
Make sure the nozzle is not clogged (This generates low extrusion flow)
When the nozzle is partially clogged, the extrusion flow is irregular. This generates a lack of material in the layer. This can occur due to different factors:
- Particles that got into the nozzle due to foreign bodies inside the filament;
- Clogging due to misconfiguration of retraction;
- Particles that remain from other less common materials (carbon fiber, filaments mixed with wood, etc.) that the new filament does not completely get rid of;
- Burnt filament remnants.
All this waste is stuck on the walls of the nozzle and reduces the flow. This is known as under-extrusion.
Good quality filaments are suitable to prevent foreign bodies within the material and thus prevent clogging. Poorly manufactured filaments also have diameter inconsistencies and this causes clogging if the diameter is larger or poor flow if the diameter is less than standard.
How to clean the nozzle
The most used technique is explained below. It requires a needle of the diameter of the nozzle (This kit is usually included with the printer).
- Heat the hotend to the temperature of the filament. For instance, for PLA at 410°F to 446°F.
- Insert the needle through the beak, making inward and outward movements.
- Remove the needle and manually push the filament.
If the above technique failed to unblock the nozzle, the next cleaning technique called “Atomic Method or Cold Pull” consists of:
- Heating the hotend to the working temperature of the material and removing the filament that was being used.
- Inserting PLA and making it extrude a bit.
- Cooling the hotend to around 194°F.
- Pulling the filament with a strong movement.
When extracting the material, it is possible to observe the waste that is stuck to the tip. These steps need to be repeated as many times as necessary until the tip comes out clean. In the image below, see how the extraction of waste decreases by successively repeating these steps.

Another important factor to check is the condition of the PTFE tube inside the hotend. It is normal for the tube to burn or deteriorate with usage, also causing clogging as seen in the following image. Simply change the Teflon for a new one, making sure that it is well placed in the nozzle.

Check that the toothed wheel does not have waste due to filament wear. If there is dust from the material, remove it with a brush.

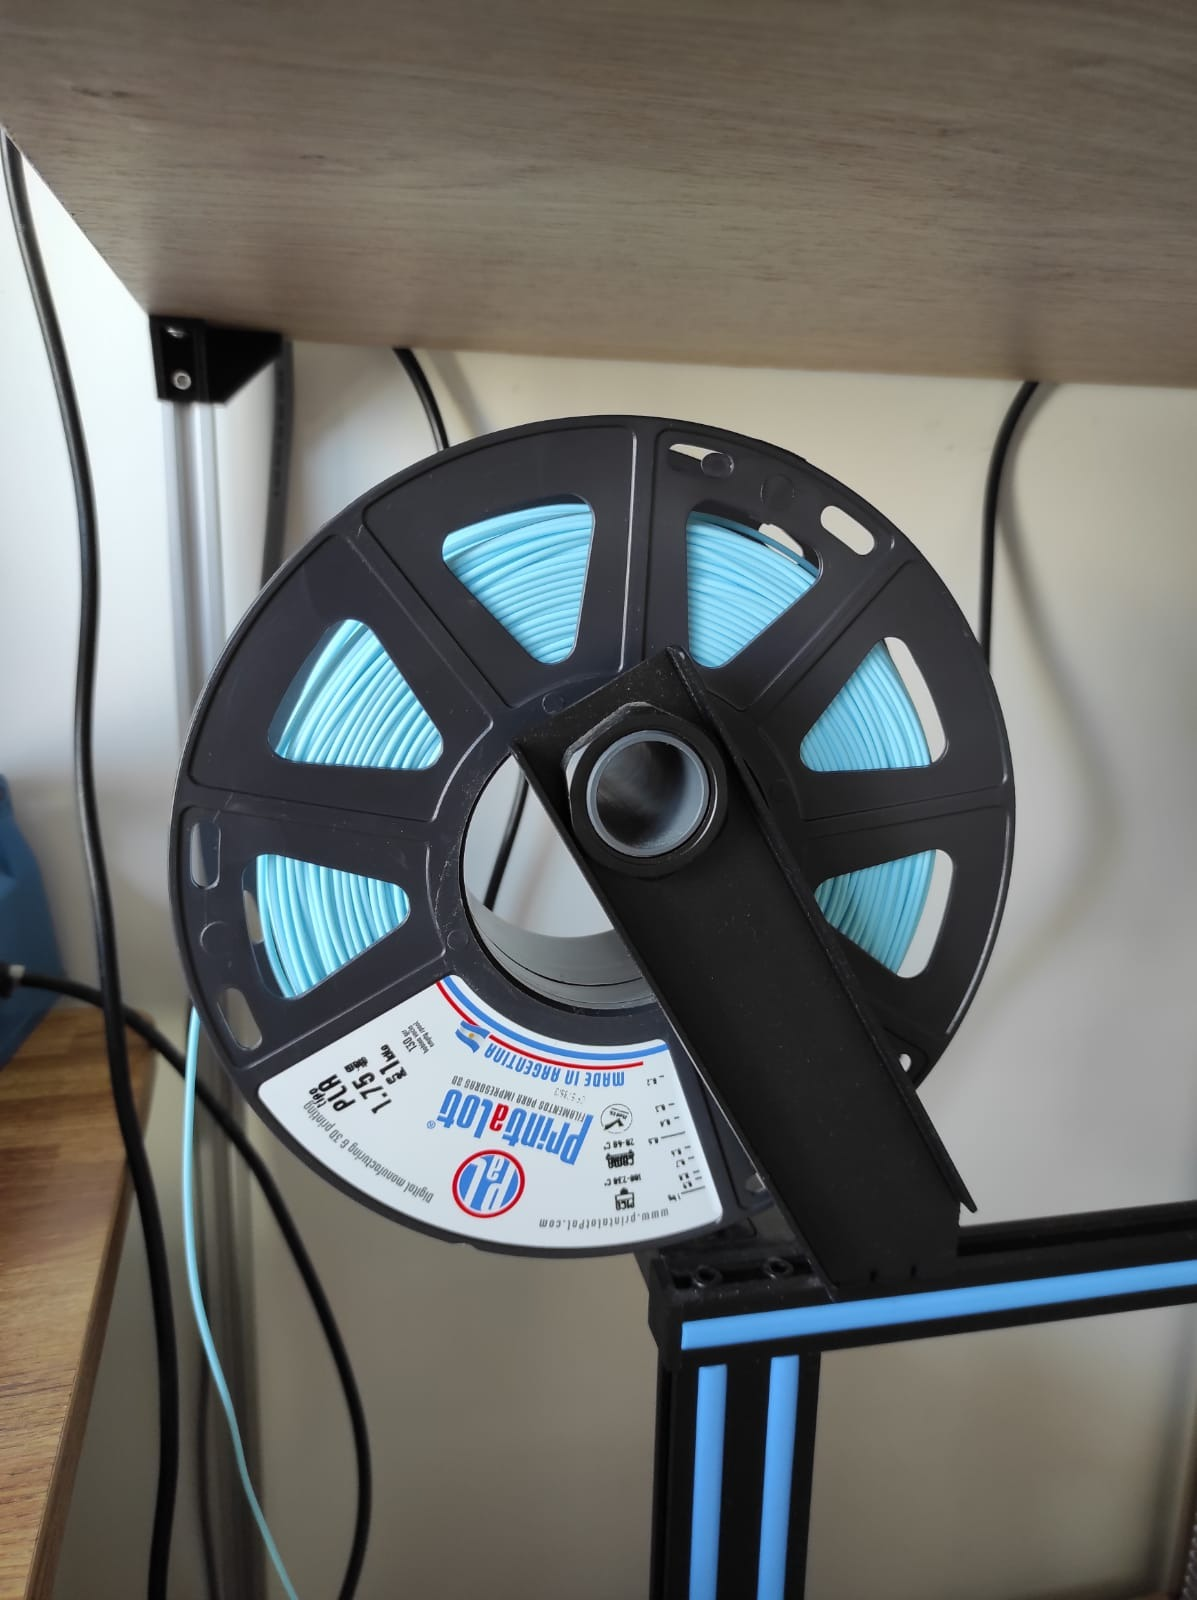
A major factor is the way in which the filament spool turns. The shape of the spool depends on the filament manufacturer and in some cases, the center hole of the spool is much larger than the support on the printer. When printing, the extruder motor ends up pulling on the filament and can cause the material to misfeed the hotend. For the spool to be well centered, users can print an adapter such as these:

Watch the following video where the above-mentioned procedures are shown:
Lubricate all parts as necessary
How to do it
If the printer uses smooth rods and linear bearings it is important to lubricate the rods correctly, first wiping off old grease with isopropyl alcohol. Do not use WD-40 as a lubricant since it dries very quickly, causes a lot of friction, and damages the bearings. Suitable lubricants are Teflon (PTFE) based. It is also important to lubricate the bearings and the threaded rods of the Z-axis.
Level the bed
A good leveling of the bed is essential to start printing correctly. Bed calibration can be done manually by tightening the spring screws at the ends of the bed, or automatically using sensors. These sensors can correct small unevenness that cannot be corrected manually, especially when the surface of the bed is large (greater than 9.84×9.84 in) or if the bed has some factory imperfection.

How to do it
If the printer does not have an auto-leveling sensor, it is necessary to follow these simple steps using a piece of paper:
- Bring all axes to the origin
- Disable the motors to move the X and Y axis by hand
- Take the print head to a corner and place the sheet of paper between the nozzle and the bed
- Move the screw in that corner, tightening or loosening it, and simultaneously move the paper to feel a slight friction
- Repeat the step in all the corners
- Finally, check at different points on the bed that it is well leveled
To verify that it is properly calibrated, make a quick print by placing circles or squares at different points on the bed such as:
Ender 3 Level Test – Thingiverse
Slicer Settings
Slicing software consists of dividing the 3d model to be printed into slices or layers using the setting parameters established by users. In this way, they create a file with commands (gcode) that the printer reads. This indicates the movements that each axis must perform as well as temperatures, speeds, etc.
Here are some settings that can fix this layer skipping problem.
Adjust Flow Rate
Since not all filaments have exactly the same diameter or material, it is necessary to adjust the flow parameter. By default, the flow in slicers is set as 100% but in general, the flow rate is between 90% and 110%.
How to do it
Calibration requires a ruler or caliper and a marker.
- Preheat the hotend to working temperature
- With the ruler, measure 4.33 in on the filament up from where the print head is introduced and make a mark with the marker
- From the display slowly extrude a total of 3.93 in
- Measure again with the ruler and write down the distance between the beginning of the head and the mark. If the measure is:
- a) Equal to 0.39 in: the flow is properly calibrated!
- b) Less than 0.39 in: the flow is greater than it should be. This is called over-extrusion
- c) Greater than 0.39 in: the flow is less than it should be. This is called sub extrusion
If said measurement is not 0.39 in, it can be easily corrected by doing sums. It is necessary to know the value of the steps of the extruder motor; generally it is obtained from the display (“Control>Movement>Extruder”).
New flow [%] = (Number of steps [steps/in] x 3.93in) / (4.33in – measurement)
This is the new value that is set in the slicer.
Another way of calibrating the flow rate is printing a test piece and measuring certain angles with a caliper, as shown in the following guide: The Best Flowrate Calibration Method! by petrzmax – Thingiverse
Adjust resolution (Line thickness)
The maximum layer height is restricted by the nozzle diameter. As a general rule, it is taken to be 20% less than the nozzle diameter. For instance, for a 0.015in nozzle, the maximum layer height is 0.012in. In this way, a good adherence between layers is ensured without any space between them.
In some printers, there are the so-called “magic numbers” which are layer heights at which that particular printer works best. Actually, these numbers are not so magical but they are determined by the pitch of the threaded rods located on the Z axis.
For Ender printers, the recommended increment between layers is 0.0015in. For instance: 0.0031, 0.0047, 0.0062, 0.0078, 0.0094 in.
How to do it
To set this parameter, it is necessary to adjust the parameter “Layer height”.

Other not-so-common reasons
Warped bed
Among Ender users, some cases of warped beds were reported. No matter how much users calibrate it manually, they will always find parts of the bed where the filament does not adhere properly to the bed.
How to fix it
In these cases, it is best to install an automatic leveling sensor and set the calibration points within the firmware.
Find the step by step in the following video on how to carry out this setting.
Filament stripped or bitten by extruder gear teeth
When the nozzle is clogged, the material does not flow properly. The extruder motor gear reduces its traction. Therefore, if the material cannot be pushed correctly the gear eats the filament and this loses traction.
In other cases, the pressure exerted by the gear system on the filament is very strong and deforms it.
How to fix it
To solve the first case, clogging in the nozzle must be cleaned as explained above.
In the second case, it is only enough to loosen the tension of the gears which is usually because of a screw and a spring. The pressure must be enough to pull the filament without deforming it. An easy way to tell if it is properly tightened is to extrude material and pull the filament out manually. If the gear jumps, it means that it still needs a little more tightening.
Error processing API data.