Extruders are a key part of the printer. They are responsible for pushing the filament through the nozzle. Together with the hotend they make up the extrusion system. Though there are many designs, the most common one is comprised of a motor, a drive gear, and an idler wheel or a second gear (in dual gear designs) with a spring that pushes it into the main gear to grip the filament.
Extruders skip steps, slip, or make clicking sounds when they can’t push enough plastic through the nozzle. This may be due to a partial or fully clogged nozzle, the nozzle being too close to the print bed, low extrusion temperature, entangled filament, a problem with the PTFE tubes, incorrect tension in the idler spring or simply because you are trying to push the printer beyond its capabilities.
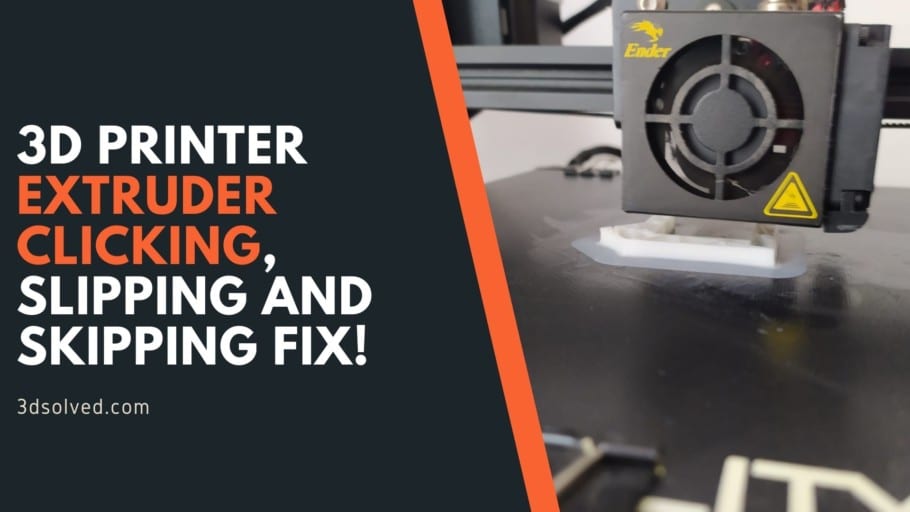
What causes the Extruder to Skip & how to fix the problem?
There are multiple reasons to why an extruder could be skipping steps, and probably the simplest one (which happens to me a lot) is a clogged nozzle. But let’s take a look at all the reasons and how to fix them:
Entangled filament
Entangled filament is a simple problem that is commonly overlooked, and it can ruin a print. If the spool isn’t neatly winded as the extruder unwinds, a knot can be formed and jam the system. To prevent this, you should always buy from brands that wind their spools uniformly or rewind them. Another important tip is to never leave the end loose, so the spool is always tightly wound.
PTFE Tubing Failure
Your printer may have one, two or no PTFE tubes depending on whether you have a Bowden or direct drive extruder and a lined or an all metal hotend.
Bowden tubes direct the filament from the extruder to the hotend restricting the path so that it can be pushed or pulled from afar. The tighter the tolerances the better for accuracy but tighter tolerances also increase the chances of the filament getting stuck.
The first thing you should check if you have a Bowden tube is that the filament slides easily through.
- Detach it from the hotend and try to move the filament manually.
- If it flows freely the problem isn’t there.
Sometimes direct drive extruders also have a PTFE tube to guide the filament into the extruder. In those cases, the internal tolerances are not so important as it is only a guide so that the filament isn’t wandering around. It can get blocked the same way and must be the first thing to check though.
With PVA and PVOH and other soluble filaments, air moisture absorption can cause jamming inside the PTFE tube. The filament becomes sticky and swollen so it is good practice to carefully dry these filaments before use.
On some designs (but never on all-metal hotends) the PTFE tube may go directly into the hotend and touch the nozzle.
- Check that the tip of the tube isn’t deformed or burnt.
- If you have a long Bowden tube you can just cut the damaged part and reinsert it.
- Use a sharp blade and try to cut it as perpendicular as possible to get a clean edge.
- If the tube is short or you have cut it beforehand it may be best to replace it altogether.
This issue can also be encountered with liners inside the barrel. Cutting the tube in this case isn’t a possibility, so you must replace it.
In direct drive extruders, sometimes the liner gets caught between the gears and gets crushed blocking itself. Sometimes you can press the liner from the sides and make it round-shaped again but in most cases it’s better to replace it altogether
Spool holder creating too much friction
Spool holders should allow the spool to freely rotate while the extruder pulls on the filament to unwind it. The added friction from the holder takes away pushing force from the extruder. Check your spool holder to make sure the spool turns with little effort when pulling on the filament. If your holder has bearings, check that they spin freely. Sometimes the spool holder can be improved, and a better replacement can be bought or even printed.
Nozzle is Too Close to the Print Bed
First layer height is one of the most crucial settings for successful prints. If the nozzle is too far, the first layer doesn’t stick and if it’s too close the first layer will be squished.
If you notice that the problems with the extruder occur mostly during the first layer the best guess is that the first layer is too close and the gap through which the extruder must push the plastic becomes too narrow and the force required is increased beyond the capacity of the machine. This can even reach the extreme of not having any plastic come out.
If the bed isn’t levelled this may happen only on some places and not on others. In that case it may not be a problem of incorrect first layer height but a bed levelling one.
Z offset is the setting that tells the printer the difference between the homing Z height and the actual height of the tip of the nozzle. This is really important because you want the machine to know exactly where the Z0 is. If, for example, you are off by 0.1 mm when you try to print a 0.2 mm first layer you will actually get a 0.3 mm separation from the bed and you will certainly have adhesion problems. Depending on whether you have an automatic bed levelling system or just a standard homing switch the process will be slightly different.
To solve this with the best results it is advisable to use a feeler gauge. With this tool you will be able to precisely know the separation between the nozzle and the bed. A second choice would be a sheet of white paper. Standard bond paper with 70 g/m2 (grams per square meter) will have a thickness of 0.09 mm and an 80 g/m2, 0.1 mm.
How to adjust Z offset:
- Make sure that your bed is level led and clean.
- Make sure the nozzle is clean and doesn’t have any drippings.
- Heat the nozzle and bed to printing temperature.
- Home Z and move the nozzle roughly to the center of the bed.
- Lower or raise the nozzle manually so that the feeler gauge or the paper with known thickness barely slides between the bed and the nozzle.
- Take note of the final Z height.
- Go to the Z offset setting and enter the final Z height previously noted down minus the gauge thickness. For example, if the final heigh was -1.30 mm the Z offset should be -1.4 mm if the thickness was 0.1 mm. The same goes for a positive value such as 1.10 mm minus the 0.1 mm thickness of the paper or gauge the z offset should be 1.00 mm.
- Store the settings to the machine.
- To verify that you’ve successfully established the z height, home Z again and jog manually to the thickness of the gauge (E.g.: 0.1 mm). It should barely slide in the gap.
The Z offset can also be entered in the slicer and with GCODE commands. In Marlin it would be M206 but bear in mind that the sign is inverted. A positive value will bring the nozzle down and a negative value up. Remember to save to the settings to eeprom before powering off the machine or otherwise you’ll have to enter them each time you turn it on.
One you’ve set this up correctly you should get a perfect first layer. If you keep getting extruder or adhesion problems, there’s probably something else to fix.
Extrusion Temperature is Too Low
When the nozzle temperature is too low the plastic may be too viscous to go through or it may not melt altogether. The extruder will have to put too much force and will click or grind the filament. Temperatures should be set for each filament according to the manufacturers’ specification and fine-tuned to get the best results. It is also possible to increase the temperature a few degrees to print faster if the extruder can´t keep up, but within a sensible range. If you push too far the print quality can decrease drastically or the polymer can even burn. Every printer has some error in the reading so the printing temperature may not be the same for a given filament spool of filament.
Clogged Nozzle
Nozzles are basically a piece of metal with one hole to receive filament and another smaller hole through where the molten plastic is pushed out. The small outlet hole is prone to clogging, especially with the smaller ones. A clog is formed by solids that can’t be melted and consequentially can’t be pushed out. They can be plastic that became charred or some other material that went into the nozzle and wasn’t supposed to.
To prevent the plastic from charring you should go over the temperatures recommended by the filament manufacturer and turning off the hotend while not in use. If the hotend is kept at a high temperature for a prolonged period without extruding, the molten plastic inside can start to caramelize and charr. This chemical reaction changes the physical properties of the material preventing it from going into a liquid phase.
Another problem that can be caused by not turning off the extruder is that the filament inside the hotend can become annealed. This means that the internal structure of the polymer changes and it requires significantly more heat to melt.
Foreign solids can come from many sources. A few years ago, there were a lot of cases of small pieces of metals or other impurities inside the filament that were big enough to create a plug inside the nozzle. Nowadays this shouldn’t be an issue if you buy reasonable quality filament. Another source that is commonly overlooked is the accumulation of dust in the roll of plastic. A little bit of dust doesn’t cause any harm but if you constantly use dusty filament, it can build up inside the nozzle and cause problems.
Keeping your filament rolls clean and installing a piece of foam to wipe off any debris that might be stuck before entering the hotend will prevent future issues.
How to identify a clogged nozzle:
A full clog is easy to identify. If the nozzle is at the correct temperature and you have discarded any blockage in the PTFE tube or the bore in the cold end and you aren’t able to manually push plastic out of the nozzle, it is most certainly clogged.
A partial clog is not easy to spot if you don’t know what you are looking for because plastic does come out. A way to figure it out is to watch how the plastic comes out. It should go more or less straight down and be perfectly round. When there’s a partial clog it usually curls up and it has an irregular shape.
How to unclog a Nozzle:
If you found that your nozzle has a clog, there is a method that can clear it without disassembling. This method is called cold pull because it basically consists of heating the nozzle to a low temperature and yanking the filament out hoping that what is causing the blockage comes out with it.
It may be a good idea to use a fine needle like the ones used for acupuncture to poke inside the nozzle while it’s at printing temperature to push the clog before doing a cold pull.
To perform a cold pull:
- Heat up the nozzle to melting temperature.
- Set heater to 100ºC and hold down the filament until it cools to that temperature.
- Pull firmly from the filament while holding the carriage. Be careful not to burn yourself with the hotend that will be hot.
- Look carefully at the tip of the filament. Ideally, you’ll see a cone at the end with some grime in it. If you don’t see a cone and your filament stretched, try repeating with 95ºC instead of 100ºC.
- Repeat steps 1 to 4 until you get a clean cone in the tip.
If a cold pull didn’t clear the clog, you will probably need to disassemble the hotend. Depending on the hotend model you have the process may be different but for most of them you can get away with an adjustable wrench to hold the heated block and a tube wrench of the right size to unscrew the nozzle.
You must be incredibly careful when performing this operation because the connection between the heated block and the heatsink is a very thin and fragile tube. The tube is thin because as there is little material to conduct heat it acts as a heat-break. Disassembly must preferably be done while the heater is on so that any material inside or that might have leaked is molten and doesn’t bind the parts together.
Once you have taken the hotend apart you’ll be able to see if the clog is in the nozzle or up the barrel. If you can push plastic with the nozzle removed a quick fix will be replacing the nozzle or trying to clear it with other methods outside the machine. The barrel can also be removed and replaced if blocked.
To reassemble the hotend check the manufacturer’s instructions. A few things to watch out for that will apply to most models:
- Make sure to tighten the nozzle into the barrel and not the heated block so that there is a tight seal between them.
- Use thermal paste for better performance and anti-seizing in the threads.
- Do not overly tighten the nozzle, especially the brass ones as they will snap easily and removing the broken threads from the heated block can be a challenge.
- The final tightening must be done at printing temperatures. Be extremely careful not to burn yourself.
Filament Spring Tension too tight or too loose
The tension that pushes the idler wheel into the filament to press it against the drive gear should be just enough to grip it. If it’s too loose the drive gear will either spin freely or grind the filament creating a depression that will make the filament even harder to push.
Providing you discarded other issues such as clogs or too low a temperature, try tightening the spring in the extruder. If a bump has already been created you should take the filament out, cut the chafed length and reinsert it. When the spring is too tight the filament will squash or get very deep grooves from the gear teeth. This will add extra friction to the system that can even stall the stepper. If this is your case, try decreasing the tension.
Bear in mind that changing the spring tension in the extruder can slightly change the feed rate. After adjusting the tension check that the printer isn’t under or over extruding and adjust it in the software accordingly.
In dual gear extruders this setting is more forgiving as the tension should be only enough to make the gears mesh. Check if the manufacturer has any recommendations regarding the tensioner and follow them. For dual geared extruders tension is more on the loose end than the tight end.
Dirty extruder gears or debris trapped in drive gear
Extruder gears can become dirty with time and decrease drive efficiency specially on those with fine teeth. Bad spring tension in the idler wheel or driven gear can accelerate this process but it’s not always indication that you should adjust it. Check if there is accumulated dust or debris from the filament around the drive gear and inside the teeth.
To clean the extruder gears:
- Use some compressed air
- Give it a go with a small brush.
- If the gear is really gummed up you can disassemble the extruder, take out the gears and give them a thorough brushing.
Be sure that the printer isn’t running before sticking anything inside it or fiddling with the moving parts. Steel wire bristles can be too harsh for some gears, brass or nylon brushes are preferred. Usually drive gears can be released by loosening a small Allen setscrew. When putting the gears back in, check if there is a flat in the axle. If there is, tighten the setscrew into it.
The Extruder Can’t Keep Up with the Printer Speed
The 3d printing community is continuously pushing machines to print faster and manufacturers continue making upgrades and new printers to keep up. Upgrading a part of a machine can create bottlenecks on other parts and old generation extruders are usually the culprits. When printing faster the machine not only has to move the X, Y and Z axis faster but the extruder has to be able to push more plastic out of the nozzle. This also can be the case when printing thick layers.
Increasing the printing temperature may be a simple fix that works well when the printing speed is constantly high but can bring further problems with models that have fine details that make the printer slow down in some parts. If the temperature is too high and the printer slowed down, the plastic will melt too much, and printing quality will be compromised. In an extreme situation the plastic can charr and clog the nozzle.
The better solution is to get a better extruder or a high-flow nozzle. There are some really good drop-in replacements such as the CHT high-flow nozzles that can boost your extruder’s capacity without changing anything else.
When printing with bigger diameter nozzles forces are decreased but extrusion speeds are increased. In this case you’ll see that the motor skips steps or even stalls because it can’t keep up. To fix this you’ll need to replace the extruder or lower the printing speeds.
You can lower the speed to a low setting such as 25 mm/s and try increasing it by 5 or 10 mm/s each time to get the highest speed that doesn’t present issues.
Extruder Motor driver current is Improperly Calibrated
Extruder motors are usually steppers, and, unlike dc motors, they have more than two leads and require switching currents to rotate. The piece of electronics that is in charge of the switching is called a stepper driver. The most common ones in older machines were called Pololu and were based on an Allegro 4988 chip. These chips and other older ones use a potentiometer to adjust the peak current that runs through the motor coils.
When the current is too low, the motor doesn’t provide enough torque for the machine to run properly. When the current is set too high, the motor will run extremely hot and can greatly decrease its lifespan or even burn. To adjust this current, you should have at least some knowledge of electronics and the correct tools.
Check the manufacturers’ documentation on how to set the Vref (reference voltage) correctly as it can be different for each one.
I wouldn’t recommend fiddling with the machine’s electronics as this problem isn’t common on machines that aren’t DIY and you risk damaging your machine permanently.
To access the electronics, you need to access the main cabinet where there can be mains voltage, don’t open it unless you know what you are doing, and the risks involved.
Loose connectors or broken wires can also affect steppers’ performance. Check for any loose wires or connections that may be creating problems.
Conclusion
Problems with extruders are quite common but if you go through the list checking for issues in order, you’ll most likely find and solve them. I would recommend approaching them in this order:
- Entangled filament; easy to spot and solve.
- PTFE Tubing Failure.
- Spool holder creating too much friction.
- Nozzle is too close to the print bed.
- Extrusion temperature is too low.
- Clogged nozzle.
- Filament spring tension too high or too loose.
- Dirty extruder gears.
- The extruder can’t keep up with printing speeds.
- Extruder motor driver improperly calibrated.
Check out our recommended products section

We created a recommended products section that will allow you to remove the guesswork and reduce the time spent researching what printer, filament, or upgrades to get, since we know that this can be a very daunting task and which generally leads to a lot of confusion.
We have selected just a handful of 3D printers that we consider to be good for beginners as well as intermediates, and even experts, making the decision easier, and the filaments, as well as the upgrades listed, were all tested by us and carefully selected, so you know that whichever one you choose will work as intended.
Error processing API data.