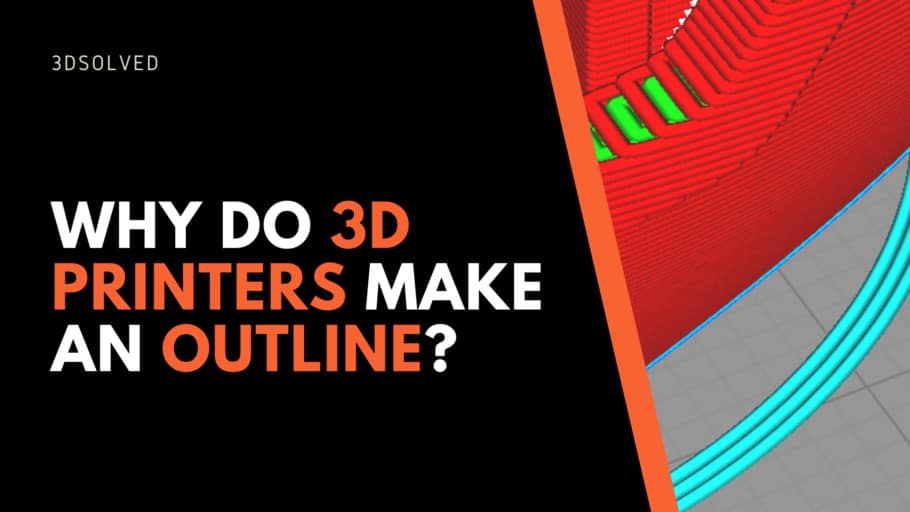
If you pay attention when booting up a fresh print, you’ve probably noticed that your 3D printer will make a small outline around the part you are printing. This is called a skirt, and it is meant to initiate the printing process and make sure it runs smoothly. Now you might be wondering why it helps the process to run smoother. In a nutshell, why do 3d printers make an outline?
Why do 3D printers make an outline? 3D printers make an outline at the beginning of a print in order to prime the nozzle for the print. This ensures that there is no unwanted buildup or malfunction in the nozzle prior to beginning the job. Without a skirt, the nozzle may also be blocked during the first millimeters of the model, negatively affecting the initial layers of your print.
Keep reading to see more details about skirts, and some comparisons between skirts, brims, and rafts.
What Is the Outline at the Beginning of a Print?
When a 3D printer makes an outline around your part before beginning the initial layer, this is called a skirt. The skirt helps prime the extruder before it makes the first layer. This ensures that the plastic is freely flowing and ready to go, with no obstructions in the nozzle that may negatively impact your print.
If you do not use a skirt to begin the print, there may be plastic in the nozzle that has been exposed to high temperatures for too long. The skirt can also help you detect any adhesion or leveling problems prior to starting the print.
Typically, your slicer will have settings for different types of skirts. This allows you to customize things like which extruders you wish to prime, as well as skirt offset and the number of layers in your skirt.

Do You Need to Use a Skirt When Printing?
In general, using a skirt is a good idea because it primes your extruder and helps you detect any problems before the print really gets started. However, there are other solutions similar to a skirt that have their own advantages and disadvantages. I’ll talk more about these in a moment, but for now, let’s focus on the pros and cons of using a skirt at the beginning of your print.
Advantages
- Using a skirt primes the extruder prior to printing
- Ensures proper flow through the nozzle
- Helps detect adhesion or leveling problems
Disadvantages
Unlike a raft or brim, a skirt will not improve bed adhesion
Why Is the First Layer So Important?
The first layer of a fresh print is important because it acts as the base for all subsequent layers. If there are leveling or adhesion issues with the first layer, then the rest of the print will be off, or even completely botched. The main thing you want to avoid is poor adhesion to the print bed. If the part you are printing becomes detached from the bed, it can cause poor alignment with subsequent layers, as well as other problems.
The main factors that affect the first layer of a 3D print are bed level and bed adhesion. If your print bed is not even, it can cause errors between layers as they are printed, or it can contribute to poor bed adhesion. Poor bed adhesion means potential failure for your print.
Is a Skirt Still Important if the Printer Draws a Line on the Side of the Bed First?
Some slicers, such as Cura, have presets that prime the nozzle by printing a line off to the side prior to starting the print. This functions similarly to a skirt by priming the extruder prior to starting the job. The line is referred to as a priming line or purge line.
Since the priming line performs a similar function to a skirt, you may choose to forego the skirt under the “Build Plate Adhesion” settings for your slicer program. Skirts are generally better for detecting adhesion and leveling issues compared to a priming line, so it is advisable to use a skirt in most instances.
It is not necessary to use a priming line if you already plan on using a skirt or other solution at the beginning of your job. The priming line can be disabled by checking the start G-code for your printer.
What Happens if You Don’t Use a Skirt?
If you do not use a skirt, then the material in your extruder may not be primed for use before starting the first layer. This can cause errors in the initial layer printing, potentially leading to the failure of the entire print. Using a skirt allows you to detect problems with material flow, bed adhesion, and leveling before the printer actually starts the first layer of your job.
If your printer draws a priming line, then a skirt may not be necessary for the purpose of priming the extruder. However, as mentioned above, the priming line will not be as useful for detecting adhesion or leveling problems. Using both a priming line and a skirt is not necessary.
Another alternative is to use other adhesion solutions, such as a raft or a brim. These methods involve layers of filament designed to help with adhesion but have different advantages and disadvantages compared to a skirt. I’ll talk more about these later on in this article.
How Do You Activate the Skirt Setting (Usually on by Default)
Most slicer software will have the skirt setting turned on by default. However, if the skirt setting is not enabled for whatever reason, you can follow a few simple steps. Using Cura, these would be as follows:
- In Cura, navigate to “Print Settings” and select “Build Plate Adhesion”.
- From here you can select the type of adhesion solution you want to use, click on “Skirt”.
- Once selected, you can adjust settings for line count, distance, and minimum length.

If you do not see these settings in Cura, then make sure you have expert mode enabled. This can be accomplished by clicking on the three horizontal lines next to the search bar and selecting “Expert Mode”.
Bed Adhesion Alternatives to Skirt (Brim & Raft)
In addition to skirts, there are other common solutions for priming the extruder while increasing adhesion and stability. These include brims and rafts. Each solution has its own advantages and disadvantages, which I’ll go over for you now.

Brim
A brim is a layer of material that is printed around your object, similarly to a skirt. Unlike a skirt, however, a brim will actually connect with the edges at the base of your printed object. This helps with bed adhesion and stability when printing your object.
Unlike a raft, the brim will connect to the base layer of your object, but will not reach underneath it. This makes the brim easily removable compared to a raft, but less stable.

Advantages
- Helps improve bed adhesion.
- Helps prevent warping.
- Helps with noticing adhesion or leveling problems prior to the actual printing.
- Easily Removed.
Disadvantages
- Brims use more material than skirts.
- Brims can leave a mark around the base layer that must be sanded after printing.
A brim is useful when you don’t want to use a lot of material for a raft, but you want improved adhesion compared to a simple skirt.
Raft
This third solution involves printing a small platform underneath your object to assist with adhesion and stability. The main difference between a brim and a raft is that the raft consists of multiple layers which sit underneath your object, whereas a brim simply connects to the edges at the base of the object.
Both a raft and a brim will improve the bed adhesion of your object, but a raft will give much better adhesion and stability. However, a raft will be more difficult to remove from the finished product, since it connects across the bottom of your object and not just around the edges.

Advantages
- Stronger adhesion than brims.
- Improved resistance to warping.
Disadvantages
- Harder to remove than a brim.
- Improper removal can potentially damage a print.
- Uses a lot of material.
In general, you will want to use a raft if the object you are printing will require very strong adhesion. This is sometimes necessary with larger print jobs that have multiple smaller points of contact with the print bed.
Conclusion
Using a skirt for your 3D printing job is a good way to make sure your extruder is primed and ready to go. It also helps you detect any potential problems with the adhesion or leveling prior to starting the print. Without a skirt, you can end up with errors in the first few layers of printing that can negatively affect the quality of your print.
If you need something that helps more with adhesion or stability, then a raft or brim might be a good alternative. These solutions allow you to prime the extruder while also giving extra support for the printed object. Rafts will give you more adhesion and stability, but they are more difficult to remove compared to brims.
If you have any questions or concerns, feel free to fire away in the comments section.
Check out our recommended products section

We created a recommended products section that will allow you to remove the guesswork and reduce the time spent researching what printer, filament, or upgrades to get, since we know that this can be a very daunting task and which generally leads to a lot of confusion.
We have selected just a handful of 3D printers that we consider to be good for beginners as well as intermediates, and even experts, making the decision easier, and the filaments, as well as the upgrades listed, were all tested by us and carefully selected, so you know that whichever one you choose will work as intended.
Error processing API data.