If you’re new to 3D printing then you probable might have heard that there are different types of build plates you can use to print, some of which are made of glass, aluminum, spring steel, etc.
In this article, I will do my best to give you a definitive answer on which one you should go for, as well as give you a general overview of the different build plates themselves, their pros and cons, and more.
Here’s a table where you can quickly see some of the differences between the different materials:
| Type of Bed | Heating Properties | Adhesion Properties | Durability | Price |
|---|---|---|---|---|
| Aluminum Bed | Great Heat distribution and retention | Usually requires Glue Stick, Hairspray, etc. | +++ (Suffers from warping) | $15-$40 |
| Glass Bed | Thermal Shock Resistant. Great Heat distribution. | Better than aluminum, may require Glue Stick or hairspray. | +++++ (No warping but may break/chip) | $13-$25 |
| Magnetic Bed | Adds mass, requires more heat. | Great Adhesion; Doesn’t require an adhesive. | + (needs to be replaced often) | (about $35 for a pack of 5) |
So, without further ado, let’s get started!
Aluminum Bed

Temperature is a vital component of 3D printing. It is essential to control the heating and cooling process relative to the filament, bed and build plate being used.
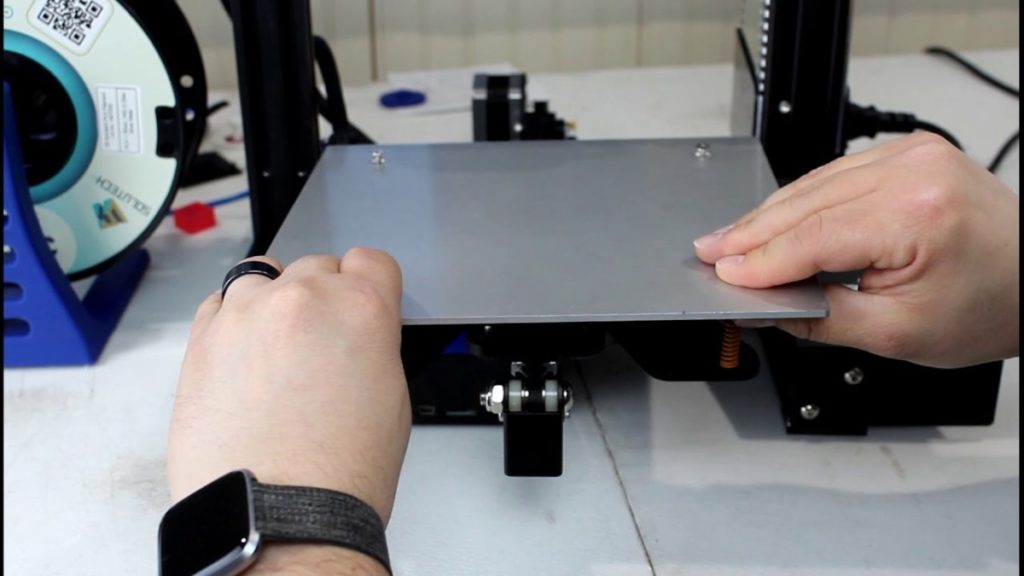
Aluminum rises to bed surface demands due to its heat conductive qualities. Heat is absorbed rapidly and spread evenly over the entire bed and will therefore transfer to the build plate evenly.
Aluminum does have an adverse reaction to heat though. It expands in the direction of least resistance when heated and creates a central convex or concave shape tapering to the edges.
Warping becomes more prevalent overtime where the center of the bed will not align with the sides on a horizontal axis. This poses a problem as the Z-axis (vertical axis) will not hold true to the required space between the plate and the nozzle in the printer head.
The thickness of an aluminum build plate should be a minimum of 3mm to reduce the effects of heat expansion, resulting in warping.
Anything less than this will result in a reduced lifespan of the aluminum plate itself. It is imperative that the build surface is 100% flat, and it should also have an adhesive quality to keep the foundation or first layer of the build in place.
Aluminum is a popular choice for both the bed and the build plate because of its heat retention and distribution over the entire build surface.
However, aluminum can be polished to a super smooth surface on par with glass surfaces, reducing overall adhesive quality. To compensate for this, there are products like hairspray, glue sticks or adhesive tape that can be used on the build plate to improve first layer adhesion.
The heat attributes of the print material also have an effect on adhesion to the build plate. ABS filament has a much higher melting point than PLA filament and will need adhesive assistance, especially with large builds.
Pros
- Lightweight material
- Reduces load on the Z-axis
- Even heat distribution.
- Fast heat absorption and retention and rated as the best of all bed types.
- Inexpensive and widely available.
- Can be used in conjunction with a glass build plate.
- Will not break with a hot end crash.
Cons
- Prone to warping when heated if the plate is too thin.
- May scratch when cleaning adhesive material off the surface.
- Needs replacing more often due to warping.
- Warping can only be checked when the plate has been warmed up and ready for use.
Making one yourself/replace the build plate
To replace the build plate, be it glass or aluminum, you can either buy a new one or build your own from aluminum which is relatively straightforward to accomplish.
Yes, replacing a glass plate with an aluminum one is possible, but adjustments to accommodate the new plate must be made.
To build your own aluminum plate, you will have to use a cast aluminum tooling plate as it comes in flat sheets instead of conventional aluminum that normally comes rolled up. Cast aluminum plates are available under brand names like MIC6, or ALCA 5 and dealers are easy to locate. Just look on eBay, and you’ll find a healthy dealer listing.
A new heating system might be necessary, and you can use high-temperature silicon to attach the new heater to the underside of the printer bed.
You will also have to adjust the thermistor to match the output of the new heater. Measure the exact size of the new build plate and cut it to size. You will have to sand down the edges and cover the plate with a layer of PET tape to create an adhesive surface for your print material.
Once the new plate is complete, you will have to fine-tune the level and check the head’s function, especially the speed of the head to be sure there are no vibrations.
Learn more about how to make an Aluminum bed with this “Instructables” Guide.
Glass Bed

Glass beds are the most common type of 3D printer beds with aluminum being a close second.
The main reason for glass beds being so popular is their smooth, even surface and that they are not prone to warping like aluminum, but glass is fragile and breaks easily. There is a degree of thermal expansion, but it is not a cause for concern with the heat parameters of 3D printing.
Glass conducts heat at a slower pace, but it evenly distributes the heat across the bed surface, which is perfect for 3D printing. Most glass beds are long-lasting, but this depends on how they are treated.
The good thing about using a glass bed is that you will never have to worry about it warping, like it happens with aluminum beds, which makes printing easier.
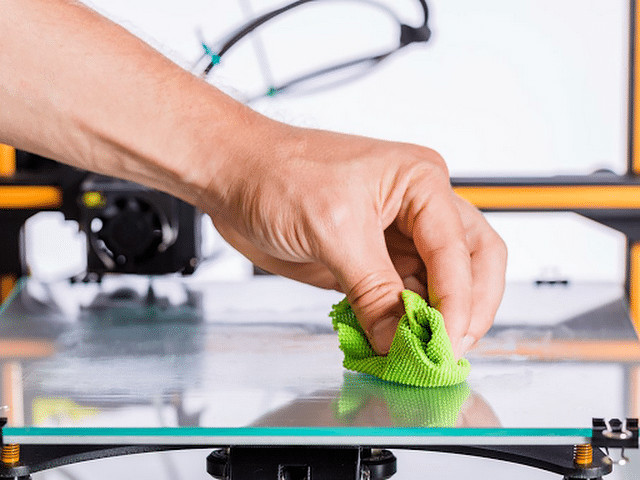
Build plates made from glass are easy to use and clean, and pose problems when printing with PLA. In fact, the bottom finish is always very smooth and even.
Glass tends to be cheaper, but there are different types of glass, and the more robust types will obviously cost a bit more.
Different Types of Glass Beds
Tempered Glass: This glass is much stronger than normal glass and will not flake when removing 3D prints from it.
It is also shatter-resistant, and this explains why it is used where safety is a concern like with safety doors and large windows.
Tempered glass is also heat resistant it does have a relatively long lifecycle with 3D printing. It provides consistently flat and smooth print foundations and can be used for several thousand print hours without any detrimental effects to the glass or the print quality.
Borosilicate Glass: Borosilicate glass is viewed as the ideal glass for 3D printing.
It is strong and durable but must be treated with care as it may chip if handled incorrectly. Like Tempered glass, it has high heat resistance with low thermal expansion and can pose some print adhesion difficulties.
The glass is made from several different compounds, boron trioxide being one of them. It is commonly used to make Pyrex dishes due to its ability to withstand extreme temperatures, both cold and hot.
The one issue with Borosilicate Glass beds is that, when removing a print from them, they might chip a bit.
Regular Glass and Mirror: Normal glass is commonly used for picture frames and home windows but can be an alternative to the more expensive glass types used for 3D printing.
This type of glass is used both as a separate build plate and also to save time, since it is placed on top of a tempered or borosilicate glass bed and once the print is complete, it is removed, making the cooling process much faster.
A new build plate can then be used right away to continue printing.
Regular glass is prone to chipping and breaking so care must be exercised during use.
Due to the print material’s expansion and contraction, it may stick enough when the first layer is laid down and loosen during cooling so removing the print from the glass will be relatively easy, but I’d still recommend trying different adhesives, as well as trying to print without them, to see how well glass performs.
The common problem is that the foundation of a PLA or PETG print may stick too firmly to the glass and will cause chipping when removed.
In some cases, the distance between the head and build plate can be increased slightly to reduce the pressure applied to sticking the foundation layer to the build plate. However, it is best to avoid using low-quality glass as a build plate.
Low-quality glass does not react well to temperature change, and a sudden increase in temperature may result in it shattering to pieces.
Mirrors are also used as build plates since they provide an ideal printing surface. Here again, strength is an issue and cracking and chipping are common.
Using PLA filament will produce great quality prints as the heat is manageable. Mirrors may produce excellent quality print foundations and offer an ultra-smooth and level build bed, but it is not a long-term solution as the mirror’s quality will degrade over time.
They remain an excellent alternative for hobbyists who are not looking to print in large volumes.
Optimal Thickness of 3D Glass Beds
For most hobbyist 3D printers, a glass build plate should be about 3-4mm thick, especially if it’s a large build plate.
Glass will stress under its own weight, so if the printer bed covers a larger area, then you may want to consider increasing the thickness to 6mm.
The reason for using relatively thick glass is to counter the effect of thermal shock. There will usually be a high-temperature difference between melted filament and a heated build plate or bed, and this could harm the build plate.
However, the thicker the build plate, the more resistant it will be to temperature shocks.
Borosilicate glass has a high resistance to temperature changes, or thermal shock, and it can also withstand heat up to 240 degrees Celsius, which is ideal when using PLA, ABS and PETG filaments.
Pros:
- Glass is affordable and widely available.
- Provides a consistently smooth and flat printing surface.
- Some glass types have a high resistance to thermal shock.
- Much easier to clean and to spot dirt or oil build up on the plate.
- Easier to remove prints from glass.
- Glass is user friendly and can withstand chemical erosion.
- Glass is durable but must be handled correctly.
Cons:
- Prone to cracking.
- Slow heating time.
- Inferior quality glass is not designed to withstand thermal shock.
Magnetic Beds

The introduction of a magnetic bed is an innovative concept that uses an existing bed as a heated surface foundation.
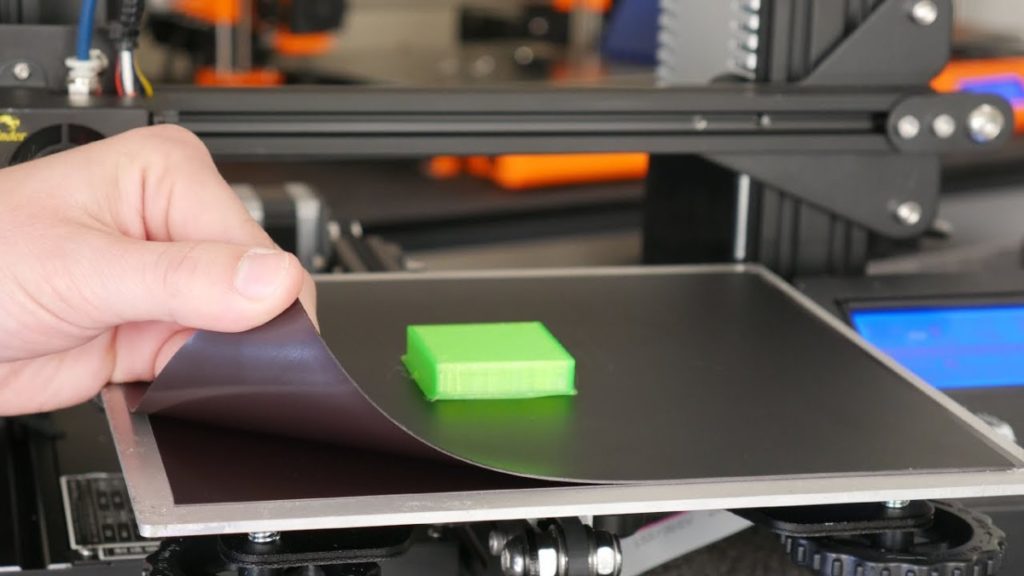
There are two flexible parts or sheets to a magnetic bed: The first sheet has adhesive on one side and is stuck onto the existing bed as a permanent fixture. The second sheet, which is the build plate, sticks to the bed thanks to its magnetic characteristics.
Once the printing process is complete, you simply remove the magnetic building surface, and since it’s rather flexible, you can bend it to detach the model from it instead of having to scrape it off.
This concept works especially well with PLA filament as the heat is not too intense, but with ABS and PETG filaments, which have a higher melting point, the first layer tends to stick rather firmly to the build plate.
The magnetic sheets can be cut to size for a perfect fit for your printer bed. But make sure that the interlocking ability is not compromised when you cut the sheets to size.
The build plate or top sheet will degrade over time and lose its magnetic properties, which is why, even though magnetic build surfaces are fantastic because of how easy it is to remove the 3D print, they will need to be replaced quite often.
Different Magnetic Beds
Build Tak FlexiPlate: Build Tak uses a magnetic system to keep its spring steel build plate in place during the printing process, and it can go to up to 120 degrees Celsius, which means that it can be used to print with ABS.
Removing the 3D print is extremely easy since all you have to do is bend it downwards and then upwards and that’s it! It comes right off.
Generally, the prints stuck insanely well to the surface, and in some cases, you will have to adjust the settings to get them to stick a little less. However, if your first layer isn’t adhering well, consider using BuilTak’s own adhesives since glue and hairsprays aren’t recommended here.
Easy-Peelzy: The top surface of Ease-Peelzy is very similar to the Build Tak one, and it is also very flexible, which makes removing the 3D models extremely easy and fast.
Sadly, it can only go up to 80 degrees Celsius, which makes it a great building surface for PLA and PETG, but not ABS, and overtime it will degrade, so it will need replacing.
There are a couple of other magnetic build surfaces out there, but these are the ones I currently recommend.
Pros
- Easy to use and clean.
- Eliminates using extra adhesives.
- Easy print release.
- Interchangeable build plates.
Cons
- Not durable. Quality will deteriorate through general wear and tear.
- Will warp over time.
- Easily scratched.
- Can be expensive to replace.
Conclusion
If budget is not an issue, then definitely give Build Tak a try since it will take your 3D printing experience to a whole new level simply because you won’t have to worry about your prints sticking to the bed too hard.
Glass beds are by far the most used building plates and most people who try them don’t want to go back.
One of the best options is to have an aluminum build plate and then stick a glass one on top of it, and if you face adhesion problems simply use a glue stick or hair spray and you should be good to go!
Check out our recommended products section

We created a recommended products section that will allow you to remove the guesswork and reduce the time spent researching what printer, filament, or upgrades to get, since we know that this can be a very daunting task and which generally leads to a lot of confusion.
We have selected just a handful of 3D printers that we consider to be good for beginners as well as intermediates, and even experts, making the decision easier, and the filaments, as well as the upgrades listed, were all tested by us and carefully selected, so you know that whichever one you choose will work as intended.
Error processing API data.
