If you want to improve your print times without sacrificing print quality, then you might want to consider printing using adaptive layers.
“Hey! But what are adaptive layers?” you might ask. Well, in this article I will go over what they are, how they work and how you could implement them in your own prints to achieve even better results.
In short; Enabling adaptive layers allows you to print using a variable layer height, which means that the printer will increase or decrease the layer thickness while printing to achieve a smoother or rougher finish depending on the shape of the object. This way, sections that need a smooth finish will print with a lower layer height, but the rest of the print will use a thicker layer height which saves time and filament.
What is adaptive layer slicing in Cura?

Adaptive slicing in Cura allows for a reduced print time without sacrificing print quality, and this is a new feature to the software from version v3.2.0 onwards. You can download Cura here if you need to.
This feature is designed to automatically adjust the layer height emphasizing on curved geometric areas and printing them with thinner layers, while areas with less structural changes will be printed with thicker layers.
This simple modification to the printing process ensures smoother finishes on the curved surfaces of the print, while at the same time reducing the print time. In fact, the print time is way less than what it would be if the entire design was printed with a thin or small layer height. Granted, there might be visible lines in the print, but not where it matters the most.
What the software does is allow you to configure the optimal trade-off between printing time and surface quality, where printing time is reduced and the quality of the surface finish is improved. Learn more about it in this scientific article.
The layer height of a print is instrumental to the finished appearance of the print. For example, using a layer height of 100-micron or less means that each layer will be very thin, and the merged layers will look like a smooth, unified print with no noticeable layer lines.
How much printing time you can save will vary from print to print, which means that sadly, I cannot give you an average estimate, but in many models the difference is quite important.
Be aware that not all surfaces benefit from using adaptive layers to the same degree when printing. To see a detailed example with explanations of the process and expected outcomes, you can check this article by diyodemag.com.
What are the advantages of adaptive layers in Cura?

Right: Print time after enabling adaptive layers.
Enabling adaptive layers will reduce printing time and material use by adapting the layer height depending on the shape of the section that is being printed by reducing the layer height in complex and curved sections to create a more detailed result, while increasing it in specific parts that do not require the same level of detail.
This process produces prints with a higher quality while reducing the actual print time when compared to printing the same model using standard layer heights.
With thinner layers, the staircasing effect is greatly reduced, but the opposite is also true for thicker layers.
Using adaptive layers not only reduces print time and increases print quality, but also reduces the time spent on post-production where a lot of sanding would have been necessary to smooth specific surfaces.
Using adaptive layers will help smooth out areas that would not come out as smooth with a regular print (if thicker layers are used), which means that less post-processing will be needed. But not just that, since you can use a lower layer height to create a smoother finish in specific sections, if there are some hard to reach parts of your print that would otherwise be impossible to smoothen out by sanding, for example, using a lower layer height will ensure that that specific section comes out as smooth as possible.
Essentially, using enabling adaptive layers can not only help you cut down on printing time and overall material usage, but also at reducing the time it takes to post-process the model.
When should you use adaptive layers?
Using adaptive layers depends on the functionality and aesthetics that you’re going for with your print, but it also depends greatly on the geometric design of the print, for example: In designs that have steep angled- or curved areas, the higher resolution of adaptive layers will automatically print a smoother finish.
Adaptive Layer Thickness works best for:
- A design with gradual geometric changes in slope angles and curved walls.
- Prints with fine detail in some areas that are necessary to the functionality of the print, whereas other areas may not require such level of detail.
- Creating prototypes that require a detailed and smooth finish that accurately print to the desired specifications.
Adaptive Layer Thickness should not be used for:
- Prints that require consistent and precise detail throughout the entire print. In other words, a complete high-resolution print.
- Printing different structures simultaneously on the same build platform. The adaptive Layer program is not designed to cope with more than one set of print specifications at a time.
How to configure adaptive layers
1. First you need to enter the advanced configuration mode by clicking on the Hamburger-style menu:

2. After doing that, scroll down to the “Experimental” option and click on the gear icon. Next a new window will open and in the search bar type “Adaptive” and enable Adaptive Layers as well as the other three options:

3. Now you can go back to the first menu and under “Experimental” you should see the Adaptive Layer mode and be able to enable it:

4. Now you need to configure the settings and click on slice, and depending on the complexity of the print you should be able to see a noticeable drop in print time.

Here’s what the different settings do
- Adaptive layer maximum variation is the maximum allowable layer height difference from the base height. i.e., if we start at 300-micron or 0.3mm and the maximum is Δ.2mm, the maximum resolution can be 0.1mm or 100-micron.”
- Adaptive layers variation step size: The difference in the height of the next layer compared to the previous one.
- Adaptive layers threshold: Determines how likely thinner layers will be used. Smaller values result in more thinner layers, while larger values result in a tendency toward thicker layers.
How do you determine the height of a layer?
With printing in general, the layer height is restricted by the dimension of the nozzle and should not exceed 80% of the nozzle’s diameter.
Most 3D printers come standard with a 0.4mm nozzle, and the majority of users do not change the nozzle to another size. With a 0.4mm nozzle, the maximum layer height should not exceed 0.32mm, while if you were using a 0.6mm nozzle, the layer height restriction would be placed at 0.48mm.
Can you change the layer height mid-print?
Changing the layer height mid-print, while doable, is not advisable, as altering the G-code that was created during the slicing of the print design will more than likely negatively impact the final product and you will have to start the print from scratch.
If you are not happy with the quality of a print, you can adjust the print settings, including layer height, by re-slicing it, but this starting a whole new print from scratch.
Just as a side note, if you really want to change printing specs (layer height) midway into printing, it is technically possible, but the risk of print failure is very high. Essentially, you would need to pause the print and slice it again with the new layer height, then open the G-code and clear all the instructions already completed in the printing phase before you paused the print.
You will then introduce an offset on the Z-axis based on the current height of your incomplete print and print the new file. If you manage to get it right without any print errors, the final print may not be aesthetically pleasing, so the better option is not to waste time and material but to rather begin the process from the beginning with your new settings.
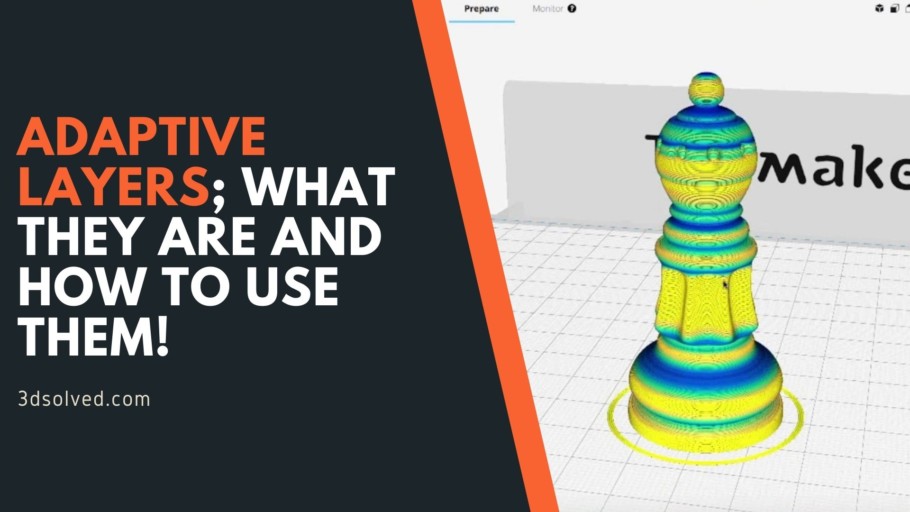
Example with adaptive layers
In order to provide a real example, I decided to print a simple chess piece. Although my ELO rating is quite low (not even scored), I can tell with certainty that we are dealing with a Pawn.
I sliced the same object both with and without adaptive layers, setting a base layer height of 0.2mm.

We are dealing with small pieces, which means that the absolute time saved is not that impressive (just a mere 3 minutes). In order to really see the benefit of this feature, it is worth noticing that these 3 minutes roughly translate to 8.6% less time, which is actually non-trivial.
Keep in mind that this percentage will vary depending on the specific topology of the object being printed. As an extreme example, if we were to print a cue without any details, both printing times would be exactly the same!
Conclusion
Using adaptive layers can help you not only cut down on printing time, but also on the amount of filament that gets used to complete the print, and this add up over time, so essentially you’re saving both time and money when using this setting.
It’s worth noting, however, that this feature is still in its experimental form and that it may not work as intended for you at times, so you’ll have to give it a try and see how it goes.
Check out our recommended products section

We created a recommended products section that will allow you to remove the guesswork and reduce the time spent researching what printer, filament, or upgrades to get, since we know that this can be a very daunting task and which generally leads to a lot of confusion.
We have selected just a handful of 3D printers that we consider to be good for beginners as well as intermediates, and even experts, making the decision easier, and the filaments, as well as the upgrades listed, were all tested by us and carefully selected, so you know that whichever one you choose will work as intended.
Error processing API data.
I’ve found with some prints that I can save as much as an hour or more using this feature. Worth fiddling with in my opinion. Thanks for the article.