Ender 3 Bed leveling can be quite difficult at times, especially if there are some things that aren’t working as intended.
In this article, I’ll explain how to fix a wobbly bed, how to fix a bed that is higher on one side, how to fix the bed screws that seem to be turning in place, and how to install better springs that will keep your bed perfectly leveled for longer periods of time.
If you don’t want to have to go through all the trial and error that we did in order to find the Ideal Settings for creating high-quality prints on your Ender 3, then definitely check out our own Cura Profiles tailored specifically for the Ender 3 Printer Series.
Fix Ender 3 Bed Wobble

If the bed of your Ender 3 is wobbly, maybe you accidentally bumped against it at some point, then there’s one really easy fix which should work in 99% of situations.
What generally happens is that the bolts that attach the bed to the Y Carriage loosen slightly and need some adjusting.
Here’s how to fix it:
- Push the bed all the way to the back.
- Put the Ender 3 on its side (power supply side on the bottom).
- Using the open-end wrench that came with the printer, use it to fix in place one of the nuts on the Y Axis carriage (on the top side of the rollers).

- Next, using the Allen Key that came with the printer, tighten up the screw until it’s fairly tight, but not too tight since you want the rollers to be able to turn freely.

- Do this on all four screws.
- Place the printer in its upright position again and check if the bed is still wobbling.
- Move the bed all along the Y Axis and check that it does so without any issues.
In most cases, this should’ve solved the problem. If for some reason it’s still wobbly, go through this entire procedure again making absolutely certain that the screws inside of the rollers are tight enough. Just remember not to tighten them too much, otherwise the bed might have a hard time moving in the Y Axis.
Fix Ender 3 Bed higher on one side

If after leveling your bed you find that either the left or right side ends up a lot higher than the other one and the bed leveling screws are tight on the one side but loose on the other, then it might be a misalignment with the X axis and the carriage/trolley it’s attached to.
This issue is very common, especially after you’ve just put together the printer for the first time, since overlooking a couple details during the assembly process is quite easy.
This can be caused by the Z axis being slightly rotated, by the Eccentric nuts being either too tight or too loose, or by a slight misalignment between the X Axis and the carriage that the extruder is attached to.
I wrote an extensive post on how to fix all of this that you should definitely check out as well: Ender 3: Fix X Axis Sag.
In order to fix this particular issue, you will need to slightly disassemble the printer. Here are the steps to follow:
Partial Printer Disassembly
- Remove the filament as well as the spool since you don’t want to be dealing with the weight of it, plus it will tangle up and be a nuisance.
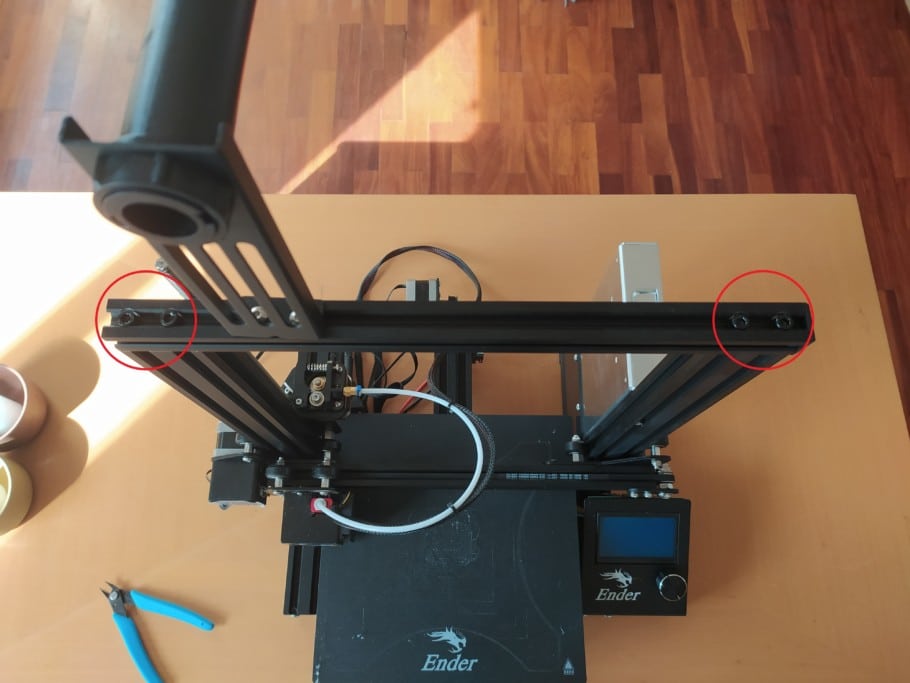
- Using the big Allen key that came with you assembly kit, remove the screws on the top rail.
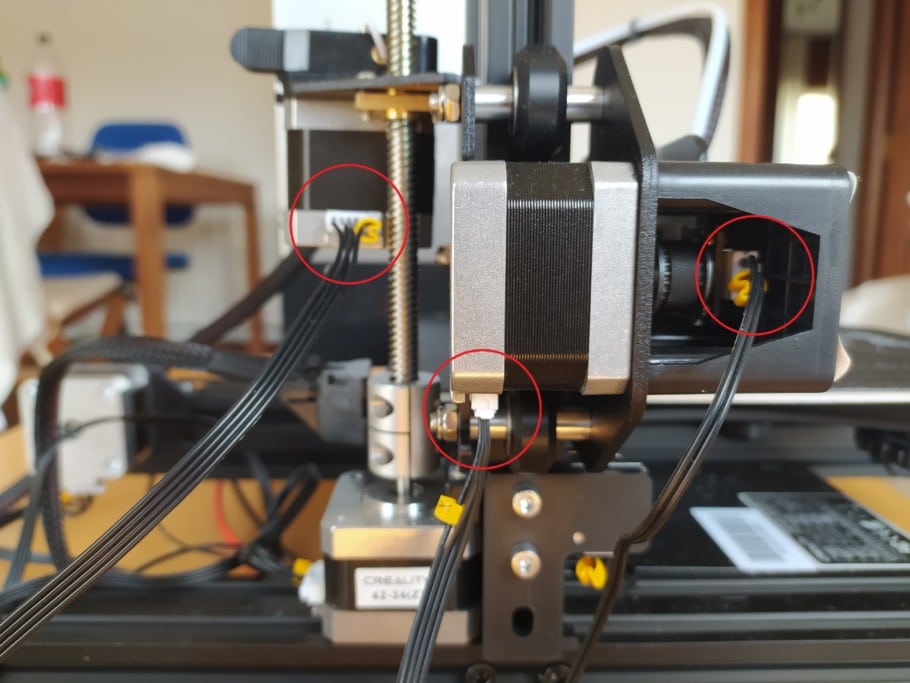
- Next, make sure to remove the cables connected to the E motor, X and Y axis motors.
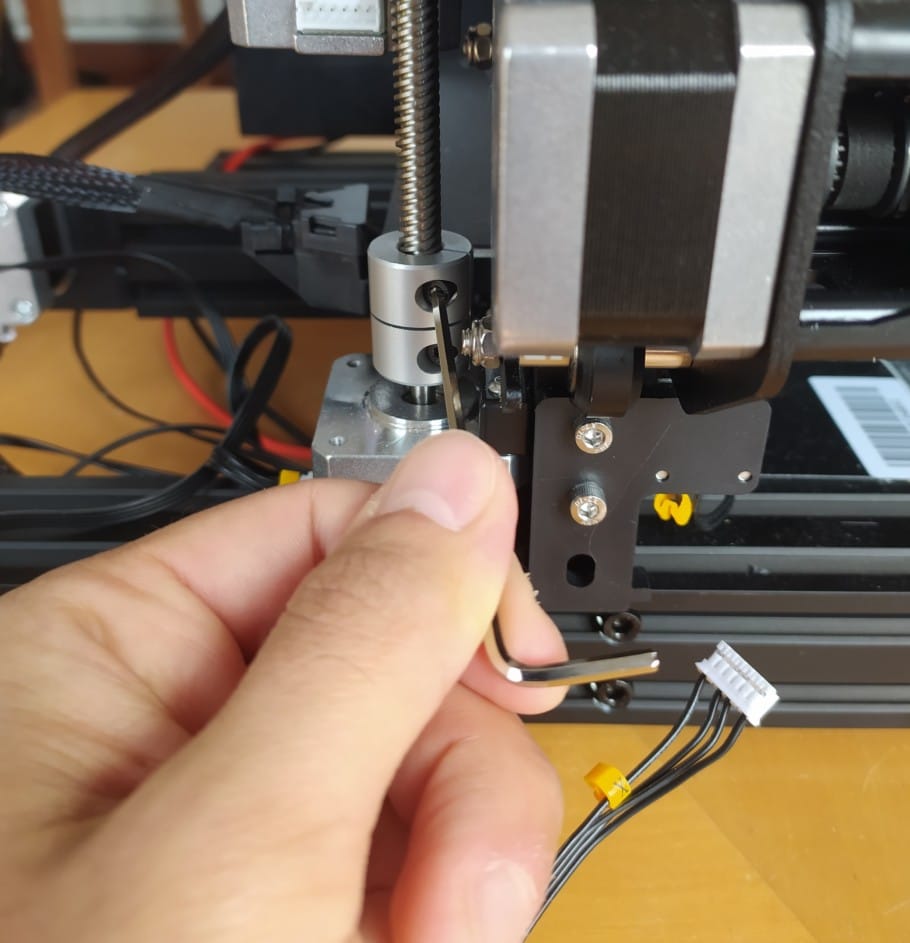
- Using the smaller Allen key, loosen up the screw on the Z rod and then remove it completely by rotating it counter clockwise and leave it on the side for now.
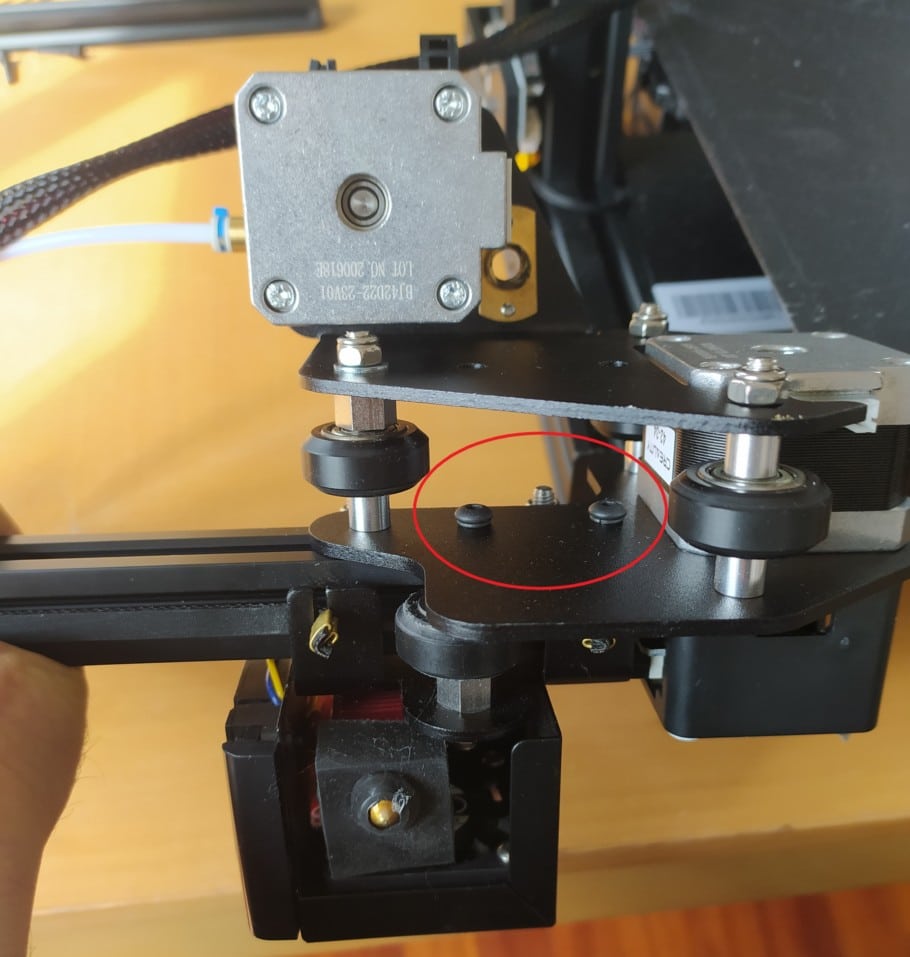
- Push the X axis all the way up until you can detach it from both Z Axis and locate the two screws that secure the X Axis to the extruder carriage.
After these five simple steps it’s time to get to the actual fix, which is quite simple and easy to do.
How to fix Ender 3 Bed higher on one side:
If you look at the trolley/carriage that the extruder is attached to, in the middle there should be two screws that secure it to the X Axis, and these might either be a bit loose, or when you tightened them during the assembly process, the whole structure didn’t line up correctly.
- Using one of the Allen keys provided with the printer, loosen the two screws that secure the carriage to the X Axis, but leave the one closer to the center of the printer a bit tighter than the outer one.
- Using that first (inner side) screw as an anchor point, slightly adjust the X Axis until it’s lined up correctly.
- Tighten both screws until there is no play whatsoever.
If done properly, next time you level your bed it should actually be leveled, and not much higher on one side than the other.
If the issue still persists, you might need to look under the bed of your Ender 3 to check if everything is installed correctly.
Fix the Heated bed Screws Turning in place

I’ve seen many people complaining about not being able to properly level the bed because the screws that are used to level the bed weren’t properly attached to it, and when rotating the adjustment wheel, the screw would also turn, essentially not tightening or loosening the springs.
Luckily, this never happened to me, but
This is not the simplest of fixes, but unless you want to replace the entire heated bed, then it’s your only option.
Here’s how to fix it:
- Turn the adjustment wheel of the problematic screw all the way to the right until it completely comes off the screw.
- Next remove the spring.
- Put some nylon washers on the screw and then put a nut on top of it and tighten it hard enough to that the screw can’t turn.
- Reinsert the spring and the adjustment wheel.
- Level the Bed.
I would highly recommend doing this procedure on all four screws since the nut will help all four of them to properly stay in place and not turn when you turn the adjustment wheels.
Change the Bed springs

If you’re having a hard time leveling the bed, or if you need to re-level it after almost every single print, then it might be due to the springs that come with the Ender 3.
Those springs are fairly soft and allow the bed to move, which is not something you want to happen. Replacing them with these yellow springs, which are much sturdier, will make it so that once you level the bed, it should be much harder for any of the sides to move.
Here’s how to do it:
- Remove the adjustment wheels by rotating them clockwise (Push down on the bed so the springs don’t exert any force on the wheels and spin them. This way they will come off in two seconds).
- Remove the old springs (These are between the bed and the support structure/Carriage that moves along the Y Axis).
- Insert the yellow springs and put the support structure/carriage back in place.
- Tighten up the adjustment wheels
- Level the bed.
Just changing the springs on their own and not following any of the previous steps, will already lower the overall number of times you need to level the bed.
Of course, if the right side of the bed is completely off, either higher or lower than the left side, you will need to adjust the X Axis, since changing the springs won’t solve this problem.
If you don’t want to have to go through all the trial and error that we did in order to find the Ideal Settings for creating high-quality prints on your Ender 3, then definitely check out our own Cura Profiles tailored specifically for the Ender 3 Printer Series.
Conclusion
The Ender 3 seems to have a lot of bed leveling issues. In my case, I had all of them except the one where the screw was turning in place.
After watching loads of videos on YouTube, I realized that some people got printers that didn’t have any of these issues, while some had all of them, so I guess it also comes down to how lucky you got with your own personal Ender 3.
If your bed is much higher on one side than the other, you might be dealing with an X Axis sag, and if you follow the steps I show in the article I just linked, you should be able to fix the two issues in one go.
Like I mentioned earlier, I would recommend adding a nut to the bed screws as well as changing the springs, since this will keep the bed leveled for much longer.
I hope this information was useful!
Have a great day!
Check out our recommended products section

We created a recommended products section that will allow you to remove the guesswork and reduce the time spent researching what printer, filament, or upgrades to get, since we know that this can be a very daunting task and which generally leads to a lot of confusion.
We have selected just a handful of 3D printers that we consider to be good for beginners as well as intermediates, and even experts, making the decision easier, and the filaments, as well as the upgrades listed, were all tested by us and carefully selected, so you know that whichever one you choose will work as intended.
Error processing API data.
I can not get mine leveled. 4 wheels are tightened all the way and there is still too much of a gap???
I haven’t been able to complete a sample project
Any suggestions
You need to adjust the Z-offset. Here’s our guide on how to do that on the Ender 3: http://3dsolved.com/ender-3-z-offset-how-to-adjust-it/.
I hope it helps!
I was reading the first fix under ‘Ender 3 Bed Wobble’ and was a bit confused when you said to use an allen wrench on the bolt and an allen key on the screw because an allen wrench and allen key are the same thing, were you referring to the open ended wrench that came with the printer to use with the nut?
Ha! Yes, indeed! My mistake there!
Hi,
Great article and very practical, pictures helps allot!
I have another problem with leveling the bed that it seems nowhere I can find answer to, and maybe you can share some suggestions on what might be causing the problem.
I have perfect (exactly the same) gap between nozzle and bed in all 4 corners, however in the middle of the bed, the nozzle is digging into the bed. If the middle point is set then the other settings in nearly all corners are lost. No matter how I try the bed is not leveled and cant print properly, especially small and delicate in size models.
There is no wobbling in the bed, the bed surface seems to be flat.
Wonder if you have come across this problem.
Will appreciate any ideas and suggestions on how to approach this issue.
Hey there! I’m sorry that’s happening to you.
In my case, the opposite is happening which means that when I level the bed on the corners, the nozzle is too farm from the bed in the center.
You could fix this by doing some mesh bed leveling (32-bit board required, so check which one you have). If you have this board, you may need to update the firmware which is super easy. If you don’t have the board, you may want to consider installing a BLTouch for automatic bed leveling.
But look into mesh bed leveling, it might help!
Regards!