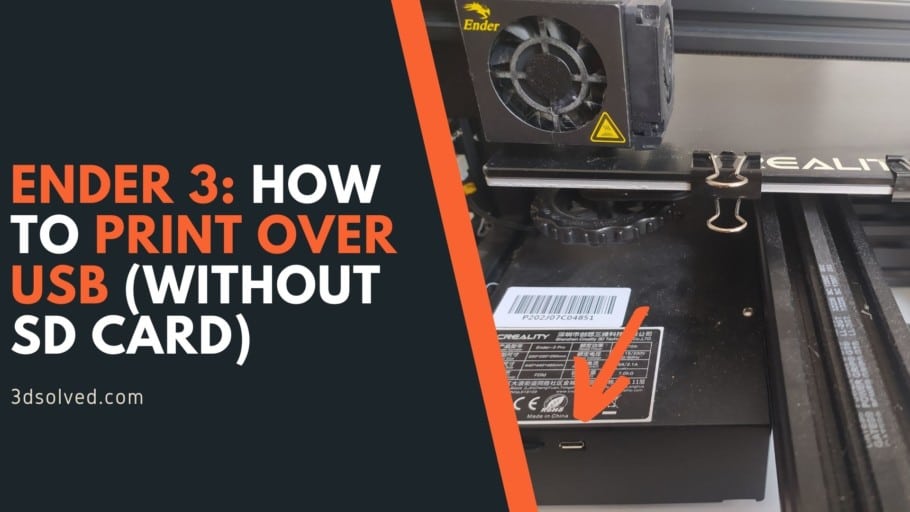
Have you ever looked at your 3D printer and asked yourself what that micro-USB port is for and why you always end up printing using the provided SD card?
Well, in this article I will be going over how to use said USB port to print your 3D models just like you would when using an SD card.
However, it’s worth noting that there are some cons to doing this and you will also need to install some drivers and additional software.
If you don’t want to have to go through all the trial and error that we did in order to find the Ideal Settings for creating high-quality prints on your Ender 3, then definitely check out our own Cura Profiles tailored specifically for the Ender 3 Printer Series.
Let’s get started!
Using Cura to Print Over USB
If you didn’t know, Cura allows you to print a model directly via the software by connecting the printer to the computer using a USB cable. However, it’s not as simple as that, so here’s a quick guide on how to be able to print over USB with Cura and what additional software you may need to download.
What you will need in order to print over USB:
- A USB Type-A to Micro USB cable.
- The CH340 drivers (These usually come stored inside the included SD card, but mine didn’t come with an .EXE file so I had to download it from the site that I just linked to).
Note: The site where you can download the drivers is completely in Chinese, but just press the first big blue button and you’ll get the correct .EXE driver file.
Here’s how to use Cura to print over USB:
- Install the CH340 driver (usually comes with the included SD drive).

- Connect the printer to the computer using a USB to micro-USB cable.
- Open Cura, import and slice the 3D model using the desired settings.

- Click on the “Monitor” tab on the top of the screen.
- If the printer needs to be preheated, do it via the Monitor tab.

- Click on the small arrow to the right of the large blue button (The one on the bottom right of the screen) and click on “Print via USB”.

- Don’t disconnect the USB cable or turn the computer off, deactivate sleep mode as well as the screensaver (the computer needs to be 100% active otherwise the print stops).
When using Cura to print over USB you can actually control a lot of the printer itself, for example; You can move the X, Y, and Z axis, preheat both the bed and the nozzle to any temperature, view the print time, and even send G-code.
Just remember that it’s extremely important to not let the computer go to sleep or even put on a screensaver, all of this needs to be completely deactivated otherwise the print will stop as soon as the computer is no longer 100% active.
Using Pronterface to print over USB
Just like in order to use Cura to print over USB and control the printer remotely you need to install the CH340 driver, you will also have to do the same in order to be able to print using Pronterface. Also, you will need to download Pronterface as well.
What you will need in order to print over USB:
- Pronterface (extract the .EXE and open it, no installation needed.)
- The CH340 drivers (These usually come stored inside the included SD card, but mine didn’t come with an .EXE file so I had to download it from the site that I just linked to).
Note: To download Pronterface you need to follow the link I just provided, scroll down and click on the download link that matches the version of your OS (Windows 64-bit, MacOS, etc.).
Here’s how to use Pronterface to print over USB:
- Install the CH340 driver (usually comes with the included SD drive).

- Connect the printer to the computer using a USB to micro-USB cable.
- Open your slicer of choice, import and slice the 3D model using the desired settings and export the file in .gcode format.

- Open Printerface and make sure that the port is set to the highest one possible (COM3 in my case) and the Baud rate to the required one by your printer (115200 on my Ender 3 Pro).

- Click on Connect (If it’s not able to connect, try another Baud Rate).
- Load the .gcode file and preheat the bed and the nozzle (either using Pronterface or via the printer’s firmware).
- Click on “Print” (it takes about a minute until it starts printing).

- Don’t disconnect the USB cable or turn the computer off, deactivate sleep mode as well as the screensaver (the computer needs to be 100% active otherwise the print stops).
Pronterface, just like Cura, allows you to move the X, Y, and Z axis, and adjust the bed and nozzle temperature. However, Pronterface also provides you with controls over print speed, print flow, and even lets you extrude some filament (maybe you changed the filament recently).
Why print over USB instead of using the SD card?
This is a very valid question, and I think that most of you may have had the idea that printing over USB would be a lot better than using the SD card, right? At least that’s what I used to think.
However, when printing over USB you need to keep your computer on, and not just that, but not even the screensaver can be activated since this will cause the print to stop.
The only benefit of printing over USB is that you don’t have to drag the SD card around to be able to print, or if you have a printing farm, but that’s a whole other story! The disadvantages of printing over USB seem to be greater since there’s a higher risk that your print won’t be completed.
If you don’t want to have to go through all the trial and error that we did in order to find the Ideal Settings for creating high-quality prints on your Ender 3, then definitely check out our own Cura Profiles tailored specifically for the Ender 3 Printer Series.
Check out our recommended products section

We created a recommended products section that will allow you to remove the guesswork and reduce the time spent researching what printer, filament, or upgrades to get, since we know that this can be a very daunting task and which generally leads to a lot of confusion.
We have selected just a handful of 3D printers that we consider to be good for beginners as well as intermediates, and even experts, making the decision easier, and the filaments, as well as the upgrades listed, were all tested by us and carefully selected, so you know that whichever one you choose will work as intended.
Error processing API data.
So, installing even a 16Mb memory, which costs pennies by now, on board of a 3D printer was an issue for manufaturer. LMAO.
it was soooo helpful thank you
My son got an ender3v2 as a gift from Amazon for the retired, boarded old man. I love to do things perfect. 40 yrs in the elevator industry. Think about it 80 flrst can’t be off 1/2”. From
Top to bottom PERFECT!! Got a cr touch first 1?? ,springs, lights, a shelter ( it looks like a grow tent. From Amazon. I have to update the marlin firmware download crtouch erase the bin. & update the display only with Dwin set?? with no more than a 8gb fat 32 format before use. The one with my ender Creality Sasid from that one OMG HE SAID ITS OK it’s all gone. My poor son dad do you like it. I sorry we’ll get something else it’s ok. I’m SO CONFUSED. I don’t know what to do. My laser cnc are great. That’s why my boy purchase it. I just don’t get. The video that are Chinese I can’t understand. I do get english