The 3d printing workflow from 3d model to 3d object is mostly done from a computer. At one point though, you need to get the G-Code files into the 3d printer itself. With stock Ender 3 this step is a little bit cumbersome, especially if the printer isn’t near or even in the same room.
Giving your printer Wi-Fi capabilities not only can make the workflow smoother and easier but will also let you add extra features like remote monitoring and control.
If you don’t want to have to go through all the trial and error that we did in order to find the Ideal Settings for creating high-quality prints on your Ender 3, then definitely check out our own Cura Profiles tailored specifically for the Ender 3 Printer Series.
How To Make Ender 3 Wireless
The Creality Box is the easiest to set up and use but has a limited functionality, whereas the best all around option is using a Raspberry Pi and Octoprint or Astroprint. An alternative that requires more effort is to change the mainboard, but this requires some technical knowledge and doesn’t bring a lot of extra benefits.
Creality Wi-Fi Box

The Creality Box is a device that connects to the Ender 3 mainboard through a USB cable and lets you connect to your printer via Wi-Fi or ethernet cable. The setup is easy and straightforward, and the brand makes use of QR codes to help you in the process.
Once set up it lets you access your printer through the Creality Cloud App on an android or IOS smartphone. In the app, there is a marketplace where you can download designs, a cloud slicing service, and a menu to control some aspects of the printer.
This option may be good for inexperienced users but if you are somewhat experienced, you will find that there is not a lot of room for customization. There is no way to send G-Code files directly to the printer, and the only way is to slice them in the cloud slicer itself. Editing the slicing profiles is extremely limited so you won’t be able to use the highly tweaked ones you already have.
Note that the manual controls of the printer are disabled when using the app, so changing any parameters mid-print can only be done on the smartphone.
Multiple printers can be connected and managed with a single smartphone, but each printer needs its own box.
While the price for the main unit is really good, the only webcam compatible with it is the one sold by Creality, and it isn’t cheap. So, if you also want to monitor the printer remotely you might want to consider other options. Also, it requires a 2.4-amp charger (or greater) and a microSD card that don´t come in the box.
Specifications
- Price: ≈ 20 USD
- Pros: All-in-one package wireless printing. No experience is required. Design matches the printer. Cloud slicing.
- Cons: No Windows support, only access via mobile app. Slicing can only be done in the cloud and slicing profiles aren’t very customizable. Only works with stock Creality printers.
- Ease of setup: Easy
- Ease of use: Easy
How to use the Creality Wi-Fi box
To use the Creality Box there is a lot of official info but basically, these are the steps:
- Insert a FAT32 formatted microSD card into the box.
- Plug the printer and the power adapter to the corresponding ports on the box.
- Download and install the Creality Cloud app into a smartphone.
- Create an account and log in into the smartphone.
- Tap on the “+” sign and scan the QR code to link the device.
- Set up the Wi-Fi network in the app
- Now you can control the printer, download 3D models, and slice them to print.
Wireless SD Card
Wireless SD cards are flash memory devices designed to allow file transfer over Wi-Fi directly into the card. Originally, they are meant for digital cameras, but app have been made to enable them to work with 3D printers as well. Considering the price and functionalities I would not recommend using them. They aren’t as easy to use as they seem, and they only help you avoid inserting and removing the card from your computer. Unless you already have one lying around, I wouldn’t buy one for this purpose. You’ll also need an SD to MicroSD adapter for it to work.
Specifications
- Price: 60 USD
- Pros: No changes to the printer needed.
- Cons: No control over the printer. Lack of extra features.
- Ease of setup: medium
- Ease of use: easy
How to use a wireless SD card on your Ender 3
The use of these cards requires the modification of root files in the card and some software developed specifically.
In the following link you’ll find the process well documented by the developer of the software
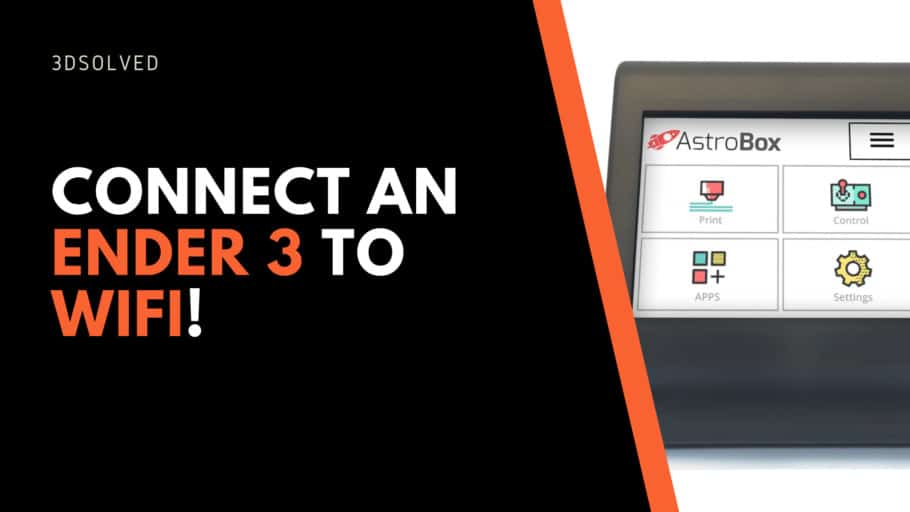
AstroPrint (and Astrobox)

AstroPrint is a cloud-based control platform that enables you to connect your printer to the internet and control it from there. It offers an all-in-one solution right out of the box. Featuring cloud slicing, 3D model browsing and downloading, printer control and the ability to take snapshots and videos it’s your best choice if ease of use is of utmost importance to you.
Astroprint needs a Raspberry Pi to operate but if you don´t want to take the trouble of sourcing the software and transferring it to a microSD card you can buy an AstroBox. AstroBox is the Creality Box but done right.
There are two versions: AstroBox Gateway which is basically a Raspberry Pi in an enclosure and a preloaded microSD card and the AstroBox touch that adds a touchscreen also. These options would be the best hassle-free alternatives.
You just need to plug it to the power outlet and the printer; make an account and you should be up and running. The free account limits the number of printers to two so that is something to take into account if you have more printers. It hasn’t got much room for tinkering and tweaking so for some users OctoPrint would be a better choice.
Specifications
- Price: 60 – 100 USD (RPi or AstroBox)
- Pros: Cloud slicing, good printer controls, remote monitoring.
- Cons: Not as customizable as OctoPrint
- Ease of setup: Easy if you buy the package, medium if you source all the parts yourself
- Ease of use: Easy
What you will need
To install Octoprint you will need:
- Ender 3 Printer
- Raspberry Pi 3B+
- A USB power supply of 2.5+ amp
- A good USB cable
- An Ethernet cable or a Wi-Fi USB adapter (only needed for setup)
- A microSD 8+ GB, better if it has a good speed rating
- USB camera or RPi camera (Optional)
- A computer with a card reader and a MicroSD to SD adapter.
How to use a Raspberry Pi with Astroprint
If you don’t but the AstroBox hardware that comes plug-and-play you can install it on your own on a Raspberry Pi:
AstroPrint has a lot of videos and documentation about the subject.
Based on Astroprint’s website, follow these steps:
- DOWNLOAD AND INSTALL ETCHER.
- DOWNLOAD AND UNZIP THE ASTROBOX GATEWAY IMAGE.
- https://www.astroprint.com/download-3d-printer-software
- INSERT THE MICROSD INTO THE COMPUTER
- USING ETCHER, FLASH THE .IMG FILE FROM STEP 2 ABOVE.
- Ensure “Validate write on success” is enabled to make sure your card and/or card reader are in a good state.
- Ensure that the flashing and validation processes complete successfully. If there are errors, it could indicate that your SD Card is damaged, and you should not use it for this project.
- EJECT YOUR CARD AND INSERT IT INTO YOUR RASPBERRY PI.
- APPLY POWER AND WAIT FOR IT TO BOOT UP.
Once you’ve done those steps you can download the AstroPrint app and connect to your Astrobox via WIFI and set it up. Note that you will need the extra Wi-Fi USB adapter plugged into the RPi for it to work.
If you used an ethernet cable to connect it to your router the process is a little bit trickier as you need to do it on a browser. There’s a lot of official information to guide you on that path.
Octoprint

Octoprint acts as a printing server and lets you manage your printer from a computer or smartphone. Most commonly it will run on a Raspberry Pi, but it can also run on an old smartphone that you tossed in a drawer giving it a new purpose.
It is free (except for the R-Pi or the old smartphone) and it is packed with functionalities. As it is open source there are also plenty of plug-ins to expand its capabilities even further made by the vast community of users. You’ll be able to make time-lapses or monitor your print if you pair it with a webcam or even detect failed prints with “The Spaghetti detective”.
It enables you to fully control your printer and develop custom features. The only downsides are the not-so-easy setup and that it doesn’t have cloud slicing or managing it from the web securely. There is a workaround for the last two that is to connect Astroprint as a plug-in.
Specifications
- Price: ≈ 60 USD (Raspberry Pi)
- Pros: Very customizable, great control over printer, plenty of plugins to add new features.
- Cons: No cloud slicing, connecting to the internet a little bit cumbersome.
- Ease of setup: Medium
- Ease of use: Easy to medium
What you will need
To install Octoprint you will need:
- Ender 3 Printer
- Raspberry Pi 3B+
- A USB power supply of 2.5+ amp
- A good USB cable
- A microSD 8+ GB, better if it has a good speed rating
- USB camera or RPi camera (Optional)
- A computer with a card reader and a MicroSD to SD adapter.
How to use a Raspberry Pi with Octoprint
To set up OctoPrint:
- Download the Raspberry Pi imager from https://www.raspberrypi.org/software/
- Insert the microSD card into the computer
- Install and run the imager
- Select OctoPi on the “choose OS” menu, “other specific purpose OS”
- Select your SD card on choose storage
- Press Ctrl+X and in the menu configure your Wi-Fi network
- Click on Write.
- Put the microSD card into the RPi and power it up with the power adapter
- On Octopi-local/ on your browser you should now be able to access Octoprint
- Follow the steps to configure
- Plug your printer into the RPi
OctoPrint vs Astrobox for wireless printing
Octoprint and AstroPrint are similar in some ways and even complementary on others. AstroPrint is a whole environment and quite easy to use. So, if you are looking for an out-of-the-box experience it will be an exceptionally good choice. On the other hand, if you would like to have absolute control over your printer and take advantage of the plugins of a large community, Octoprint is the way to go.
Octoprint can be installed on an old smartphone too so you may already have the hardware without knowing. It can also connect to AstroPrint with a plugin so you can get all the functions of one on the other.
The best part is that the hardware is mostly the same for both (Raspberry Pi, not the old smartphone) so if you try one and want to switch, it won’t be a big deal.
Wi-Fi Mainboard
Ender 3 comes with a basic mainboard so switching it can bring many benefits. If you only want the Wi-Fi capabilities though, it might not be the most sensible way to go.
Changing the mainboard requires in most cases to wire and crimp the connections for every part of the printer. Sometimes you might even need to swap the power supply. You will also have to deal with firmware on the new board so if you don’t feel comfortable with all the skills required it might be best to stick with other alternatives.
Disclaimers aside, if you do decide to go for the mainboard swap, you’ll get a powerful silent printer apart from having built-in Wi-Fi. Two good alternatives are the Duet 3D Wi-Fi board and the SKR + ESP01 Wi-Fi module.
Changing to Duet boards will allow you to use RepRap Firmware or Klipper which have extra features that improve the printing quality overall.
A cheaper alternative that requires less effort with all the features and the Wi-Fi is to switch to a Creality silent board and use Octoprint or Astroprint. With this option, you’ll avoid crimping and wiring, and firmware changes.
Specifications
- Price: 100 – 200 USD
- Pros: Extra features and processing power.
- Cons: Requires extra work to get it up and running. More costly than other options.
- Ease of setup: Hard
- Ease of use: Easy – Medium
How to Install & use the Wi-Fi Mainboard
Depending on which board you choose to install the process may be different but probably the steps to install the new board will be these:
- Unplug the printer
- Open the electronics enclosure.
- Check the new board documentation to see what to connect where and if you need to crimp new connectors.
- Disconnect and take out the old board.
- Insert the new board and connect all the wires.
- Make sure that the voltages and power requirements match and if not change the power supply accordingly.
- Flash the chosen firmware into the new board.
- Connect and start the printer.
- Check that every system works.
Are there any problems associated with printing over Wi-Fi?
Wi-Fi can sometimes be unreliable and if it stops working mid-print it can cause a failed job. Systems that don´t store the G-Code in its own SD Card are the most susceptible because they depend on Wi-Fi throughout the whole print while the ones that only use it to transfer files and start the printer are more robust.
A way to deal with unreliable Wi-Fi is to avoid it altogether with a wired ethernet connection. Some boards and Wi-Fi boxes have an ethernet port to be wired directly to a router. If you aren’t sure about the quality of your Wi-Fi or want a more secure connection this is the way to go.
If you don’t want to have to go through all the trial and error that we did in order to find the Ideal Settings for creating high-quality prints on your Ender 3, then definitely check out our own Cura Profiles tailored specifically for the Ender 3 Printer Series.
Conclusion
Wi-Fi connectivity for your Ender 3 can open a world of possibilities. There are several options to choose from, but it depends on who you are and what you like. If you are a tinkerer or someone with the technical skills to change the mainboard, you can go for it. If you like things simpler but you still want the features, a Raspberry Pi with AstroPrint or Octoprint is the way to go. Finally, if you want the simplest and cheapest solution and you don’t mind the drawbacks the Creality Box may be enough for you.
Check out our recommended products section

We created a recommended products section that will allow you to remove the guesswork and reduce the time spent researching what printer, filament, or upgrades to get, since we know that this can be a very daunting task and which generally leads to a lot of confusion.
We have selected just a handful of 3D printers that we consider to be good for beginners as well as intermediates, and even experts, making the decision easier, and the filaments, as well as the upgrades listed, were all tested by us and carefully selected, so you know that whichever one you choose will work as intended.
Error processing API data.