You may have recently bought a 3d printer and started obtaining some results after iterating and tweaking some settings. You already solved layer adhesion, filament temperature, and other basic aspects and now you are doubling down on printer quality. Congratulations! Let’s move on to the next problem on your journey towards becoming a printing legend: How can jerk or ghosting in 3D printing be solved?
Ghosting can be solved by reducing printing speed, regulating jerk, and acceleration, with the ideal settings being: speed 60mm/s, acceleration 1500mm/s2, and jerk 10mm/s. Depending on what printer you own, you may have to increase or decrease those values. If ghosting still occurs, consider adding dampeners to the machine and check for loose belts that need to be tightened.
What is Ghosting, Jerking, or Ringing?
Ghosting, jerking, or ringing in 3D prints occur when your 3D pieces have patterns or characteristics reoccurring across the surface of your prints mostly in the form of lines due to the rapid change of direction of your 3D printer during printing.
The fact is that each of these ghosting lines is usually light and subtle, but they all together form echoes that distort the beauty of your 3D prints.
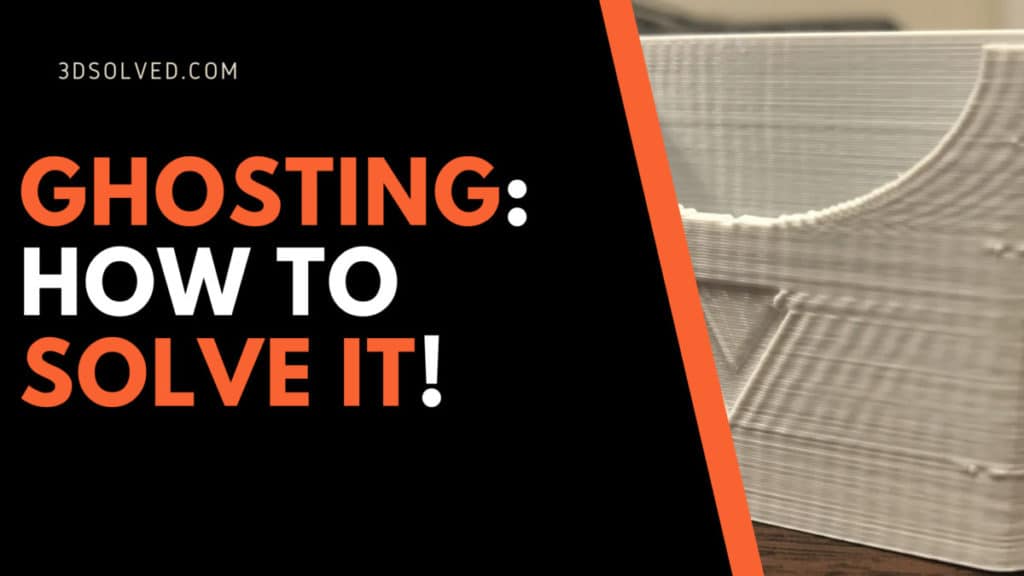
It may be usefull to take a look at a clear example of a object that was victim of ghosting.

How to Detect Ghosting in your 3D prints
It is not uncommon for people to mistake other anomalies and distortions with ghosting, especially those who are new to 3D printing.
Visible infill is one of those imperfections that are easily confused with ghosting. Visible infill occurs when the lines and patterns of the internal support system of your 3D printer are printed on the surface of your 3D print(s).
This effect is especially visible when we set our prints to have very thin outer shells. If the wall is not thick enough, then the infill or printing pattern will show through the shell.
From my explanation, it is evident that visible infill is quite different from ghosting. You can tell that your prints are ghosting when features certain features are re-occurring, different from visible infill wherein the printing structure becomes visible on your 3D prints.
In other words, ghosting occurs when you clearly see that certain features of your print repeat near them. Unless in extreme cases, ghosting tends to be quite subtle, hence its name!
Let us first take a quick look at the main possible causes of ghosting in order to later see how we can solve them. You can also go straight to the solutions, but you will deprive yourself of some invaluable information! Why would you do that to that to yourself?
What causes ghosting in 3D prints?
It would gladden your heart to know that the causes of ghosting in 3D prints are relatively obvious and logical.
Ghosting, echoing or ringing is caused by vibrations in the printer. When the printer head of your 3D printer moves and changes direction at a very fast pace, other parts like the X gantry, extruder, printer bed, and nozzles vibrate, leaving irregularities like extra layers of single details on your 3D prints.
The fact is that not all moving parts of your 3D printer can be tightened enough to completely solve the issue.
Testing for Ghosting
You can easily test if your printer is prone to exhibit ghosting. Many users think that ghosting is one of those issues that only professionals and experienced hobbyists can solve. This could not be further from the truth!
A factor that can affect the quality of your 3D prints is the weight of your X gantry. This would depend on the type of material it’s made of; carbon fiber, steel, or aluminum.
The heavier the material used, the higher the risks of ghosting. Steel is the heaviest material. The likelihood that your 3D prints would ghost is lower when using a carbon fiber X gantry.
Whichever X gantry material you use, the occurrence or not of ghosting depends on the particular setting(s) you give to the speed, acceleration, and print jerk. A somewhat reasonable setting to get you started can be as follows:
- Speed- 60mm/s.
- Acceleration – 1500mm/s2.
- Jerk – 10mm/s.
If you prefer settings that would enable your 3D printer to print very fast, it is advisable you use carbon fiber material for your X gantry because of its lightweight. You should always prioritize low and moderate printing speed, no matter what X gantry material you use.
The very first thing you have to do is print an object of any shape and form. While printing, check the moving parts of your 3D printer. Look at the extruder, nozzles, and the likes. If they resonate heavily, ghosting will occur.
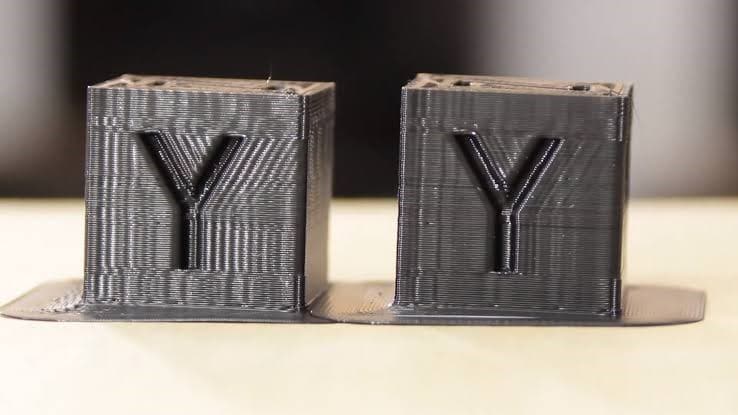
After the print is completed, you have to check the sharp edges and details of your print. If the edges are repeatedly printed and details such as letters are re-occurring, this is most likely ghosting.
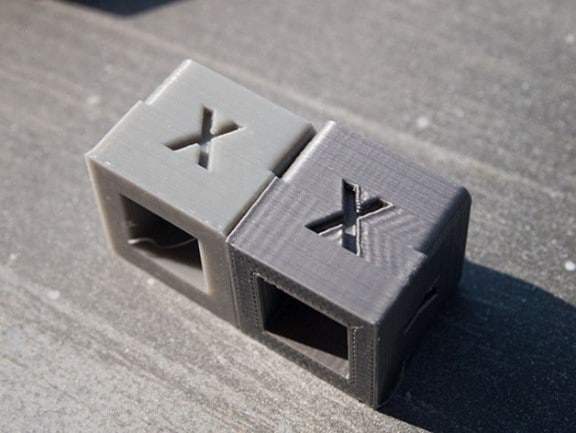
Look at the following picture. The one on the left is what we could consider a successful print. The one on the right clearly shows an aggressive amount of ghosting!

You may notice that the object printed above hardly has any real-world application, and you are right again! This little box will not leave the solar system as part of a novel scientific endeavor, but it will do something greater: they help us benchmark printing quality on the X, Y, and Z-axis.
You can download this test from Thingiverse by clicking here.
As a bonus feature, it will also let you know if your printer is properly calibrated and prints according to scale. By this, I mean that you should be able to get a caliper and measure 20mm on each dimension.
It is clear how the diagonals of the letter were repeated after the sudden moved required for printing it. It is also worth mentioning that those diagonals only repeat on the right-hand side of the letter. The avid and acute reader (that would be you) may infer that this is because the extruder is printing from left to right, causing the vibrations to occur after the letter.
Make sure to test your printing with different varieties of 3D printing filaments, speed, temperature, and jerking settings.
Note that the higher the temperature, the stronger the vibration effect thereby leading to obvious ghosting. In addition, cooler filament colors reduce the effect of ghosting. You should consider all these parameters when testing for ghosting on your 3D printer(s).
Your XY gantry material, acceleration, and jerking speed all contribute to the quality of your 3D prints. It can be tedious and incredibly time-consuming to improve the gantry of your printer, so let us first tweak the settings of your printer and see if we can get rid of those scary and annoying ghosts.
Acceleration and Jerk Settings
Acceleration settings refer to the settings of the pace of your printer head while printing. The acceleration settings vary according to the slicer of your choice, but they all do more or less the same things.
The higher the pace of the printer head, the faster your printer head places the filament. One thing you should take note of is that acceleration is not fully utilized while printing miniature models. This is because they are usually so small that there is not enough distance to be covered.
Jerk, on the other hand, is a more technical setting. The jerk of your 3D printer determines the pace at which your printer head would move from its stationary position during 3D printing.
The jerk setting determines the least amount of speed required for a specific change in overall printing acceleration.
The higher the jerk settings the faster the movement from its stationary position and vice versa. Analogously, it is the minimum speed that your printer will get to before starting to move in another direction.
I still have problems getting my head around the abstraction level of Jerk. I convinced my brain to think of it in terms of a car slowing down before a turn, after which it will move again but in a new direction. You are probably smarter than me, so do not judge me for finding this primitive and inelegant analogy useful!
What impact do the acceleration and jerk settings have on 3D print quality?
The acceleration and jerk settings in 3D printing have critical effects on the overall quality of your 3D prints. These settings go a long way in determining whether your 3D prints will feature ghosting or not. Sometimes, a lot of people prefer higher jerk and acceleration setting while printing because it saves time.
You may be willing to accept some ghosting on your print in order to save precious time. You won’t be the first person to value time over quality.
I will never judge you for doing so, but you have to know beforehand what kind of output you want to obtain. If you are going for a one-off, definitive print, you may as well consider “wasting” some extra printing time and allow the printer to give you a beautiful object in return.
Recommended Acceleration and Jerking Settings
The recommended acceleration setting for a standard 3D printer should be 60mm/s while the jerk setting should be 10mm/s. This would give you reduced and regulated printing resonance, resulting in smooth and standard detailing.
Keep in mind that these settings serve just as a ballpark figure. If you own a generic no-brand and low-cost machine, you will probably have to go below these values. On the contrary, you may have an incredible printer like the Voron 2.4 and laugh at my conservative settings!
What other problems do these settings solve?
By adjusting the acceleration and jerking settings of your 3D printer, you get to solve other problems like rough printing surface, noisy printing operation, layer line skips, distorting curves, Z-wobble and the likes will be a thing of the past if you set proper jerk and acceleration settings.
Possible solutions for Ghosting
We already know how to define and detect ghosting. In addition, we also are aware of its causes. By now, I guess you feel the urge to solve the issue. Let’s have a look at all the things we can do to prevent ghosting from happening under our watch!
• Adjusting the acceleration and jerk settings to the standard settings discussed above.
• Printing speed: The truth is that when you operate your 3D printer at high speeds, violent vibrations and ringing are likely to occur. High printing speed does not bring smooth detailing at every directional movement, and even though it will take longer, the difference in output quality will be obvious.
• Printer rigidity: This relates to the movement of the entire printer while working. Your machine has to be rigid in its position to avoid excessive vibration. One thing you can do is to get vibration dampeners for the four corners of your printer. This will help to keep the printer in place and reduce vibrations and noise. This simple yet effective “upgrade” can go a long way in improving your prints!
• Tighten loose belts: If the motion belts of your 3D printer are loose, you will get definitely see irregularities in your prints. Tightening up the belts of your 3D printer will reduce the vibrations and improve the overall quality.
Conclusion
The key to avoiding ghosting in 3D printing is to set of your acceleration and speed in accordance to your machine.
Most ghosting problems will disappear by properly setting these two parameters. Advanced improvements can also be done, like improving the rigidity of the printer, tightening loose belts and adding dampeners to the printer.
Check out our recommended products section

We created a recommended products section that will allow you to remove the guesswork and reduce the time spent researching what printer, filament, or upgrades to get, since we know that this can be a very daunting task and which generally leads to a lot of confusion.
We have selected just a handful of 3D printers that we consider to be good for beginners as well as intermediates, and even experts, making the decision easier, and the filaments, as well as the upgrades listed, were all tested by us and carefully selected, so you know that whichever one you choose will work as intended.
Error processing API data.
