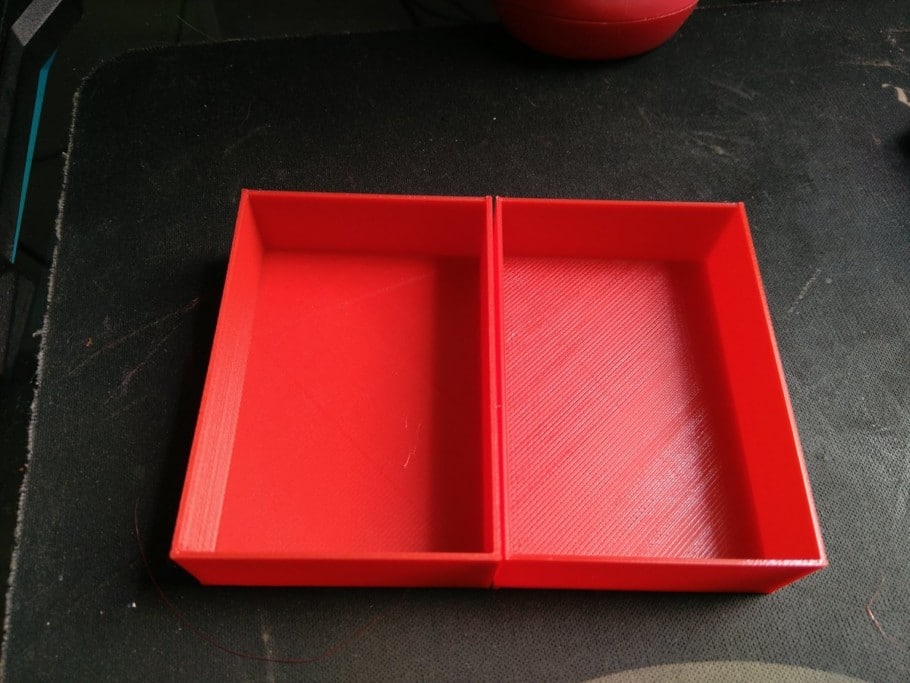
As a 3D printing enthusiast, I am always trying to improve the quality of my prints in any way I can find. In this article, I will introduce you to a very cool slicing feature called “Ironing” which allows us to smooth out the top surfaces of our 3D printed objects.
If you are looking to improve the aesthetics of your prints, look no further!
What does ironing do?

Ironing is a function that was first introduced by Ultimaker’s slicer Cura. As of today, it is featured by all the popular slicers in the market. Ironing allows us to smooth out flat top surfaces by keeping the nozzle hot when it is done printing and moving it over the finished surfaces. The heated nozzle will soften the filament of the top surfaces and while it is traveling across the object it will extrude a very small amount of filament to fill any holes and gaps. This effect will flatten any layer lines yielding much smoother top layers.
You can use Ironing whenever you print an object with a flat top surface parallel to the build plate that you want to smooth out. Ironing other kinds of figures like round objects will not have any positive (nor negative) effects.
Advantages and disadvantages of ironing
When you properly tune the settings for Ironing in the slicer the obvious advantage is smoother top layers in your 3D printed objects. This is a positive aesthetic effect but it can also be a functional improvement. Let’s say you want to glue two pieces together, Ironing allows you to maximize the contact surface of the pieces strengthening the bond between them.
On the downside, the first thing you will notice is that Ironing has a significant impact on printing time. Depending on your object’s surface size it can increase the printing time by 10 to 50%. When Ironing large surfaces, some printers can get jammed due to the slow and small extrusion that occurs during ironing. Also, if your Ironing settings are not properly set, you can end up with bumps and other irregularities on the top surfaces.
Advantages of ironing
- Smoother top layer
- Maximizes contact surface when gluing parts together
Disadvantages of ironing
- Significantly increases printing times
- Extruder can get clogged when ironing large surfaces
- Imperfections like bumps if settings are not properly set
How to enable ironing in Ultimaker Cura
By default, the Ironing feature is not visible in Cura when you first install it. In order to enable Ironing, follow these simple steps:
- Open the print settings panel.
- Click the hamburger menu and go to “Manage Settings Visibility“.
- Type “ironing” in the search bar and check “enable ironing”. There you can also enable the Ironing settings if you want to try different options. Then close that window.
Now you will see “Enable Ironing” in the settings menu under the “Shell” submenu. Go ahead and check that box.
That’s it, ironing is enabled now!
Ironing Settings
- Iron Only Highest Layer: This option lets you decide whether you want to use Ironing just for the topmost layer or for every flat surface. Leave this unchecked if you want to iron every horizontal surface.
- Ironing Pattern: This feature lets you control the way the nozzle will move across the top layers while Ironing. There are 2 options, “Zigzag” is the default one and it moves the nozzle back and forth in a zigzag pattern, and “Concentric”, which will iron the print from the outside to the center.
- Ironing Line Spacing: This manages the distance between the ironing lines. A spacing of 0.1mm is the default and it yields a very smooth finish. On the downside, it will take longer to finish, so depending on how smooth you want the top layers to be you can adjust this value. More space between the lines will speed up the process.
- Ironing Flow: This controls how much filament is being extruded while ironing. A flow of 10% is the default value used to fill holes, but you can decrease this if the surface is still rough as it is possible that it is over extruding while ironing.
- Ironing Inset: This option lets you decide how far away from the edges you want the nozzle to be. Because ironing extrudes a little bit of filament you don’t want it to go all the way to the edges as it could create a rim effect or a reverse elephant foot on the top surface of your model.
- Ironing Speed, Acceleration, and Jerk: These 3 options will let you fine-tune the speed at which the nozzle will move while the ironing process is running. For a more detailed description of these settings, check out this article
How ironing affects precision and tolerances
Ironing does change the size of your printed model, but it does not make that much of a difference. If you are printing a functional part or a model with tight tolerances you can still potentially use the Ironing feature without problems. As long as the Ironing process is not depositing too much filament you will not need to make any changes to the model in your CAD software.
Frequently asked questions
Which layers does ironing affect?
Ironing only has a noticeable effect on flat top surfaces that are parallel to the print bed. Using the Ironing settings you can choose to apply Ironing to every flat top surface or just the topmost layer.
Does ironing affect printing times?
Extra print time is required to complete the Ironing process. The main downside with Ironing is the extra print time required to finish a print. Depending on the printed model, Ironing can easily add 10-50% extra printing time. Models with large surfaces on the top layer will see their print time increased the most.
Can you use ironing with all filament types?
Ironing can be used with any filament type, but as different types of filament possess different properties the results may vary. I had good results using the Ironing feature with PLA, PETG, and ASA. There is not much we can do with the Ironing settings that affect the filament other than to change the flow rate.
Does ironing only affect flat surfaces?
The Ironing feature only affects flat surfaces that are parallel to the print bed (horizontal). If Ironing is enabled for a flat surface that is not parallel to the print bed it won’t have any impact on the object’s appearance, nor will it increase printing times.
Which slicers do have the ironing feature?
- Cura
- PrusaSlicer
- Simplify3D
- Slic3r
Check out our recommended products section

We created a recommended products section that will allow you to remove the guesswork and reduce the time spent researching what printer, filament, or upgrades to get, since we know that this can be a very daunting task and which generally leads to a lot of confusion.
We have selected just a handful of 3D printers that we consider to be good for beginners as well as intermediates, and even experts, making the decision easier, and the filaments, as well as the upgrades listed, were all tested by us and carefully selected, so you know that whichever one you choose will work as intended.
Error processing API data.
