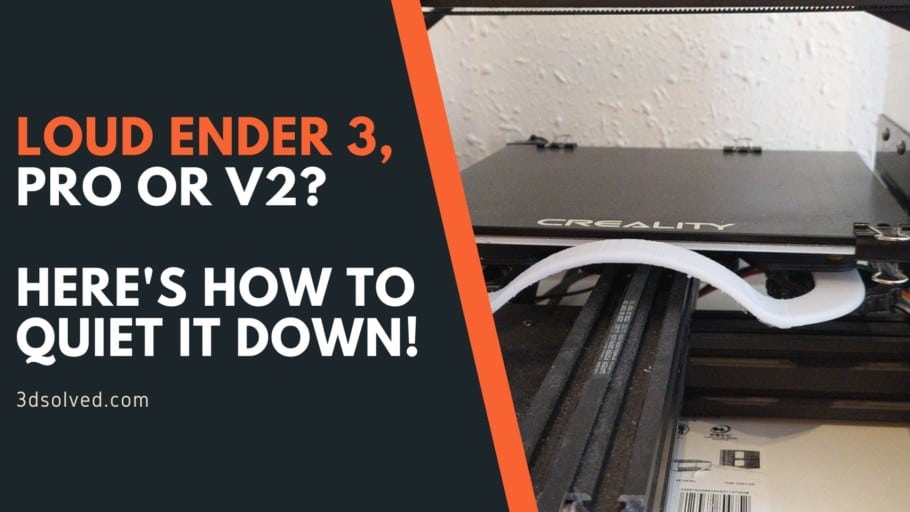
While the Ender 3 3D printers might offer an amazing value for the money, they are definitely not high-end printers. Yes, the print quality is outstanding and much better than that of many other more expensive printers, but in order for Creality to achieve this, they clearly had to make sacrifices in some other areas.
One of those areas is noise, since the Ender 3 printers, especially the Ender 3 and Ender 3 Pro, are quite noisy: The fans are loud and so are the stepper motors while printing (The Ender 3 V2 or the Ender 3X only suffer from fan noise).
In this article, I will go over all the different ways you can lower the noise coming from your Ender 3, both via purchasing some upgrades or printing your own. By far, the best solutions are the first two on this list.
Depending on which printer you have, Ender 3, Ender 3 Pro, or Ender 3 V2, there may be some upgrades that Creality has already built-in directly into the printer, like the silent stepper motor drivers on the Ender V2.
If you don’t want to have to go through all the trial and error that we did in order to find the Ideal Settings for creating high-quality prints on your Ender 3, then definitely check out our own Cura Profiles tailored specifically for the Ender 3 Printer Series.
1. Install a Silent Mainboard

The Mainboard that comes stock on the Ender 3 and Ender 3 Pro doesn’t feature the same TMC silent stepper motor drivers that the 32-bit mainboard on the V2 has, and this means that every time the print head moves, the stepper motors make a lot of noise.
Luckily, you can get the upgraded mainboard for about $35 and make the movements of the printer almost silent since it features the TMC 2225 drivers that are dead silent, plus it also comes with thermal runway protection enabled from the get-go for additional protection.
If you still haven’t bought an Ender 3, then might I suggest getting the Ender 3X that is being offered at Banggood, which is essentially the Ender 3 Pro but which features the silent mainboard, as well as a couple additional upgrades over the stock Ender 3 Pro, and all of this for less money than the Ender 3 Pro itself.
Even though the fans are typically the main culprit as far as noise goes, at least it’s a consistent kind of noise, but the sound that the stepper motors make without the silent drivers is intermittent and much more distracting, which is why I’d highly recommend swapping out the mainboard for the silent one.
There are two different mainboards you can get: The BIGTREETECH Direct SKR Mini E3 and the Creality V4.2.7 Upgrade Mute Silent Mainboard, and they both feature the silent TMC drivers. However, the first one comes with BLTouch support already built-in, making the installation process a little simpler (not much simpler, however) but costs a little more.
These are the two recommender Mainboards for the Ender 3 & Ender 3 Pro:
- BIGTREETECH Direct SKR Mini E3 (BLTouch support built-in but more expensive).
- Creality V4.2.7 Upgrade Mute Silent Mainboard
Out of all the upgrades and tweaks on this guide, I think that this is the one that most people should go for first since it drastically improves the way the Ender 3 sounds, plus it’s simple and affordable to do.
2. Install Silent Fans

The Ender 3 uses a total of 4 fans to cool the different components that need to be cooled, and these are:
- The PSU (power supply unit) fan
- The mainboard fan
- The hot end fan
- The part cooling fan
By far, the loudest out of all these fans are the hot end fan and the part cooling fan, although the Mainboard one also seems to be running 100% of the time and it’s definitely noticeable.
The power supply unit fan, although it is very loud, doesn’t run 100% of the time but rather only when needed, plus you can print a cover for it (more on that in a second) that will redirect the sound backwards. Still, it could be worth while upgrading it if you’re dead set on making your Ender 3 as quiet as possible as long as you know what you’re doing and take the necessary precautions.
The PSU fan is especially worth upgrading if the one needed is 12V instead of 24V, which is normally not the case but most newer Ender 3 Pro’s come with a 12V fan, making it really simple to upgrade since you don’t need a buck converter/step-down converter.
However, there are a couple of things to note here:
- The Ender 3, Pro, and V2 generally run on 24V and their fans do as well (open up the PSU to make certain since a couple Ender 3’s run on 12V). You would need to get 24V fans or ones that use a lower voltage and then use a buck converter to lower the voltage to those fans.
- The PSU fan should only be changed if you know what you’re doing since even if the machine is unplugged, the capacitors can still hold enough current to theoretically kill you.
Let’s take a quick look at each of the different fans:
Hot End and Part cooling fans

The hot end fan is the one that gets replaced the most since it’s working non-stop to keep the hot end cool during the entirety of the printing process, which is also why it might be the first one you choose to replace since it produces the most amount of sound.
The stock Ender 3 hot end fan is a 40x10mm fan and you have two options here; replace it with another 40x10mm fan and insert it into the same stock fan shroud, or purchase a bigger and more powerful one and use a different installation method, such as printing a different fan duct design made specifically for a larger fan, such as this one.
The part cooling fan is also 40x10mm but you can’t simply install a regular 40×10 fan since it needs to be directing the airflow towards the nozzle. Therefore, if you want to replace this one, you’ll probably need to print a new fan duct.
Most people gravitate towards the Noctua fans, which are generally used in PC’s since they provide good airflow and are whisper quiet.
However, some argue that they don’t provide enough airflow to keep the hot end cool during long prints, at least the 40x10mm fans, which can cause heat creep, which is especially common when printing PLA, and this can cause the nozzle to clog up, under extrusion, and other issues.
Not only that, but Noctua fans are 12V, and some of them even 5V, which means that you’ll need to use buck converters to lower the voltage to get them to work properly and to not get damaged.
One way to solve the heat creep issue is by installing a different hot end, such as the V6 hot end that’s being used on the Prusa MK3S printers, since its heat sink is much better at dissipating heat, negating the need for a larger, more powerful fan, and this means that you can use the 40x10mm Noctua fan safely.
If you decide to go with the Noctua fans, then I’d recommend getting the 40x20mm ones and to print a new fan duct that works well with them since the 40x10mm fans may not have enough cooling power to keep the hot end cool during long prints.
If you don’t want to go through the hassle of installing the buck converters to lower the voltage, then these 24V TH3D 40x10mm fans might fit your needs a little better.
Recommended Hot End and Part Cooling Fans:
- Noctua Fans: 12V, require Buck Converters. Quietest fans out there.
- TH3D Fans: 24V. Not as quiet as Noctua but better airflow for same size fans.
PSU and Mainboard Fans

Like I previously mentioned, the PSU fan should only be replaced if you know what you’re doing since it could be dangerous, plus it’s not running non-stop like the hot end fan so it’s not really making as much noise as you may think.
The Mainboard fan, on the other hand, seems to be running 100% and is quite loud. Luckily, it can easily be replaced by any 40x10mm fan.
As far as the dimensions for the PSU fan go, it’s 60x10mm or 60x15mm, both should fit.
For the Mainboard fans I’d recommend going with either a Noctua 40x10mm, or with the same TH3D fan I previously linked.
As far as the PSU fan goes, there are no Noctua fans of the 60x15mm size, which means that you would have to go with a more generic fan, such as this one which you can find on amazon for well under $15, and the good news is that it’s a 24V fan, meaning that no buck converters will be needed in most cases.

My Ender 3 Pro came with the Mean Well PSU and the fan is 12V, which means that I could install a Noctua fan (which would require me to make some modifications to the PSU, such as printing a new cover, to properly fit the fan), but no buck converters would be needed in this case.
Most Ender 3’s, however, require a 24V fan for the PSU, so either get one of those or install a buck converter and run a 12V fan.
What Buck Converters to use for 12V fans?

There are dozens of different buck converters available, and luckily, they are all pretty darn cheap. However, some come with voltage indicators, usually the more expensive ones, while some others don’t.
If you have a multimeter that you can use to measure the voltage coming out of the converter, then get the cheaper ones that don’t have a screen.
However, if you don’t have a multimeter and don’t want to spend $30+ on one, get these buck converters that come with a display that indicates how much voltage they are outputting and an on/off switch.
3. Use an Enclosure

Enclosures are mainly designed to keep the hot air that the printer generates within a confined space so that filaments, such as ABS, don’t cool down too fast and contract causing them to warp, or even worse, detach from the build plate.
There are many ways of enclosing a printer since you can make your own or buy one. I’d generally recommend making one if you’re the handy kind of person, but it’s going to be a lot of work and probably also more expensive than purchasing one.
You could purchase the Creality Flame resistant enclosure from Amazon for under $40, and this will allow you to print with ABS, protect your house in case the printer catches on fire, and also keep the noise down.
Of course, getting a glass enclosure or making your own out of a rigid material will provide you with a better sound insulation, but the Creality one already does help with noise reduction quite a bit. Add to this the silent mainboard and some silent fans and you won’t even notice that the printer is running in the same room that you are in.
Printable Improvements
While getting the 32-bit mainboard with the silent drivers and also changing out the fans is what will yield the overall best results, there are some additional printable upgrades you can use to further reduce the noise of your Ender 3.
Here are the ones I like the best:
4. Vibration Damping Feet

You can print these damping feet out of almost any filament, even though I’d highly recommend doing so with a semi-flexible material, such as TPU with a shore hardness of 98a (most common TPU), which is also a filament type that the Ender 3 can print without any issues in its stock form.
These damping feet will keep the vibrations generated by the printer from being spread to the table that it’s sitting on, which generally amplifies those vibrations in the form of sound, and these work quite well even if made out of PLA, so give them a shot!
If you want to print really flexible filaments, such as NinjaFlex, and create damping feet using that, then make sure to check out my full guide on how to print flexible filaments on the Ender 3, since you will need to mod it slightly.
Note: The benefit of printing the Ninjaflex Damping feet is that they snap right into the extrusions of the Ender 3 and you don’t need to remove the rubber feet that are already installed on it.
Download links here:
- Ender 3 Damping Feet.
- Ender 3 Feet (Better with NinjaFlex filament).
5. Power Supply (PSU) fan cover

The power supply fan is really the only one you can cover slightly and it will redirect the noise towards the back making it less audible to you. If you have the Ender 3, not the Pro or V2, you can also print a fan cover for the mainboard fan since it’s facing upwards, which will not only redirect the noise, but also keep debris from getting caught in the fan.
These fan covers don’t make as much of a difference as any of the previous upgrades, be it printable or for purchase, but it’s the small things that, when combined, make a larger difference in the end.
Here are the ones I recommend:
Honorable Mentions
Everything that I’m about to list here works well. However, there are better solutions to the problem which I already mentioned previously, but you may want to consider these depending on your situation.
6. Stepper Motor Dampers (only for mainboards without silent drivers)

Stepper Motor movement can generate a lot of noise, especially on the Ender 3 and Ender 3 Pro stock versions since these come with the 8-bit motherboard that doesn’t feature the silent drivers.
This means that whenever the stepper motors move, they generate a very annoying high-pitch sound.
Luckily, you can get these stepper motor dampers to help you significantly reduce the noise the motors make, and even though installing them takes about 30 minutes, it’s well worth it.
Important Note: If you upgraded to the 32-bit mainboard with the silent drivers, then installing stepper motor dampers will do nothing for you since the movements of the motors are virtually silent. This is why I’d recommend going with the new mainboard over installing the stepper motor dampers since it resolves the noise issue, plus it comes with thermal runway protection, simpler BLTouch installation, and more.
Recommended Stepper Motor Dampers:
7. TL Smoothers (only for mainboards without silent drivers)

TL Smoothers go between the stepper motors and the stepper drivers, and are another way of minimizing the noise that the stepper motors make when moving, plus they have the added benefit of helping you reduce salmon skin effects on your prints.
The way a TL smoother works is by stopping any current from flowing beneath a certain threshold, and in some drivers and some circuit boards, when one coil in the stepper motor receives the max voltage and another one receives the minimum, that coil that is receiving the minimum voltage will start to receive very low voltage spikes which will end up affecting the stepper motor’s movement, creating that salmon skin effect on your prints.
To install the TL Smoothers simply disconnect the X and Y axis cables, connect each of them into the TL Smoothers, and connect the other end of the TL Smoother to the circuit board (where the X and Y Axis were previously connected).
Important Note: Just like with the stepper motor dampers, these TL Smoothers should only be installed on printers that don’t feature the V4.2.2. and V4.2.7. silent mainboards, and in all honesty, I would directly upgrade the board instead of installing these or the motor dampers.
Recommended TL Smoothers:
8. Place the Printer on top of anti-vibration pads

The vibration that the printer generates gets transferred to the desk that it’s sitting on, which then acts as a sort of amplifier and amplifies those vibrations as sound.
I already recommended that you print your own vibration damping feed, but you could also buy these cheap anti-vibration pads and place the printer right on top of it. The pads will absorb the vibration and keep it from being amplified by the desk.
The truth is that you could place the printer on top of any soft material, since these are the ones that absorb the most amount of vibration. Just be careful to not place the printer on top of anything flammable.
9. Place the printer on top of a large concrete slab

According to CNC Kitchen, the best way of completely absorbing the vibrations generated by your 3D printer before they reach the desk is by placing a large slab of concrete on top of some dampening foam.
Not only will this completely absorb the vibrations, but it will also improve print quality slightly since it provides the printer with a base that slightly moves with the print heat, and this can reduce ringing & ghosting effects.
If you don’t want to have to go through all the trial and error that we did in order to find the Ideal Settings for creating high-quality prints on your Ender 3, then definitely check out our own Cura Profiles tailored specifically for the Ender 3 Printer Series.
Conclusion
In my honest opinion, just change the mainboard and install silent fans. This should reduce the noise drastically.
However, getting an enclosure is also something that you may want to consider since it will not just help with noise reduction, but also with printing materials that are prone to warping, like ABS, ASA, sometimes even PETG, etc.
These three things will get you 95% to where you want to be, since all the other mods/upgrades won’t have anywhere as large of an impact.
I hope this information was helpful!
Check out our recommended products section

We created a recommended products section that will allow you to remove the guesswork and reduce the time spent researching what printer, filament, or upgrades to get, since we know that this can be a very daunting task and which generally leads to a lot of confusion.
We have selected just a handful of 3D printers that we consider to be good for beginners as well as intermediates, and even experts, making the decision easier, and the filaments, as well as the upgrades listed, were all tested by us and carefully selected, so you know that whichever one you choose will work as intended.
Error processing API data.