In 3D printing each new layer needs something underneath to stick to, it may be either the bed or a previous layer. Generally, it would be best to design a part to account for that limitation but there are supports when it isn’t possible.
Supports are usually avoided because they use up more material, lengthen your print time, and can be difficult to remove. But there are some situations where supports are unavoidable or that they improve the final print quality. With a well-tuned slicer profile, the results can be stunning and with little post-processing effort.
I will go into much further detail, but if you are in a hurry, these are good support settings to get you started on an Ender 3 Pro/v2: set the support structure to “Normal“, support placement to “Touching Buildplate”, Overhang Angle between 45º-60º, Support Density to 20%, Support Z Distance to 0.2mm, and Support X/Y Distance to 0.6mm.
In the next sections, I’ll go through each one of these and discuss in detail what they are good for, and the heuristics you can use to change them. Additionally, I’ll also go through a few extra settings that should not be left unmodified.
If you don’t want to have to go through all the trial and error that we did in order to find the Ideal Settings for creating high-quality prints on your Ender 3, then definitely check out our own Cura Profiles tailored specifically for the Ender 3 Printer Series (You can get all of them for just $7).
What are supports and why do we use them?
Supports are printed structures that are not part of the 3D model, made to prevent printing in midair. Supports can either be generated automatically by the slicer or modeled beforehand when designing the piece. These structures must then be removed from the part in post-processing. Printers with dual extruders can print water or solvent-soluble supports but those have a different set of rules and settings that won’t be discussed in this article.
Different types of supports (Normal or Tree)
Automatically generated supports can be either simple structures made from lines or a grid or more complex structures with tree-like branches. The decision to choose one over the other isn’t always clear but for flat or boxy models normal supports should work well and for more organic figures tree supports will leave a better surface after being removed. Both depend heavily on how they are configured but basically, normal support structures can usually be crushed or pried out and Tree supports tend to be more solid. Tree supports will make your slicing time noticeably longer, so you’ll have to be patient with larger models.
Different support patterns
Slicers have a lot of different support patterns for normal supports, but it boils down to only two categories: strong or flimsy. Interlaced structures like the grid pattern are strong and come off in one piece once the print is finished or sometimes, they don’t come off at all because they weren’t set correctly. On the other hand, flimsy structures like lines, zigzags or concentric patterns can be crushed away. Cleanup is messier but they always come out one way or another. Neither is better for every model, and it is mostly a matter of taste and the tools available.
The most sensible first guess would be to use flimsy structures because they print faster and use less material. Nevertheless, if the structure is too flimsy, it will fail and ruin your print. There are other settings to make your support more robust. Try enabling support brim or increasing Support Wall Line Count to 1.
What is the “Support Placement”
The “Support placement” setting lets you decide if the supports will be placed everywhere or just the ones touching the buildplate. When you select “everywhere”, automatic supports can start on the model that is being printed. This means that when you remove the supports you will have an extra surface to clean.
If you don’t want supports to start on the model you can select “touching buildplate” and the slicer will only generate supports where it has a free spot on the buidplate right below. This is better for cleanup, but it may leave parts unsupported that will fail to print correctly. The last option is to switch to “tree supports” that will only start on the buildplate but will extend branches to everywhere it needs to.
Support Density
Support density refers to the number of lines that it will print to make up the support structure as it does with infill. Too dense and the supports will be more difficult to remove, use more material and print for longer. Too sparse and the object might not be well supported or even supported at all. A good place to start is 20%. It is necessary to check on the “layers view” to see the supports generated. With this view you’ll be able to have a clear idea of how the print will turn out and how difficult the cleanup will be afterwards.
What are Overhangs and Bridges and how do they limit the print?
When the printer tries to print features that are cantilevered what happens plastic is extruded in midair, and it tends to curl back or sag. These features are called overhangs and can be printed up to a point with the correct extrusion rate and cooling.
A bridge is a feature of the 3D model as well and it also involves printing in midair. This time there is another anchor point in a straight line where the print move ends. If the anchor points are close enough and there is sufficient cooling, the plastic strand stays almost horizontally. There is always some sag but in many cases, it may be fine.
Print an overhang & bridging test
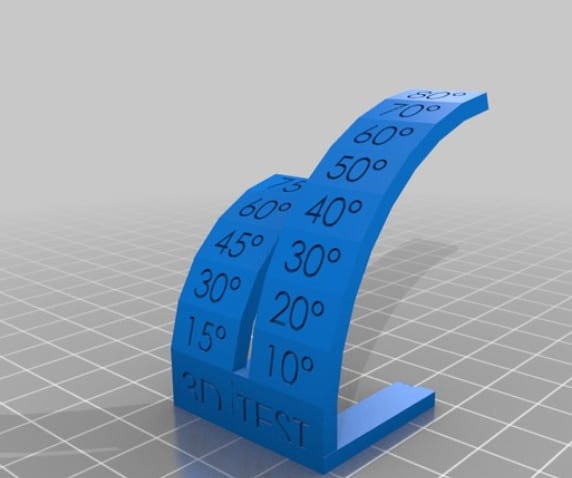
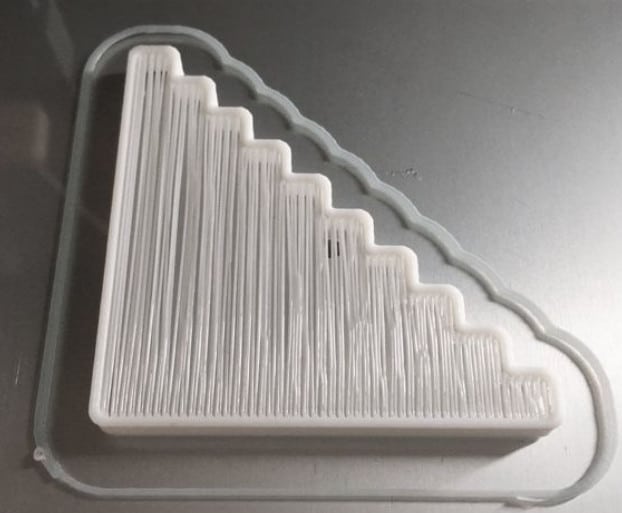
To know your printer’s overhang and bridging capabilities there are models designed to test them. The vast community has made lots of tests but here you’ll find two simple models that are a good start.
What you find out with the tests usually can be improved by tuning your slicing profile.
Overhang angle, bridges & how to improve them
Most printers can get away with 45º angle overhangs, Ender 3 can go up to 60º with the right settings. The success of a bridge depends on how much sag you are willing to accept. Up to 5 mm you will probably be successful. More than that you should consider taking the time to tune your printer or use supports. It is possible to make 150 mm bridges with some filaments.
Better cooling can result in better overhangs and bridges, check that you’ve cranked the fan to 100% to get the best results in PLA and PETG. For other polymers such as ABS this can result in delamination so be careful.
Reducing the printing temperature up to 5 or 10 ºC can also help with overhangs and bridges but layer adhesion will be affected too. If you need strong parts, try not to lower extrusion temperature too much.
Lastly, there’s the extrusion rate. With slight underextrusion, bridges and overhangs will have better quality but as with extrusion temperature layer adhesion will be affected too and you may start to see parts that are missing plastic. You can play with flow rate in the slicer lowering it by 1 to 5% each time and see the results.
What is the Support Z Distance & X/Y Distance?
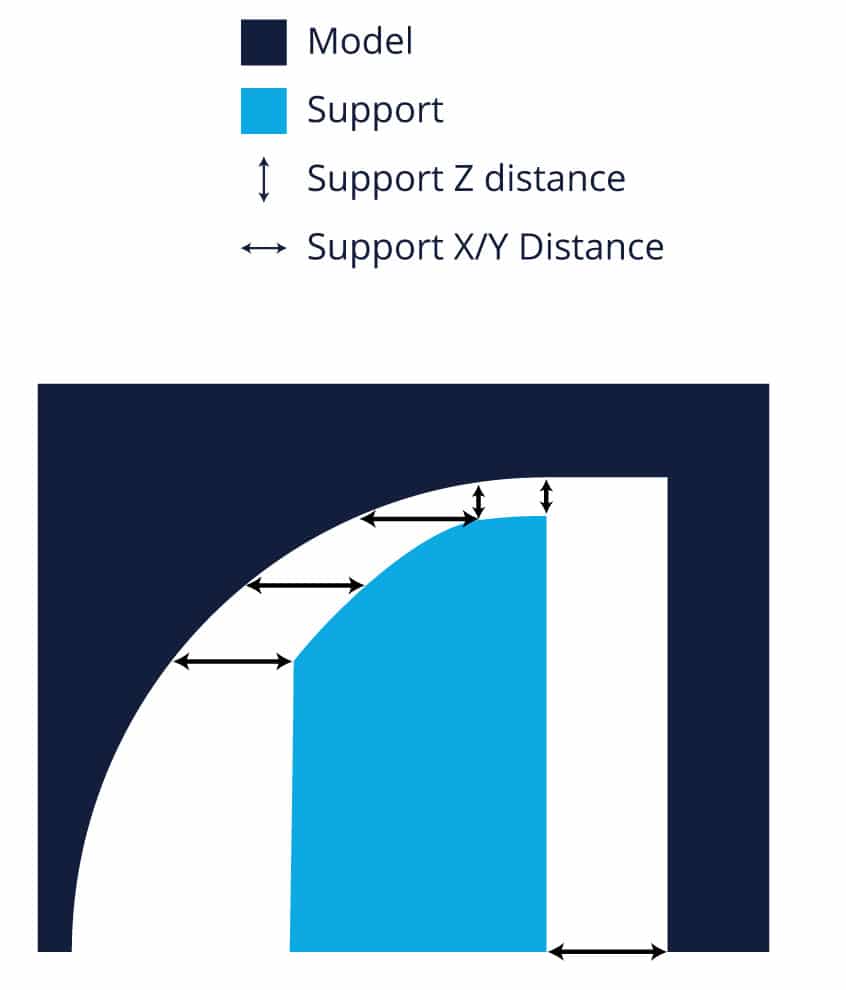
After the support structure is printed the machine needs to leave a gap before printing another layer so it doesn’t stick too well. This makes the removal process easier but leaves some roughness in the contact surface. This gap is called Z distance and it is recommended that is measures at least a layer or two. 0.2 mm is usually the standard but if your layer height is a lot smaller or higher you should change it. The bigger the gap the easier it is to remove but also poorer is the contact surface.
X/Y distance on the other hand isn’t as sensitive. It’s the clearance the slicer leaves in the X and Y direction so that the supports aren’t touching the model. A 0.6 mm or 0.7 mm value should be ok. If you are having problems detaching the supports, you can make them bigger.
When do you need supports? (45° & 5mm rules)
There are two rules for overhangs and bridges that are usually is considered to design parts for 3D printing and when slicing.
- If the overhang angle is over 45º they will probably need supports.
- If a bridge is larger than 5 mm it will probably need support.
How to access the support settings in Cura
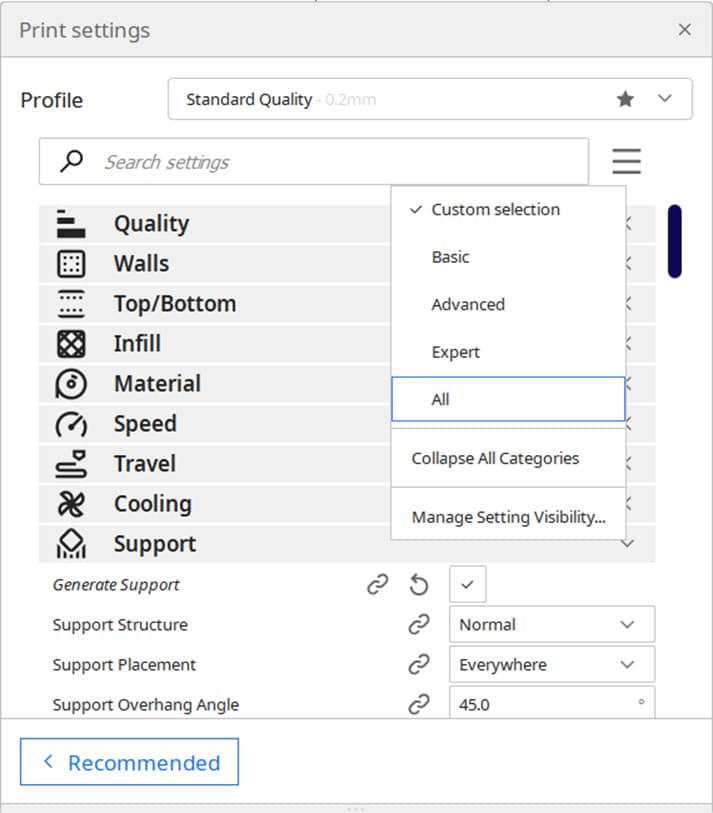
To access the support settings, you must click con the hamburger icon. All the settings from this article should be available when selecting “Advanced” on the dropdown menu except for tree supports that can be found under “Experimental” with “expert” selected.
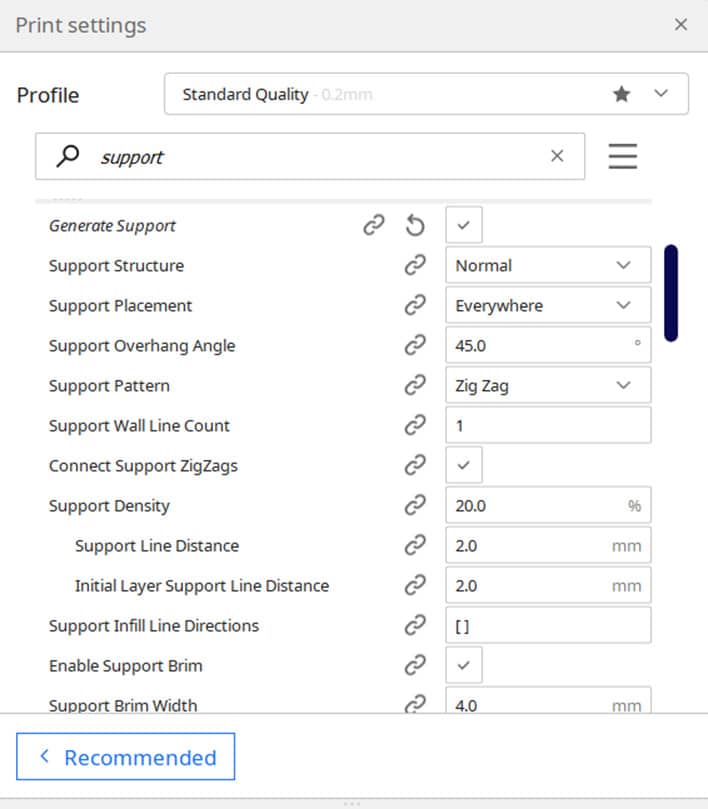
Ideal support setting for the Ender 3
- Support Structure: Normal
- Support Placement: “Touching buildplate”
- Support Overhang Angle: 45º – 60º
- Support Pattern: Zig Zag
- Support Density: 20%
- Support Z Distance: 0.2 mm
- Support X/Y Distance: 0.6 mm
- Enable support roof
- Enable support brim
If you don’t want to have to go through all the trial and error that we did in order to find the Ideal Settings for creating high-quality prints on your Ender 3, then definitely check out our own Cura Profiles tailored specifically for the Ender 3 Printer Series (You can get all of them for just $7).
Conclusion
Tuning supports correctly can make the 3D printing experience a lot easier. With the 45º and the 5 mm rule and just a few settings you should be good to go.
Remember to use the layer mode on the slicer to check on supports!
Check out our recommended products section
We created a recommended products section that will allow you to remove the guesswork and reduce the time spent researching what printer, filament, or upgrades to get, since we know that this can be a very daunting task and which generally leads to a lot of confusion.
We have selected just a handful of 3D printers that we consider to be good for beginners as well as intermediates, and even experts, making the decision easier, and the filaments, as well as the upgrades listed, were all tested by us and carefully selected, so you know that whichever one you choose will work as intended.
Error processing API data.
