If you’ve already read a few posts related to 3D printing and dabbled a little in the details of the process, you sure are aware of the existence of heated beds. This component heats the surface of a 3D printers buildplate, which has many advantages. You may also know that you can change the temperature of the heated bed, and that different filaments require different settings.
So, what is the optimal temperature of a heated bed for printing with PLA and ABS?
The optimal bed temperature for printing is 60°C for PLA and 100°C to 110°C for ABS, since these settings vastly improve first layer adhesion, which in turn leads to a greater success rate of a 3D printer. In the case of ABS, a heated bed is necessary to preserve the object’s temperature while it is being printed since it can shrink by up to 8%.
Lower temperatures reduce the benefits of the heated bed, while higher ones lead to other common issues like “elephants foot“.
Why and when is a heated bed important

3d printers are (almost) everything about temperature: for starters, you’ll need temperature for melting the filament that will form the object. The specific part in charge of that is called a hot-end, and it’s one of the extruder’s components.
A good temperature setting can be the difference between your best 3d printed object ever and a train wreck. We’ll discuss the importance of the hot end temperature settings on another occasion.
So, let’s move on to another 3d printing component where the temperature is also essential: the heated bed!
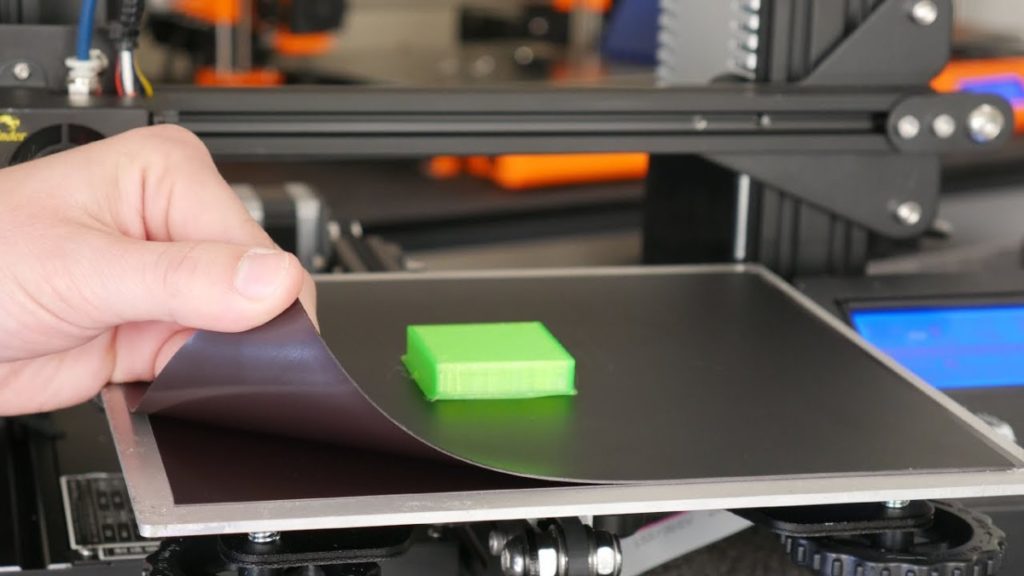
Your object will be printed on a flat surface called “bed”, by placing hot plastic layers one by one, each one on top of the previous. Due to materials’ different responses to temperature changes, poor adherence to the surface, and or shrinkage during cooldown, this process can oftentimes fail, setting the object loose from the surface, and ruining your print.
You may notice that this is, for lack of a better word, suboptimal! To prevent this from happening, a heating component can be installed under the bed. If you are lucky, your printer may already have it!
This heating mechanism improves the adhesion of the first layer and reduces the shrinkage of the thermoplastic due to its normal reaction to cooling down.
For simplicity’s sake, we’ll call this mysterious component “heated bed” from now on. Now that you not only know the name of the component but also have it installed on your printer, you should probably know what the optimal temperature for each filament type is.
Let’s talk first about PLA, since it is nowadays the most common, popular and easy-to-use thermoplastic. If you’re a beginner, you really should start here, learning the basics of 3d printing as you waste cheaper materials during your tests.
PLA is a great material for any piece that doesn’t need to meet specific requirements. A PLA printed object can withstand up to 60ºC before getting limp (a.k.a “glass transition temperature“), so it is mainly used to print decorative objects, comic book miniatures, LED lamps, electronic cases, and general-purpose supports.
It can be sanded and painted with common acrylic or synthetic paint. And above all this, PLA is by far the easiest 3d printing material to work with and print. With a little research and some practice, you can dominate this plastic and print some really decent objects.
Ideal bed temperature for PLA
As I mentioned before, some 3d printers don’t have a heated bed. This does not mean that they are useless, but rather that there are materials that can be used without heating the print surface.
PLA is one of these materials, as it doesn’t shrink too much when cooling down. Nonetheless, printing on a cold surface may also lead to other issues that the heating process frequently solves.
For example, proper bed leveling is more important when using a cold bed. If a sharp edge of your object is not firmly adhered to the bed, sooner or later it will start warping and may detach the entire print. The nozzle passes over that edge several times and accelerates this problem.
Ok, now we’ll assume you have a correctly leveled, firm, and steady heating bed. I can’t tell you a magic number that works with every PLA filament brand, but you’ll get the best results by setting your bed temperature at around 60ºC.
Some brands may require more or less temperature, but going further than 70ºC will probably lead to another problem known as “elephant’s foot”. When the bed temperature is set too high, the first layers start melting, and the weight of the piece pushes them down. The final object will be thicker on its base and lower than it should be. If you detect this, set a lower bed temperature.
On the other hand, avoid setting the bed temperature under 50ºC, as it won’t improve bed adhesion in any notable way.
Larger 3d printers have a bigger printing surface that constantly exchanges heat with the room’s air. This will cool down the bed, so you should probably increase this value when using large printers.
External factors that can affect the printing quality
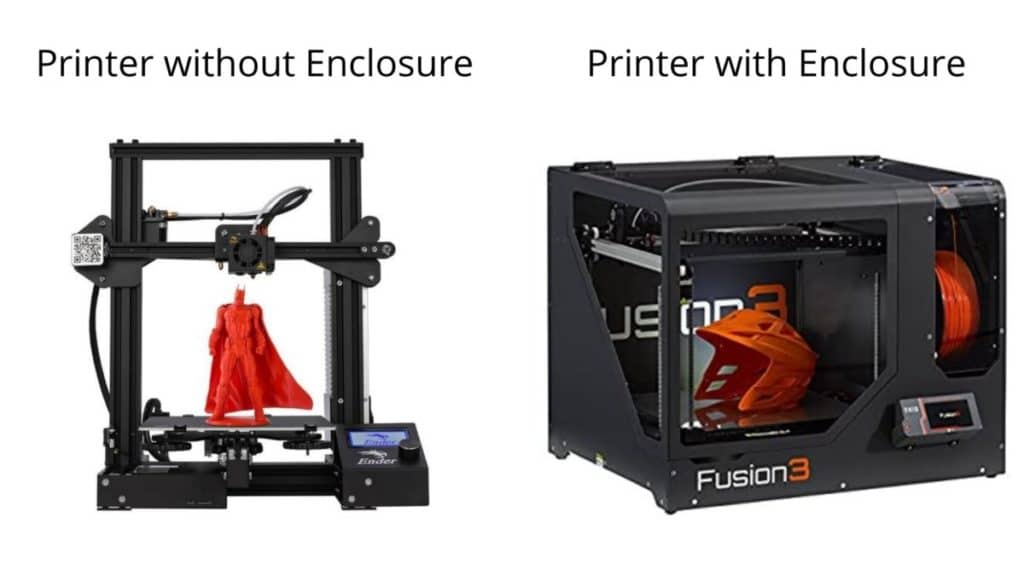
Most 3d printers are of the Cartesian type, and they are often sold without an enclosure. The Prusa I3, Ender 3, or CR-10 are popular examples of this type of printer. Having no enclosure leaves the printing process open to external effects.
So, when it comes down to setting up your work space, pay special attention to the location of your 3d printer. It should not only be distant from doors or windows, but you should also avoid placing it in the mid of the airflow between your room openings. When you open a window or a door, a breeze may form and take the heat away from your printing bed, suddenly reducing layer and/or bed adhesion.
One of the deadliest enemies of your printer is the AC system. If you can’t avoid having both in the same room, put your printer away from the cold wind of the AC, or directly beneath it. If you are still facing layer adhesion issues, experiment printing a few objects with your AC turned off to check if it has an effect on your success rate.
Another factor to consider is humidity: a moist filament gets brittle and may turn prone to failure or even useless. Leaving your spools in contact with the air in your room is not recommended, especially in humid climates. I always try to keep my spools inside a large plastic box, with some silica gel bags to keep the plastic dry.
Is a 3D printing enclosure required for PLA?

The short answer is NO, But let’s dig in a little deeper!.
It is true that the definitive solution for eliminating unwanted external effects is to enclose your printer.
Among the many advantages of using an enclosure, we find that it maintains the working temperature throughout the printing by keeping most of the heat inside. This reduces sudden changes in temperature during the entire print and maintains the printing conditions very stable and predictable.
Some 3d printers already have an enclosure, but you can also buy a standard enclosure that fits most of the top-selling machines. They are very affordable and can be removed in case do not want to use them*.
Another option is to build your own enclosure. Basically, any box can be used for this purpose! Just be sure that the temperature inside your enclosure doesn’t rise too much, as it may start a fire.
Although I’ve seen cardboard boxes being refurbished for this purpose, I certainly can’t recommend them for obvious reasons. In case the reason is not as obvious as I think, here it goes: surrounding a heating machine with a very flammable object is a clear fire hazard!
Additional fire protection for your room may be required when you save money by using cheap materials. Regardless of this fact, it is always a good idea to have a fire extinguisher nearby and ready to go.
There are some great DIY ideas on www.instructables.com! Take a look at them and browse a little bit before spending your hard-earned money on a standard enclosure.
Anyway, the use of an enclosure when printing PLA is not necessary if you place your printer in a dry, warm room.
This thermoplastic does not shrink a lot when cooling down, especially when using a heated bed, so you won’t have serious problems if you correctly leveled your bed.
I don’t recommend you expending money on an enclosure unless you live in really cold areas and no other solution can be applied. Most people nowadays use PLA as their only printing material, so they can solve most printing issues by properly calibrating their machines and getting the correct temperature settings.
If you want to learn more about different materials and expand your horizons, a logical next step is using ABS, a more demanding plastic.
Ideal bed temperature for ABS
ABS (Acrylonitrile Butadiene Styrene) was the main 3d printing material before the introduction of PLA. It has some really great properties that PLA does not, which makes this thermoplastic a popular choice for lots of makers.
In contrast to PLA, ABS can shrink up to 8% when cooled down. This makes it nearly impossible to print without a heated bed and an enclosure. Preserving the temperature of the object while printing is a necessity! As a rule of thumb, set your bed temperature to 100°C.
As a side note, in contrast to printing with PLA, you should turn off the cooling fans when printing with ABS.
Why should you print with ABS instead of PLA?
Having stated the difficulties of printing with ABS, it may seem like a no brainer that you should avoid ABS and always go for PLA. I’ll try to be fair and give a few reasons why ABS is still a popular choice even today.
The price of a spool of ABS is almost always cheaper than a spool of PLA. It’s also a tough thermoplastic that keeps its tenacity even at low temperatures.
ABS can withstand higher temperatures before losing its shape (glass transition temperature) and has a higher resistance to impact, making it the clear go-to choice for printing mechanisms, pieces exposed to direct sunlight, or objects that will be inside of a car. Outdoor objects are also usually made of ABS instead of PLA.
It also offers unique and practical post-processing techniques that you can’t apply to PLA prints. Acetone can be used to smoothen the surface of an ABS object. Besides, you can sand and paint ABS the same way you would do with PLA.
Settings for printing with ABS
According to my experience, I obtain the best results using the settings listed below. Keep in mind that you’ll probably have to slightly change them depending on your filament brand and 3D printer.
- Extruder temperature: from 230 to 245ºC, depending on the filament color and/or brand.
- Speed: 40/50 mm/s.
- Retraction: same settings as for PLA (6.5mm).
- Cooling fan OFF during the entire print.
- Bed temperature: 100ºC.
- 3mm brim around the object.
- Use a raft if the objects are too pointy or small.
Should you use an enclosed Printer or build an enclosure to print with ABS?
Many people (especially old-school makers) will tell you that you don’t need an enclosure and that they have been printing with ABS for years with a Prusa Mendel clone and never gotten a failure due to warping. In my opinion, some things were created for making our printing experience easier.
You may become the best ABS printer by dominating every setting, but that requires a lot of time, effort, and wasted material. Or, you could simply buy an enclosed printer (or enclose your machine) and get the same results just by adjusting a few details.
The way I phrased the above paragraph clearly shows a bias towards having an enclosure, and for good reason: why would you expose yourself to unnecessary difficulties? Your printer should be an end to your means and not otherwise!
So, if you want to print using ABS, do yourself a favor and enclose your printer. No breeze, door, air current, or AC will be strong enough to affect your print.
Enclosures keep all the heat inside, maintaining the working temperature throughout the object. By minimizing the heat loss, an enclosed printer will also need less electric power to reach the working temperature you set. ABS needs more stable conditions than PLA, so it’s really worth buying/making an enclosure.
Check out our recommended products section

We created a recommended products section that will allow you to remove the guesswork and reduce the time spent researching what printer, filament, or upgrades to get, since we know that this can be a very daunting task and which generally leads to a lot of confusion.
We have selected just a handful of 3D printers that we consider to be good for beginners as well as intermediates, and even experts, making the decision easier, and the filaments, as well as the upgrades listed, were all tested by us and carefully selected, so you know that whichever one you choose will work as intended.
Error processing API data.
