In this article, I will be going over what glass transition is, the temperatures at which the most common filament types reach that glass transition state as well as their melting temperatures, which are definitely not the same, how to achieve a higher glass transition temperature on 3D printed models that were printed with a filament that has a low glass transition temperature (such as PLA), and a lot more!
So, without any further ado, let’s get straight into it!
- What is glass transition temperature?
- Glass transition- and melting temperatures of 3D Filaments
- Difference between Glass Transition- and Melting Temperature of a filament?
- What does a higher glass transition temperature mean?
- What happens to filament when it is above its glass transition temperature?
- When is a higher glass transition temperature important?
- Will PLA melt in a car?
- Is it possible to improve the glass transition temperature of a PLA part?
- Check out our recommended products section
What is glass transition temperature?
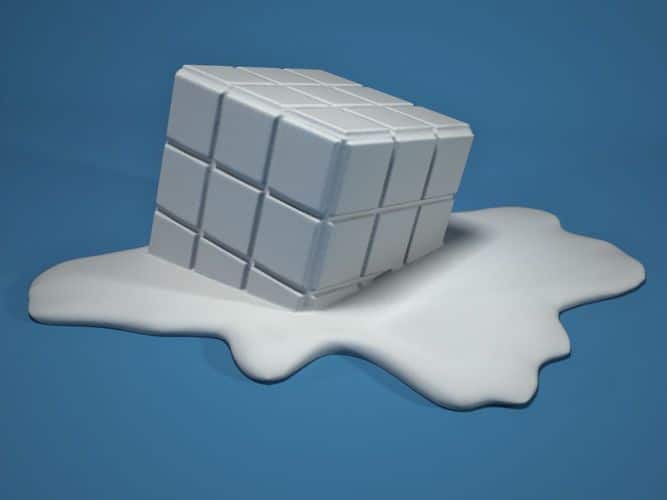
In chemistry, glass transition temperature (Tg) is the temperature at which a material undergoes a transition from a rigid, crystalline state into a glassy amorphous state. In other words, the glass transition temperature is the temperature at which a solid changes its physical properties from those of a hard, crystalline solid to those of an amorphous solid (rubbery state).
Glass transition temperature is the temperature by which molecular motion is essentially frozen. It’s a direct result of the strength of intermolecular attractive forces like Van der Waal’s forces.
Van der Waal’s forces are due to accumulating electrons in molecules. If there is too much heat energy, the attractive forces between molecules are destroyed and glass transition temperature occurs.
For those who don’t speak “Chemistry”: the glass transition temperature of a material is the temperature at which it changes from a hard, somewhat brittle solid to a material that’s softer and somewhat rubbery/gooey. I don’t mean ‘gooey’ in the sense of gum or syrup, just that you can squeeze but without cracking or breaking anything.
Glass transition- and melting temperatures of 3D Filaments
| Filament | Nozzle Temperature | Glass Transition Temp Tg (C) | Melting Temp Tm (C) | Heated Bed Temp | Warping Risk | Ease of Use | Cost |
| PLA | 180°C – 230°C | 60-65°C | 155°C | 60°C but not required) | Low | Easy | $10 – $25 |
| ABS | 230°C – 250°C | 105°C | Amorphous | Approx. 100°C | Moderate | Intermediate | $15 – $25 |
| PETG | 230°C – 250°C | 80-82°C | 210°C | Approx. 100°C | Low | Easy | $15 – $20 |
| Nylon | 230°C – 260°C | 70-80°C | 217°C | 80°C – 100°C | Moderate | Intermediate | $50 – $65 |
| ASA | 220°C – 250°C | 100°C | 250-260°C | Approx. 100°C | Low | Intermediate | $30 – $50 |
| Polycarbonate | 270°C – 310°C | 147°C | 260°C | 90°C – 110°C | High | Difficult | $30 – $60 |
| HIPS | 230°C – 250°C | 88-92°C | 180 – 270°C | Approx. 100°C | Low | Intermediate | $20 – $60 |
| TPE | 210°C – 230°C | 60-130°C | 150–210°C | Not required | Low | Easy | $80 – $100 |
Difference between Glass Transition- and Melting Temperature of a filament?

Curiously, Glass Transition Temperature (Tg) and Melting Temperature (Tm) are closely related physical properties but they are not the same thing at all, though both deal with a change in state, the two terms represent rather different things.
Glass Transition, a phenomenon related to viscosity, is not necessarily the crossover point between solid and liquid; it is the crossover point between a rigid solid and a rubbery solid. Scientifically speaking, here is how they differ: Melting temperature is the temperature at which a solid begins to melt into a liquid, while the Glass Transition temperature represents the point at which a solid becomes rubbery but not liquid.
To understand this, let’s imagine you’re making a pizza; When the cheese slices are taken out of the freezer, they are hard but after a few minutes at room temperature they become soft and rubbery. This could be considered the Glass Transition Temperature (Tg) of the cheese.
When you spread the cheese over the pizza and bake it in the oven, it melts, and this would be considered the Melting Temperature (Tm) of the cheese i.e., the temperature at which it melts from a rubbery solid into a gooey viscous liquid.
What does a higher glass transition temperature mean?
A higher glass transition temperature (Tg) means a material takes longer to turn from a solid into a soft material when you heat it up. For example, if you apply heat to something with a Tg of 200 C, it will become soft at 200 C.
A material with a Tg of 390 C becomes soft at 390 C. By soft, I mean it loses its tensile strength, stiffness, and rigidity. The object may even deform under its own weight if subjected to a temperature that is higher than its glass transition temperature Tg.
What happens to filament when it is above its glass transition temperature?
A filament that is above its glass transition temperature (Tg) is in a thermodynamically unstable glassy state and it will exhibit all the properties of a liquid.
You can refer back to the table I mentioned earlier about the Glass Transition temperature of your specific filament type, but I’d always advise you to check the specifications of the filament you bought since the manufacturer will have more in-depth instructions on how to print with it.
Why is this relevant when setting the temperature of the heated bed?
There are two main issues that can arise which are related to the temperature of the extruded filament, or rather, the temperature of the bed and how fast/slow it is allowed to cool. These issues are; Warping and Elephant’s foot.
Warping

Warping’ is the tendency of a printed part to warp upwards during the printing process. The main reason for warping is that the bottom layers are printed onto a cold plate or build platform and as they cool, they contract more than the top layers.
Therefore, the top layers bend outwards as they cool creating an uneven strain on the part leading to warping.
To reduce the warping of a 3D print, manufacturers introduced heated beds on some of their 3D printers which can be used to avoid this rapid cooling of the bottom layers.
So, now the bottom layers will be printed on a heated bed (which is already heated to a specific temperature depending on what filament you’re using) and won’t contract more than the top layers as the print gradually cools. Hence, warping will be significantly reduced if not avoided entirely.
Now, this is how knowing the glass transition temperature of the filament plays a significant role; Prior to using the filament to 3D print an object, instead of heating the bed to a random temperature, if we set its temperature very close to the glass transition temperature of the filament, warping will be completely eliminated, and the printed part will also adhere better to the bed.
Just an additional tip, level the bed at the temperature that you’re going to print at, since this will yield the best results.
Elephant’s foot

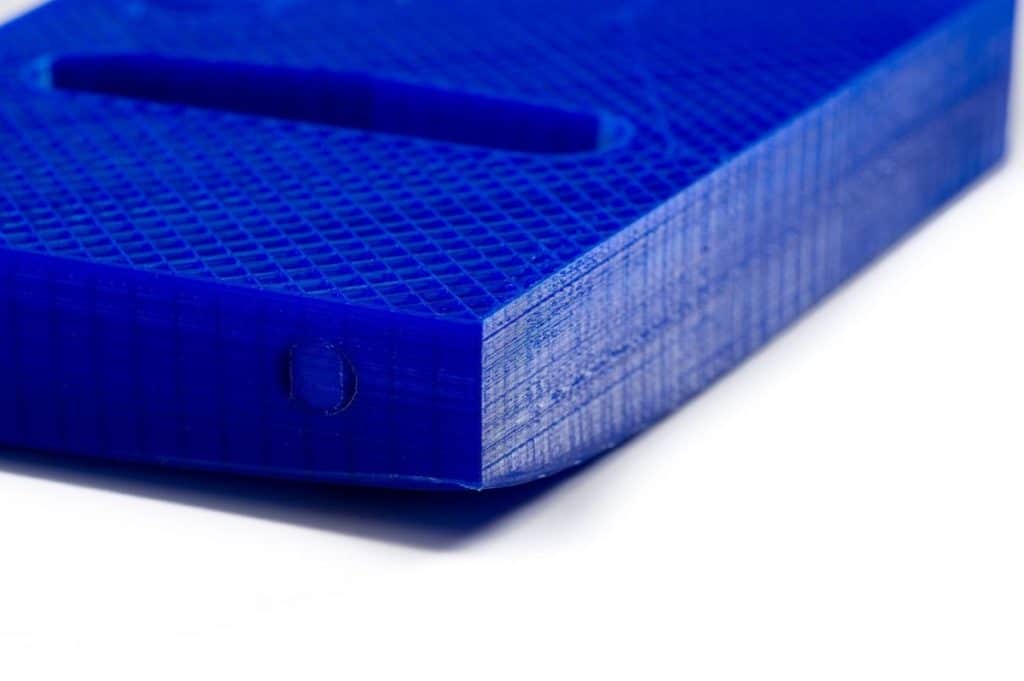
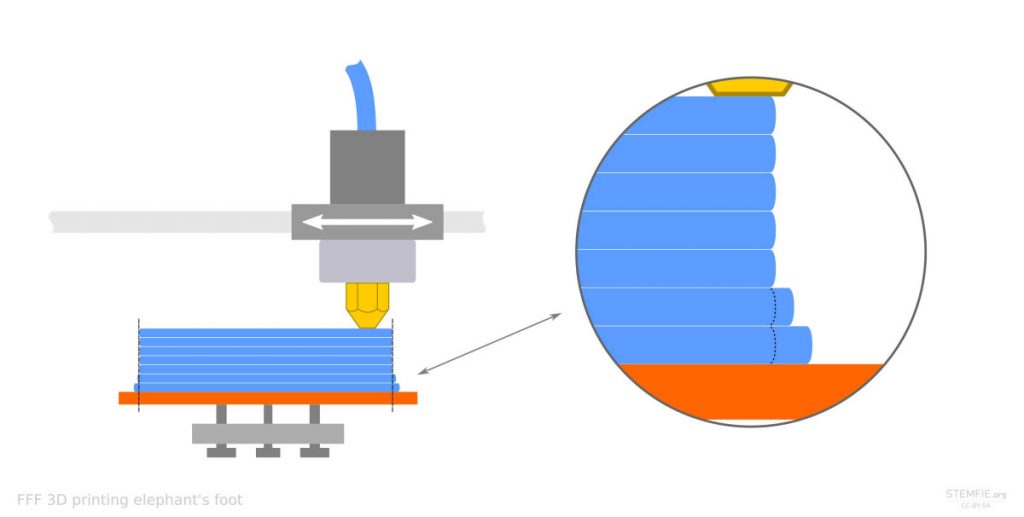
Elephant’s foot most often occurs as the result of an uncooled first layer. If the temperature of the print bed is too high, or if there is insufficient cooling, the first layer may not cool fast enough, causing elephant’s foot.
This issue tends to arise mostly in larger prints, as it is caused by the weight of the object pushing down on the first layer. If it is not cooled properly, this weight results in the bulging first layer.
Since the temperature of the bed is higher than the glass transition temperature of the filament, this causes the bottom to not cool properly and bulge outwards.
Hence, knowing the glass transition temperature of the filament and then setting the temperature of the bed slightly lower helps you eliminate the dreaded Elephants foot.
When is a higher glass transition temperature important?
The glass transition temperature can provide approximate estimates about the temperature at which a 3D printed part will transition directly from a solid ‘printed’ useful object to a soft ‘rubbery’ useless object which may even deform under its own weight.
This is why knowing the glass temperature of a specific filament will let you make a more informed decision on how to use the 3D printed part, since some plastics, like PLA, will start to deform fairly quickly if left out in the sun or in the car.
Filaments for outdoor use
If you are 3D printing an object for outdoor use, it might be more suitable to use a filament-like ABS because its glass transition temperature (105C) is much higher than the outdoor temperature even on a hot summer day, and like I just mentioned, PLA may deform if left outside in the heat.
There are lots of other filaments that can be used outdoors, like PETG, ASA, and others. However, I wrote an entire article on this subject, so make sure to check it out as well.
Uses that require material to Withstand high temperatures
If you are printing objects that will be exposed to high temperatures, then it is essential that you use a filament type that has a higher glass transition temperature, otherwise it will probably deform.
Let’s say, you have used PETG T (82C) to 3D print a part that will experience a high temperature of 85C-95C, it will surely fail and waste your effort.
PLA has a very low Glass Transition temperature, which is why I wouldn’t recommend using it for anything that would make the plastic get anywhere close to that heat level.
On the other hand, there are many filaments suitable to be used in high temperatures, such as ABS, Polycarbonate, ASA, etc. (again, refer back to the table at the beginning of the post).
Will PLA melt in a car?
PLA or polylactic acid is a thermoplastic that is derived from renewable sources such as corn and sugar cane. PLA is an all-around 3D printing material that has very good print quality with good layer adhesion and moderate strength, in fact, it’s one of my top recommendations for gears, second only to nylon.
You can even find soy-based and corn-based PLA filaments that are biodegradable!
However, PLA is highly unsuitable to be used to 3D print car parts, because its Tg is (60-65C) and on a hot sunny day, car parts printed from PLA will deform.
Of course, if you’re thinking about using PLA to print some replacement parts in the engine bay, forget about it!
This is why car parts are usually made out of ABS as it’s not only a tougher plastic but its Tg is also significantly higher i.e. 105C.
Is it possible to improve the glass transition temperature of a PLA part?
Yes, you can improve the glass transition temperature of your PLA prints by introducing additives, but you need to be aware of potential trade-offs in strength and infusibility.
PLA derivatives like TPLA or HTPLA offer the advantages of standard PLA but can be heat-treated after printing. This helps them maintain their form and stiffness at significantly higher temperatures when compared to standard PLA.
A higher glass transition temperature makes the part more rigid and tougher, and the best method to increase the glass transition temperature of the 3D objects printed from a standard PLA filament is by annealing them (heating them up to their glass transition temperature and below the melting point).
What are the advantages of annealing?
The thermal treatment of the 3D print is called “annealing”.
The common methods of annealing 3D printed objects are using an atmospheric furnace, an oven, and indirect heating sources.
This will reorganize the internal crystalline structure and cause bigger grains to form, which will result in much stronger objects that are less prone to layer separation, and tests have shown that annealing a 3D printed part can yield a 40% increase in strength and overall resistance.
The only downsides to this are that if done incorrectly, the model will end up warped and shrink in the X and Y directions while expanding in the Z direction.
Another important thing to consider before annealing your objects is that it requires the objects to be printed with 100% infill. I know it doesn’t sound ideal but annealing a print that has 20% or 30% infill will cause it to contract in unpredictable ways yielding, almost always, bad results.
During this process, it needs the infill to support it, otherwise it will deform if there are random or irregular empty spaces inside the object.
The most suitable, cheaper, and faster infill style for the annealing process is the line infill.
More resistant
3D printing is a cost-effective technique for fabricating complex parts and structures with intricate details. However, some 3D-printed objects do not have the same structural integrity that objects made with injection molding may have, especially under demanding conditions such as high strength.
Annealing is one way to improve the physical properties of 3D printed parts, making them more durable because the layers fuse together much more strongly.
It Increases the glass transition temperature
The annealing process also increases the temperature resistance of 3D-printed objects. The science behind this is quite simple, the standard 3D printed objects have an amorphous molecular structure that is random, they don’t have a melting point, instead, when heated, they gradually become softer until they melt completely into a liquid. During the annealing process, when we heat the 3D objects, their molecules rearrange themselves in a partially organized semi-crystalline structure.
This results in stronger intermolecular bonds and hence higher glass transition temperatures.
I performed an experiment to figure out what happens to the glass transition temperature of an object printed from a PLA filament (Tg 60C) once it’s annealed at 90C. My results showed that its glass transition temperature had increased to 110C.
This is almost a 100% increase and as a consequence eliminates one of the biggest challenges of 3D printing objects with standard PLA.
Easier postprocessing
FDM 3D printing produces a rough surface on the outside of the printed object. The model is not smooth and this means that it will be more difficult to process later on, for example painting or lacquering.
The annealing process can be used to smoothen the surfaces of prints, fill missing holes and produce a model with a professional appearance.
Therefore, annealing minimizes the time it takes to add the finishing touches to your new print and it also makes it stronger!
Check out our recommended products section

We created a recommended products section that will allow you to remove the guesswork and reduce the time spent researching what printer, filament, or upgrades to get, since we know that this can be a very daunting task and which generally leads to a lot of confusion.
We have selected just a handful of 3D printers that we consider to be good for beginners as well as intermediates, and even experts, making the decision easier, and the filaments, as well as the upgrades listed, were all tested by us and carefully selected, so you know that whichever one you choose will work as intended.
Error processing API data.
