If you own a 3d printer and have used it at least once in your lifetime, there is virtually no possibility that you are unaware of the existence of supports. Although they are a common feature in 3D printing, they are mostly parametrized in a suboptimal way. This article will show you how to improve the quality of supports but also reduce the necessity of adding them in the first place.
In order to achieve better results in 3d printing, supports should be added in cases where the overhang angle is greater than 45° or when the bridging distance between two structures exceeds 50mm. It should be noted that these values are understated in order to guarantee a successful print, but marginal improvements can be achieved by lowering the extrusion temperature to its viable minimum, improve layer cooling, and reducing movement speed. By doing so, angles of 60°-65° and bridges of up to 150mm can be achieved.
What are supports and when do we need them?
When we print using a 3d printer, we must know in detail the process that the machine follows to give the object its shape. Since the object is made of melted plastic that is superimposed layer by layer, the following question should always be asked:
What if the extruder deposits the filament at this specific point, but there is no material underneath?
As the 3d printer only limits itself to following the orders that the g-code file orders it, there is no way it can correct a situation like this. If the parameters are not correct, the machine will continue printing in the air, causing (most of the time) that the print is ruined and we lose time and material.
To solve that problem, supports are used. They are a vertical structure that supports the main piece, to prevent the filament from being extruded into the air. These supports are automatically placed by the slicer software using different parameters that you can modify to your liking. Alternatively, you can manually choose the location for each one of them.
The areas of an object that need supports can be overhangs or bridges. They have specific settings to choose from and modify to get the best finish.
When do we need supports?
When you start learning about 3d printing, you should always set the most conservative parameters. In this way, you make sure you can print the object without major inconveniences. Then, as you become more skilled and more experienced, you’ll be able to reduce the amount or density of supports used.
We must remember that each printer is different, and what works for some may not work for others. Generally, the limits imposed for overhangs are measured by angles (degrees) and in distance (millimeters) for bridges.
What are overhangs and bridges?
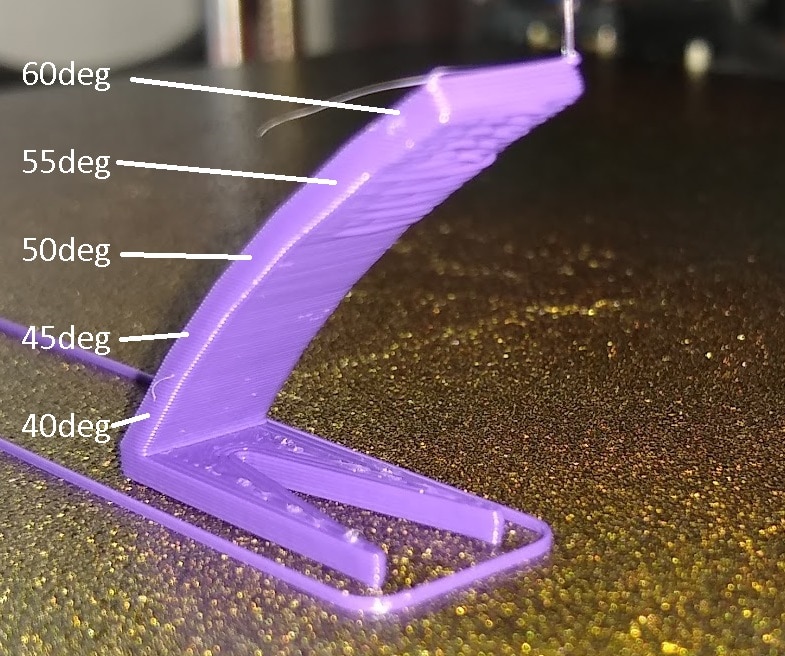
An overhang occurs at points where the draft angle of a specific part is too great. In conjunction with print speed, filament temperature, and layer height, print parameters can literally create a “cliff” that causes the melted filament to drop under.
On the other hand, bridges (as the name implies) are connections between two points of a piece, separated from each other by a certain distance. The extruder travels in one direction in the XY plane supplying material as it moves.
At first glance, it seems like a scenario prone to creating printing problems, however, we will see that some parameters can be established that allow performing bridges in a satisfactory way, even without using supports.
Angle limitations for overhangs in 3d printing and how to improve them
If we look at this from the point of view of a structure, a filament line will have a sufficient base of support if at least half of its width is supported by the previous layer. This means that for a standard line width of 0.4mm, at least 0.2mm must be supported on the bottom layer.
The only way to ensure this, for any layer thickness used, is to set a maximum overhang angle of 45˚. This angle is measured from an imaginary vertical line to the edge of the object. Defined this way, 0 degrees is a vertical piece and 90 degrees is horizontal (a bridge). Thus, the slicer will place supports where the overhang angle is greater than 45 ˚.
This is a very conservative rule and will thus always work, regardless of the other printing parameters. The reality is that we can further improve this angle by tweaking a few parameters.
How to increase the angle of overhangs
Because of the time added to a print just because of the required supports, we should be clearly interested in increasing the maximum angle allowed without sacrificing the quality of our print. This will also save a lot of wasted filament.
After modifying the parameters that can improve the overhang quality of your prints, you should try to print this overhang test. By doing marginal changes and improvements, you should be able to succeed in printing angles of 60°-65°.
Lets go through the parameters that we can modify in order to optimize our overhangs!
Reduce extruder temperature
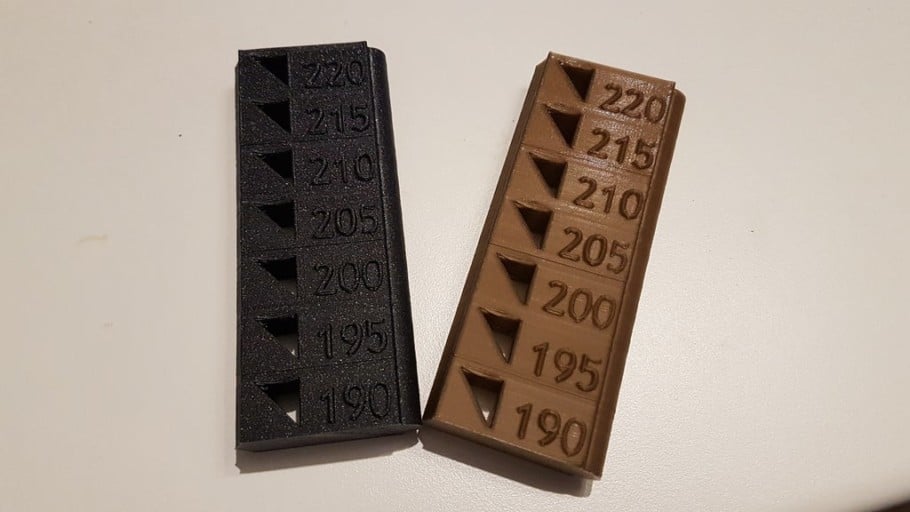
The filament flows when it reaches the working temperature, which is usually between 190 and 220 degrees C° for PLA, depending on the manufacturer, pigmentation, or composition of the thermoplastic.
Once the extruder places the plastic in its desired place, we need it to cool down to stiffen. Thus, it would not have time to drip or fall into the “cliff” that does not have sufficient support. When the material is too hot, it takes a long time to cool down, so the tendency to slip increases, and the part will end up deformed.
One way to improve this is to lower the printing temperature to the absolute minimum. For this, there are so-called “temperature towers”, which allow us to find out the optimal temperature with which to work each material. I always recommend printing a tower every time we want to try a new filament.
This test is highly recommended, as it has a “ready to print” G-code file with different temperatures for different layer sections.
Reduce flow rate
If too much material comes out of the nozzle, it will take even longer to cool down, so this parameter must be set correctly. If you see that the edges of your pieces are dripping too much instead of forming an even and solid line, it is time to adjust the flow rate or even check that the extruder steps are correct.
Increase cooling
This parameter is essential to achieve good terminations in very pronounced overhangs. Using a good layer fan is a priority when printing complex parts. It consists of a turbine (brushless fan) that blows a large flow of cold air directly to the outlet of the nozzle. This helps in cooling the filament and stiffens it. By doing so, the outer walls of the object will tend to preserve the shape that it is supposed to have.
You might also notice that one side of the print features higher and better details than the other part. This may very well be due to one side directly receiving the air from the layer fan while the other is gets blocked by the object itself. In such cases, orient the object in such a way that the most crucial details of the print have direct contact with the airflow of the layer fan.
Distance limitations of bridging in 3d printing and how to improve them
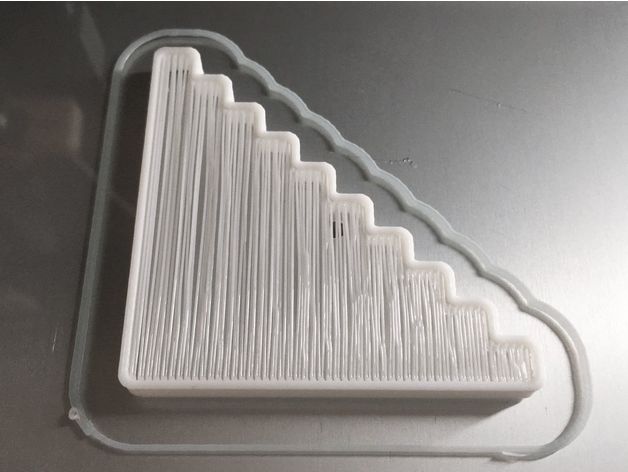
As the filament gets extruded by the nozzle during the movements specified by the G-Code, the plastic thread may tend to collapse under its own weight when while trying to print a large bridge between two structures.
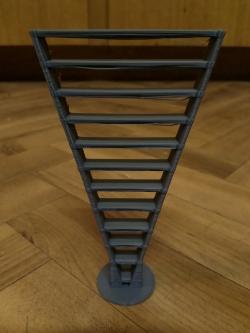
This will form a downward curve if the distance between the two support points exceeds a certain value. To know the capacity and limitations of a 3d printer, specific tests are carried out that generate increasingly long bridges in the same STL file. You can start out by printing this bridging test from Thingiverse (image above).
These tests not only work to know the capacity of our printer but also allow us to vary the printing parameters in order to improve the quality of our bridges. To do this, you must modify one parameter at a time and reprint the test in order to isolate the effect of the marginal modification.
A primary parameter when printing bridges is, again, the extrusion temperature. The speed at which the material cools down in the air is directly related to the quality of the bridge.
If your printer does not have a layer fan installed, I recommend that you get one and add it to the hotend. The best results are obtained with a layer fan of the Blower type, set at 100% of its capacity. The nozzle must allow air to pass through and not be an obstacle.
It should also be oriented towards the filament, and not towards the nozzle, as it would cool it down and cause temperature problems. My favorite blower fan is the 5015. It is both very cheap and incredibly efficient.
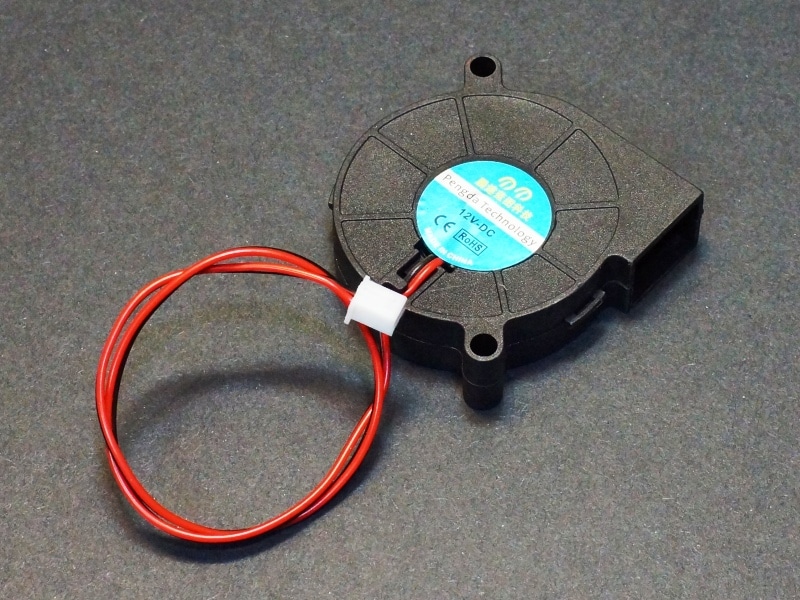
If you are using a layer fan for the first time, it is a good idea to adjust the PID control system of your extruder. There are lots of video tutorials on YouTube that explain how to do it.
Once you manage to configure your 3d printer to print bridges and overhangs satisfactorily, you might still come across bridges that are too large. For those cases, supports come in as a handy last resort that will automatically solve our problem. We are going to learn how to configure supports in Cura Slicer, but the other slicers have similar options to set.
Best settings for 3d printing with supports
In order to get started, we must select the places of the piece that we want the supports to be made. The “Everywhere” option also may place supports on the inside of the object, which could be excessive in some cases or completely necessary in others. It will depend on the design of the object.
Support structure type
This option lets us determine the structure of the supports. “Grid“, for example, will generate stronger supports that have no risk of falling even when it is very long. On the downside, they are much more difficult to remove and increases the printing time (and filament consumption) by a long shot.
“Lines” is a much faster option, since it consists of a structure formed by thin lines of filament one on top of the other. The main disadvantage of this type of supports is that, because they are by definition very thin, they also tend to tilt or crumble when the structure is taller.
It is on rare occasions that you should print with a grid structure since a line pattern will almost always be more than sufficient and will save you time and filament.
Overhang angle for support
As we mentioned before, objects that contain protrusions consisting of angles greater than the one established in this parameter will be reinforced with supports. This value will emerge from the overhang test. If you haven’t already, set 45 as the maximum angle as a temporary and failsafe value.
Fill amount
This parameter is expressed as a percentage and establishes the density of the material that will form the support. In the case of “lines”, the higher this value, the closer the lines will be to each other. Start with at least 25% the first few times. If you notice that the output quality is maintained, try marginally decreasing this value. As a rule of thumb, the optimal value should lie between 25% (maximum) and 10% (minimum).
Distance X / Y
Establishes the distance between the part and the support, in the horizontal axis (layer plane). The smaller this value, the better the holder will work, but it will also adhere to the object, making it difficult to remove. A recommended value is 0.6 mm.
Distance Z
Indicates the separation between the support and the part, in the vertical direction. A good value is 0.2mm since it allows the support to be removed with ease, and without affecting the quality of the piece.
If we do not leave a space between the piece and the support, both the support and the model will become one whole piece. This will leave unpleasant marks on the object when trying to remove the supports.
As you get more experience, you can increase the distances between the object and the support, so you can easily remove them once the printing is finished.
Multi-extrusion and supports
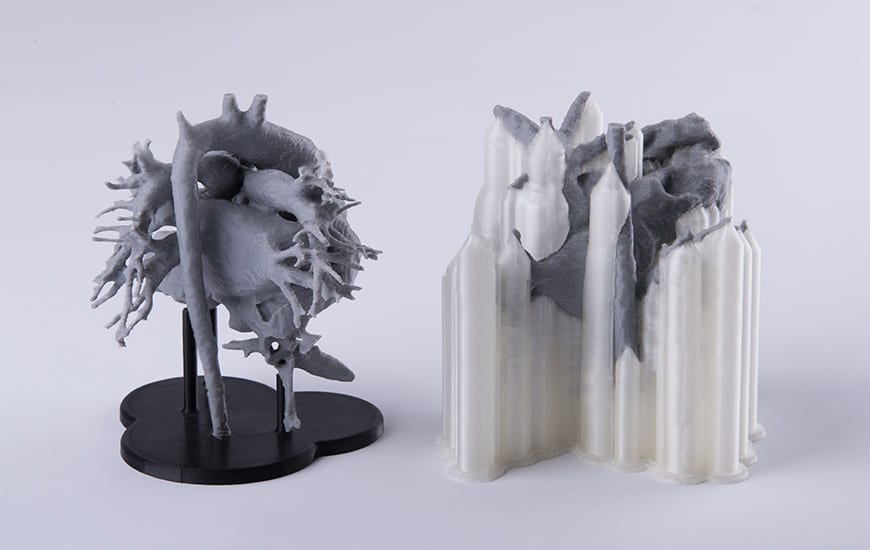
Some 3d printers have two extruders, which can be configured to print two parts at the same time or for one of them to make the part while the second extruder prints the supports. The most important advantage of this is that having a second extruder allows us to print the supports with a material that is soluble in water. A filament with this convenient property is PVA.
PVA allows us to simply dip the piece in water and get a good finish, no matter how close the supports previously were to the piece. As a disadvantage, I should mention that the price of PVA tends to be quite high.
Another filament used for supports is HIPS, which is soluble in d-limonene (a derivative of citrus fruits popularly used as an insecticide). It is cheaper than PVA, but requires an extra cost of solvent.
3d printing with tree supports
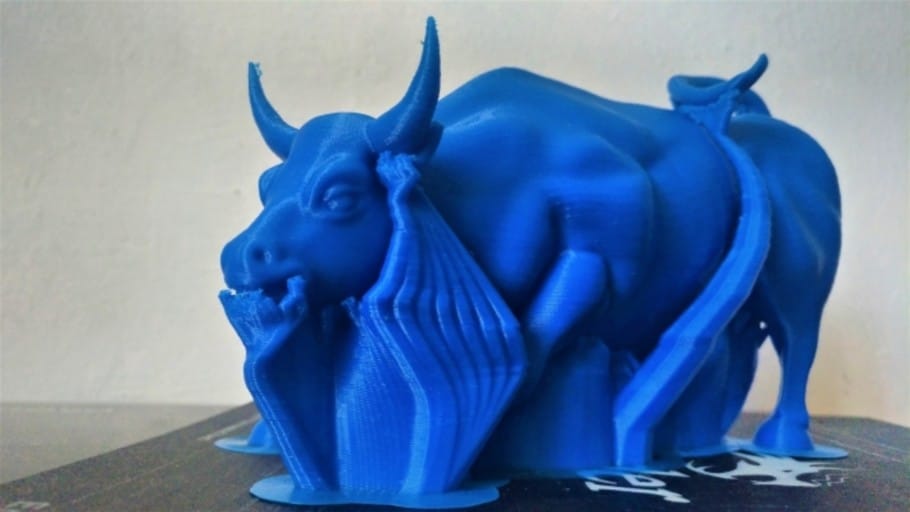
“Tree supports” are so named because of their shape. They start out as a trunk that branches as it rises along the Z-axis. These branches make contact with the part at a very small point, placed at the best-located point to maintain the structure of the object.
Some slicers, like Cura, have the option of using these supports. To enable this option, click on the configuration gear and select “Experimental” -> “Tree Support“.
Modeling programs, such as Meshmixer, allow generating the tree supports in the STL file so you only have to slice the object without caring about the support configuration.
Advantages and disadvantages of tree supports
The main advantage of these supports is that they only make contact on one point of the model, instead of doing it in a line as is the case with traditional supports. This makes the surface finish of the object much smoother after the removal process.
Another advantage is that the “tree” stays away from the part on areas where supports are not needed. This is especially convenient when printing organic models such as people or animals.
The main disadvantage of tree supports is that they are not indicated for bridges or large overhangs, since they cannot properly support planes such as line or grid supports. In addition, they are much slower and require a very long slicing time.
Check out our recommended products section

We created a recommended products section that will allow you to remove the guesswork and reduce the time spent researching what printer, filament, or upgrades to get, since we know that this can be a very daunting task and which generally leads to a lot of confusion.
We have selected just a handful of 3D printers that we consider to be good for beginners as well as intermediates, and even experts, making the decision easier, and the filaments, as well as the upgrades listed, were all tested by us and carefully selected, so you know that whichever one you choose will work as intended.
Error processing API data.
