If you’re like me and are tired of having to manually level the bed every couple of prints (not really, if you get the proper upgrades you can probably get away with leveling it every month or so), then you might want to consider getting a Bed Leveling sensor to help you out!
There are a couple different ones and I will talk about them in this post as well as give you an overview of which ones are more versatile, more precise, durable, etc., and I will also give you my opinion on which I think most people should go for.
So, without any further ado, let’s get started!
What does Auto bed leveling do?

The bed of a 3D printer doesn’t usually stay leveled for too many prints and you’ll have to manually re-level it every now and then. This generally happens with cheaper printers such as the Ender 3, and even though you can swap out the leveling screws and increase the time the bed stays leveled, you generally will have to manually adjust it every so often.
Having a properly leveled print bed is probably the most important factor when it comes to getting a successful print that sticks well to the bed, since getting the first layer right is what generally makes or breaks your print.
Luckily, some printers have a built-in feature called auto bed leveling which ensures that every time a new print is started, the distance between the printing bed and the nozzle is set automatically to the perfect height, ensuring that every print adheres to the bed properly without also getting squished too much.
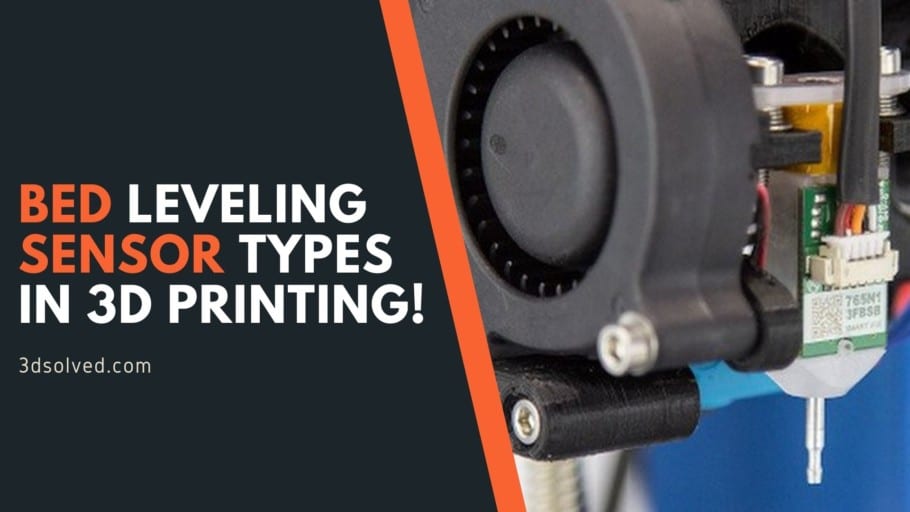
3D printers that features this auto-leveling feature have a sensor located near the tip of the print head which measures the distance between the printing bed and nozzle at specific points before the printing process even starts.
The printer then uses this information to adjust the distance between the nozzle and the bed across the entire surface creating a sort of “topographical map” of the print bed, adjusting the Z position of the nozzle to follow the build surface in a more consistent way.
The great thing is that if you have a printer that doesn’t come with this kind of sensor, you can install one yourself and never have to manually level the bed again.
Auto Bed leveling also helps a lot if you have a build plate that is slightly warped, which is the case with many printers, since it will move the nozzle up or down depending on where the build plate is warped.
Sensor Types
The auto bed leveling sensors come in all shapes, sizes and costs. Let’s discuss the different sensor types, understand their technology and compare their pros and cons to help you figure out the best option for you, since some work well on most types of build surfaces while some other don’t.
Capacitive

A capacitive sensor is a non-contact sensor that works by measuring the capacitance, which is how much energy the capacitor can hold, that changes when its sensing face is placed near an object.
A capacitive sensor is one of the fastest sensors out there, and it works on both metallic and non-metallic surfaces and even transparent ones like glass as it can detect any surface as long as its die electric constant is greater than air.
The downside of going with one of these sensor types is that they are highly sensitive to changes in temperature, humidity and build surface type. Any slight change in these three will affect their sensing distance and therefore, the level of the bed.
I print with a glass surface 99% of the time, so this kind of sensor works well for me, but if you’re someone who needs to swap out the build surface constantly, I wouldn’t recommend this kind of sensor.
Inductive

An inductive sensor is a non-contact sensor that works on the principle of electrical inductance. In simple terms, it produces a magnetic field that changes when its sensing face is placed near a metallic object (I think you can guess by now that this one will only work on metallic surfaces).
Similar to capacitive sensors, the z-offset of inductive sensors also needs to be adjusted to compensate for any changes in the temperature and humidity, which is why using an enclosure isn’t really recommended. However, if you have your printer running in an open space, inductive sensors seem to work quite well.
Physical Hall effect Sensor

A physical Hall effect sensor has a retractable plastic plunger pin (containing a magnet) and a Hall effect sensor.
In order to detect surfaces the sensor has to actually make physical contact with them which then retracts the plastic pin resulting in change in the magnetic field. This change is picked up by the hall effect sensor which then expresses it in volts.
This sensor remains unaffected by changes in temperature and humidity, but it is considerably slower than the previous two sensors since it’s got mechanical moving parts which are extremely simple, therefore it’s less likely to fail or break, and even the plastic probes last very long since they are designed to bend and not break.
The BLTouch is one of these types of sensors, and the reason it’s so popular is because it works on every single surface and because temperature doesn’t affect it. I would strongly recommend most people to go with this kind of setup.
IR Sensor (Infrared)

An infrared (IR) sensor is an electronic device that measures and detects infrared radiation in its surrounding environment. When an object comes close to the sensor, the infrared light from the LED reflects off of the object and is detected by the receiver.
It is a small non-contact sensor that can be used to detect imperfections in metallic and non-metallic surfaces and it can also work on glass surfaces, but a matte backing is recommended.
Unlike capacitive and inductive sensors, this type of sensor measures the height to the top surface of a glass bed, not the distance to a backing plate, and it’s ideal for use where space is restricted, such as under the effector of a delta printer.
Piezo Sensor

A Piezo sensor is a contact sensor, similar to a Physical Hall Sensor, that is either attached to the nozzle itself or it can also be placed under the print bed (generally used with Delta printers and much less common).
It works on the principle of Piezo-electricity (the electric charge produced in certain solid materials when they experience pressure) and this can be measured as a voltage proportional to the pressure.
Piezo sensors are very precise and accurate, especially the one mounted on the hotend, and they can be used with any printing surface including Printbite, PEI, Buildtak, Glass, Aluminium, etc.
Duet3D Smart Effector

The Duet 3D Smart Effector is only for delta printers and it allows the printer’s hotend to be used as a Z probe to accurately calculate the distance between the nozzle and the bed, taking care of any imperfections on the surface.
It also simplifies wiring of hotend components (thermistor, fans and the heater cartridge).
Which one is more precise?
Capacitive, Inductive and Physical-Hall Effect sensors are fairly similar in terms of overall precision, with the capacitive sensor being slightly worse. Duet 3D smart effector, IR sensor and hot end mounted Piezo sensor all are a bit more precise with the Hotend mounted piezo being the most accurate.
However, the Duet 3D smart effector is only compatible with Delta printers, so if you’re using a Cartesian or Core X/Y printer you won’t be able to use it.
Like I just mentioned, Capacitive sensor is not recommended if you need precision because it’s the one with the lowest precision compared to others on the list.
However, I would recommend the Physical-Hall Effect sensor the most (BLTouch, etc.) since these don’t really care whether your build surface is glass, magnetic, etc. because they have a probe that works mechanically, which makes it the most versatile one.
Probing Speed
The inductive and capacitive sensors have the highest probing speed because both of these are non-contact sensors and don’t have to probe or cycle up and down to make physical contact with the printing bed to get the ideal distance.
Durability
All sensors are fairly durable. In theory, the ones with the moving parts e.g. the Physical Hall effect sensor, have more chance of failing because of wear and tear, but in reality, their mechanisms are extremely simple and the probes are designed to bend instead of breaking, making them very durable.
In my opinion, there’s a higher chance that you will have to replace your printer before there’s any need to replace the Auto bed leveling sensors.
Versatility?
The physical Hall effect sensor is more versatile than the conductive and inductive sensors because it can detect all surfaces and its Z-offset is not affected by changes in the temperature and humidity.
All sensors except the 3D duet smart effector, hot end mounted and under the bed Piezo sensors have a separate Z probe. The relative height of the nozzle and the Z probe will vary if the print head tilts while moving in the XY plane which will lead to apparent variations in the trigger height with XY position. Mount the Z probe as close to the nozzle as possible to minimize this effect.
The IR sensors have an advantage here as they are light and small enough to be mounted closer to the nozzle.
Best auto bed leveling sensor for glass
Physical-hall sensors are generally the most suitable sensors for glass beds or any other non-metallic surface (even though they also work extremely well with metallic surfaces because they use a physical probe to measure the distance between the nozzle and the bed). Most sensors work well with a glass bed except for inductive ones since they won’t be able to detect the glass.
EZABL
EZABL is a capacitive sensor that offers electrical isolation from the motherboard, thermal runaway protection and zero temperature drift. It works with metallic and non-metallic surfaces including transparent ones. At $65, it’s a bit expensive but the extra cost might be worth it.
It has two drawbacks; you will either have to purchase the sensor mount separately or print it yourself, and to update the firmware you will have to use Arduino IDE and upload it via the 3D printer’s USB port, but this shouldn’t be a problem for experienced makers as it is one of the most well documented and well supported sensors that are currently available.
BLTouch
BLTouch is a mechanical sensor and is definitely the most popular auto bed leveling sensor out there, especially for the Ender 3. Its newer versions have the following three parts:-
- Onboard microcontroller
- Solenoid switch
- Physical push-pin
The older versions had hall effect sensors but newer ones use a solenoid switch in tandem with a microcontroller to detect surfaces when the push-pin retracts. It can detect metallic and non-metallic surfaces including transparent ones (that’s kind of obvious since it works mechanically, but I wanted to make sure that you got the info). It costs around $50 and is suitable for beginners as it’s easy to install, and many instructional videos are available online to do so.
UPtanium Leveling Kit
The Uptanium auto bed leveling kit offers the best of both worlds. Just like EZABL, its a capacitive sensor but also like BLTouch it is suitable for beginners due to easier installation. It electrically isolates itself and can detect metallic and non-metallic surfaces. It costs
The one drawback is that it sells for around $65.
One Important Consideration
If your Z probe is separate from the nozzle, essentially all the previously mentioned ones except the Smart Effector, and both Piezo types (Hotend and bed mounted), then if the print head tilts as it moves in the XY plane then the relative heights of the nozzle and the Z probe will vary with the tilt as well, causing apparent variations in the trigger height with XY position.
This effect can be reduced by mounting the Z probe as close to the nozzle as possible, but make as certain as possible that the Z probe is installed properly.
Conclusion
For most people, especially the ones who are new to the whole 3D printing world and that don’t have that much experience or knowledge of electronics and how to install the probes properly, I’d recommend going with the BLTouch since it’s a device that’s been tested by many different people and that just works! Plus, the installation is super ease when compared to the rest.
I hope this information was useful!
Have a great day!
Check out our recommended products section

We created a recommended products section that will allow you to remove the guesswork and reduce the time spent researching what printer, filament, or upgrades to get, since we know that this can be a very daunting task and which generally leads to a lot of confusion.
We have selected just a handful of 3D printers that we consider to be good for beginners as well as intermediates, and even experts, making the decision easier, and the filaments, as well as the upgrades listed, were all tested by us and carefully selected, so you know that whichever one you choose will work as intended.
Error processing API data.