I purchased my Ender 3 Pro close to half a year ago and I’m very pleased with how it performs. However, even though it’s a great printer for the price, I think that there are some definite drawbacks that you should know about.
So, in this article, I will be going over as much information as I can to provide you with an honest view so that you can make a better decision.
- Printer assembly
- Types of Build Surfaces/Beds and their pros & cons
- Leveling the bed
- Print Quality
- Reliability
- Materials I was able to print with
- Noise level (Louder than I hoped)
- Ender 3 Power Loss Recovery; Works but has its flaws
- Ender 3 and Ender 3 Pro differences
- Overall Ender 3 Pro Impressions
- Conclusion
- Check out our recommended products section
Without any further ado, let’s get started!
Printer assembly

The printer came extremely well packaged and everything required to put it together was there, in fact, they included a couple additional pieces even when they weren’t needed (such as screws, nuts, etc.) just to make sure that you have enough to build the machine properly.
From start to finish it must have taken me about an hour to put the Ender 3 together and to be ready to start my first print. The instructions are very clear and to the point, with loads of pictures that guide you through the whole process. However, it doesn’t come with Gummybears like the Prusa machines do but hey, it’s still a great experience.
Setting everything up (Some Build Process issues)
I did run into a couple problems while building it though, since I didn’t pay special attention to having everything squared perfectly (which is something that they don’t tell you in the instructions), and this led to a couple print issues which meant that I had to go back and take the printer apart partially to make sure everything was properly aligned.
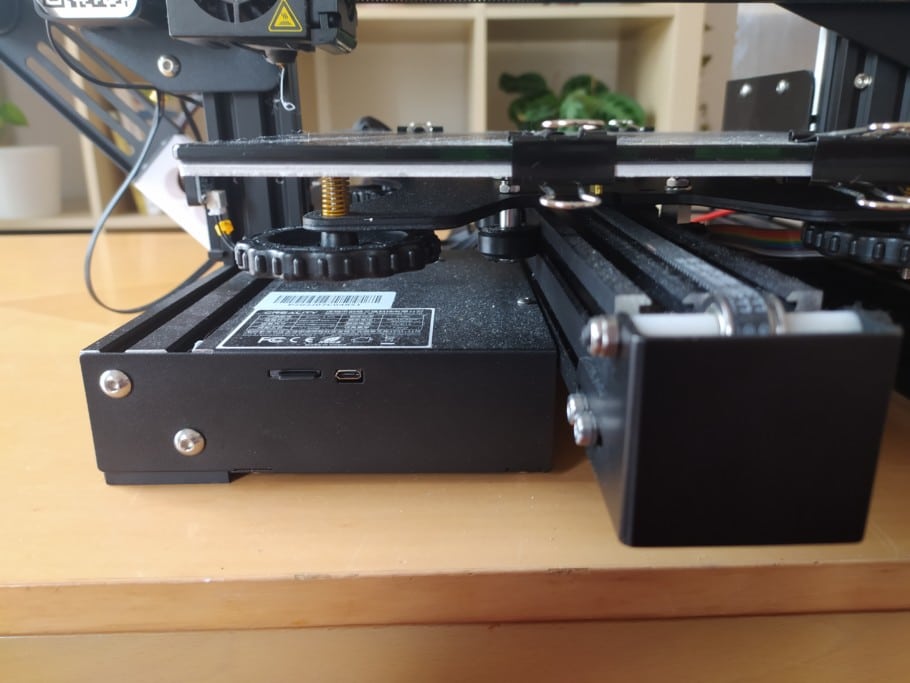
In my case, the Z Axis were slightly rotated which meant that the right carriage (the one on the opposite side to the Z-Rod and where the power supply is attached to) couldn’t roll up and down properly and was sagging a bit, which caused a whole set of problems since I couldn’t get the bed leveled because at times it would sag while at others it wouldn’t, and this threw me off.
Not only that, but since the Z Axis were a bit rotated, the power supply ended up being a bit too close to the bed and depending on how I placed the magnetic build surface on it, when the bed moved backwards it would come into contact with the power supply which causes friction, and this is definitely not what you want.
So, while building your Ender 3 make sure to pay special attention to those kinds of details unless you want to have to take everything apart to solve the problem later on.
Types of Build Surfaces/Beds and their pros & cons
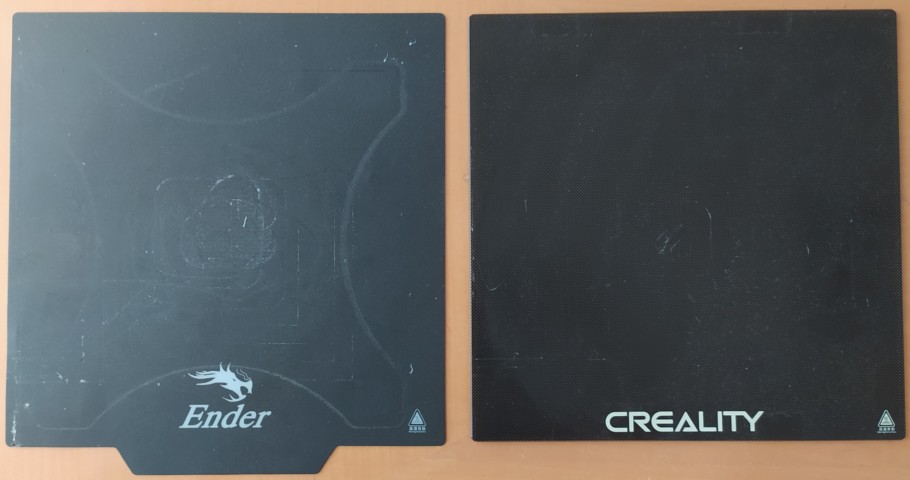
Right: Glass Bed (NOT INCLUDED)
The Ender 3 Pro comes with a Magnetic bed but I also purchased the Glass bed since I wanted to try out how the results differ, and I think that if you decide to go with the Ender 3 Pro, you should get a glass bed as well.
Important Note: The Ender 3 printers are known to have build plates (the surface where the magnetic/glass bed goes on) that aren’t perfectly straight but rather a bit warped in the middle, which means that the nozzle will be much closer on the edges of the bed than in the center and this can cause major issues, such as the nozzle digging into the bed on the corners but being too far in the center.
Magnetic Bed
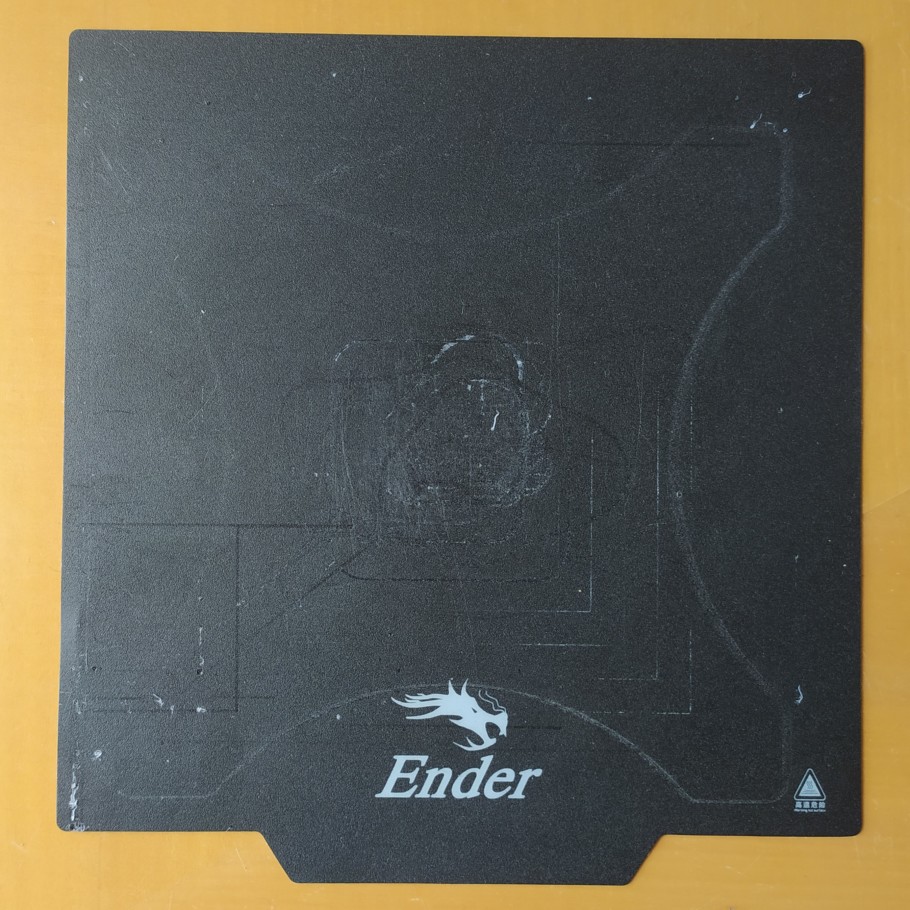
The Magnetic build surface/bed, as the name implies, uses magnets to keep the bed from moving everywhere, and it’s a really convenient mechanism not only because it is easy to use, but because the prints can also be removed quite easily once the print is done; all you need to do is remove the build surface from the heated bed, bend it slightly and the print comes right off.
One con I have to mention about this bed is that printing with, let’s say, white filament leaves that white color on the bed no matter how much you clean it and your next print, if it’s in a different color, will have white stops on the bottom.
Also, the magnetic bed is very thin and if the build plate is warped, the magnetic bed will do so as well.
Glass Bed
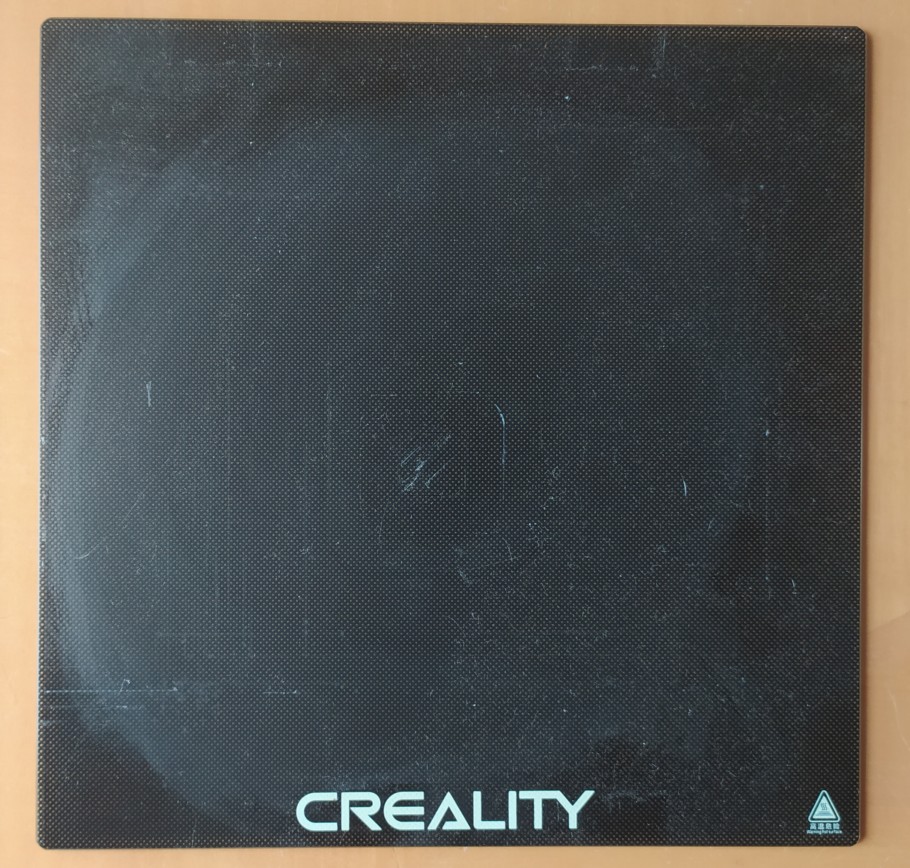
The Glass bed doesn’t come with the Ender 3 Pro but I’d highly recommend getting one since it provides much better adhesion and because it stays straight, even if the build plate is slightly warped, which makes the whole printing- and bed leveling process much easier.
In addition to this, since it’s a lot thicker it distributes heat more evenly, which is exactly what you want.
Overall, I’ve had a much better experience using the glass bed mainly because of the slightly warped build plate.
Leveling the bed
The bed leveling mechanism on the Ender 3 pro is quite straight forward and identical to the one found on most printers and once you get it dialed in right, you should be able to get a couple prints done without needing to re-level it.
However, the springs that come stock on the Ender 3 Pro aren’t the best ones and don’t keep the bed leveled for too long.
I got these yellow springs which are much sturdier and now I only level the bed like once a month, or less even, but without those you may need to re-level the bed every couple prints/days.
Print Quality
I was pleasantly surprised at how all of my prints turned out, especially considering that the Ender 3 printers, no matter if they are the regular version, Pro or V2, are entry level machines. If you get the first layer to print and adhere properly, the rest of the print usually turns out perfectly.
Now, I did encounter a couple problems when printing larger models because with the Ender 3 the Y Axis is controlled by the bed (it moves forwards and backwards).
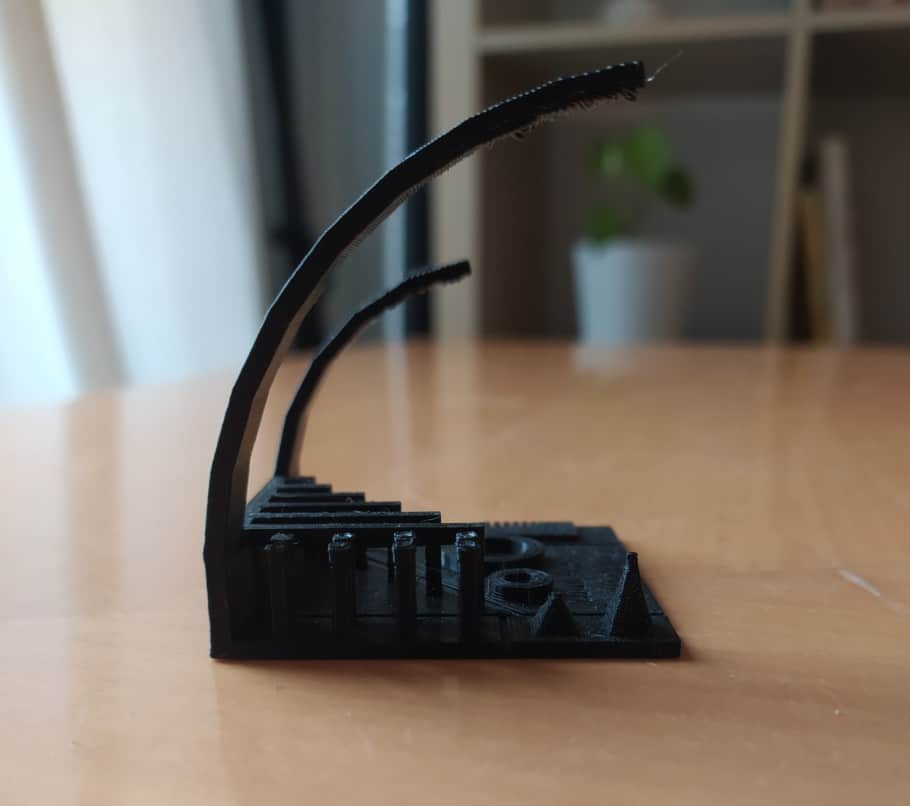
The issue with this is that it’s a lot of mass that needs to move fast which can cause some ringing. Not only that, but larger models, especially tall ones, tend to shake a bit with those fast movements and this can definitely be seen on the print.
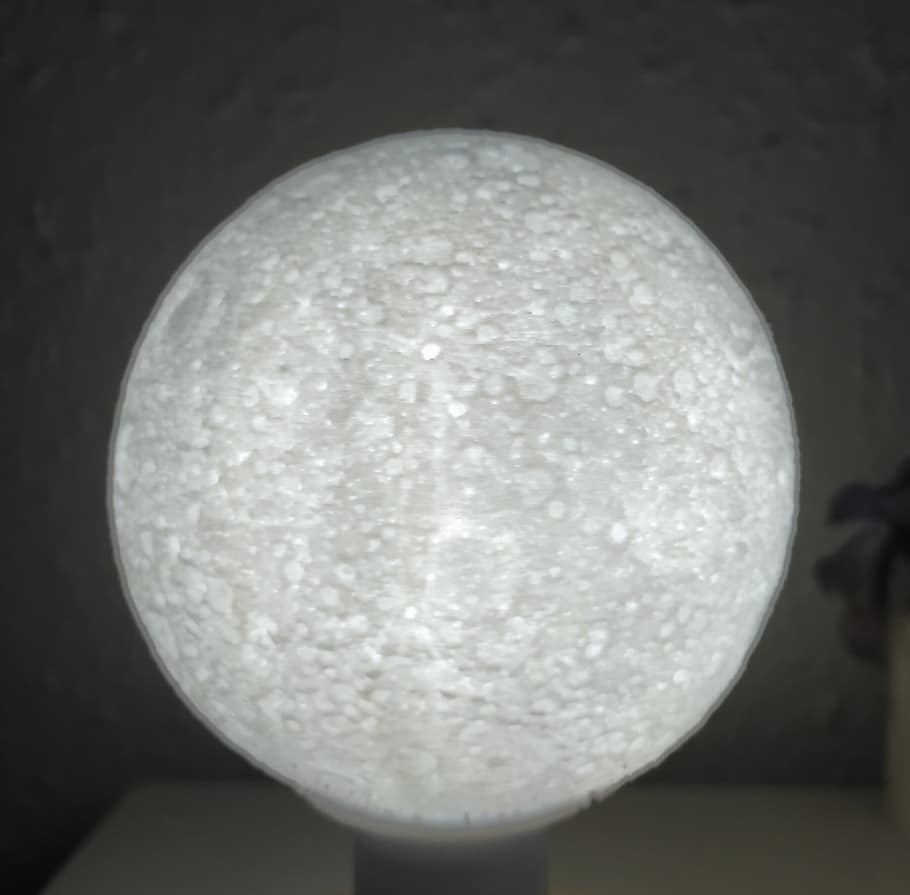
Look at this vase I printed:
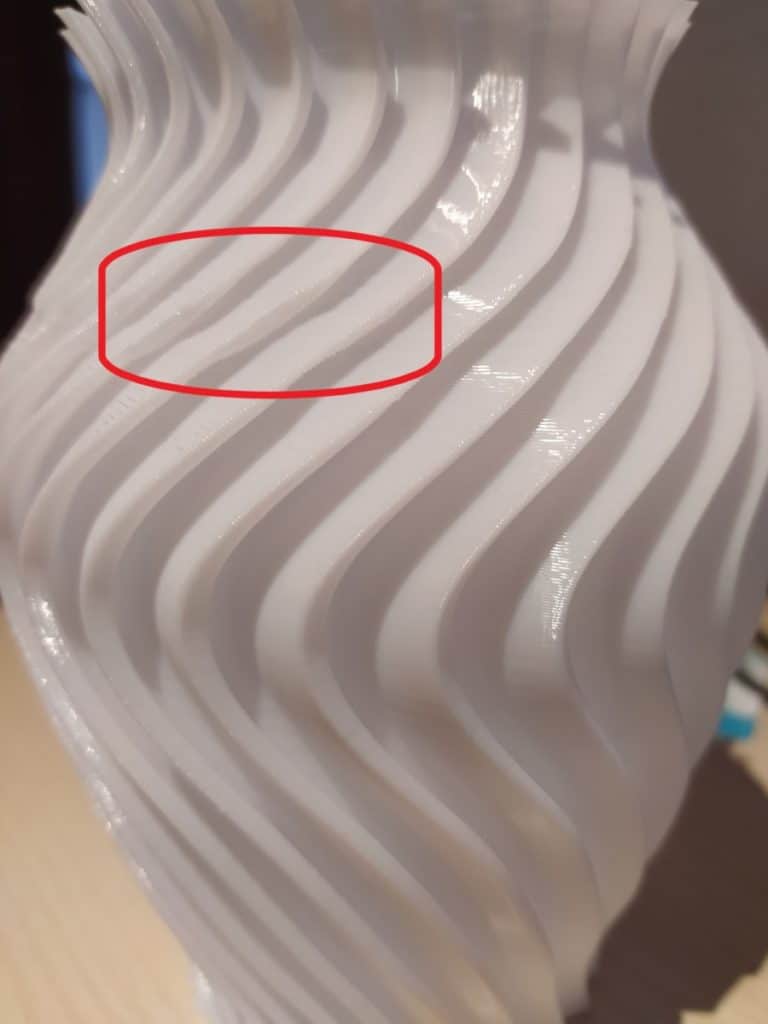
It turned out great overall, but there are a few spots where you can see that the printer wasn’t able to print it like it should (I went to see how the print was going and at times I saw the entire thing shake because of the sudden bed movements, and this seems to be the result of that).
Other than that, the Ender 3 Pro has an incredible print quality and I almost never encounter any obvious issues that need solving.
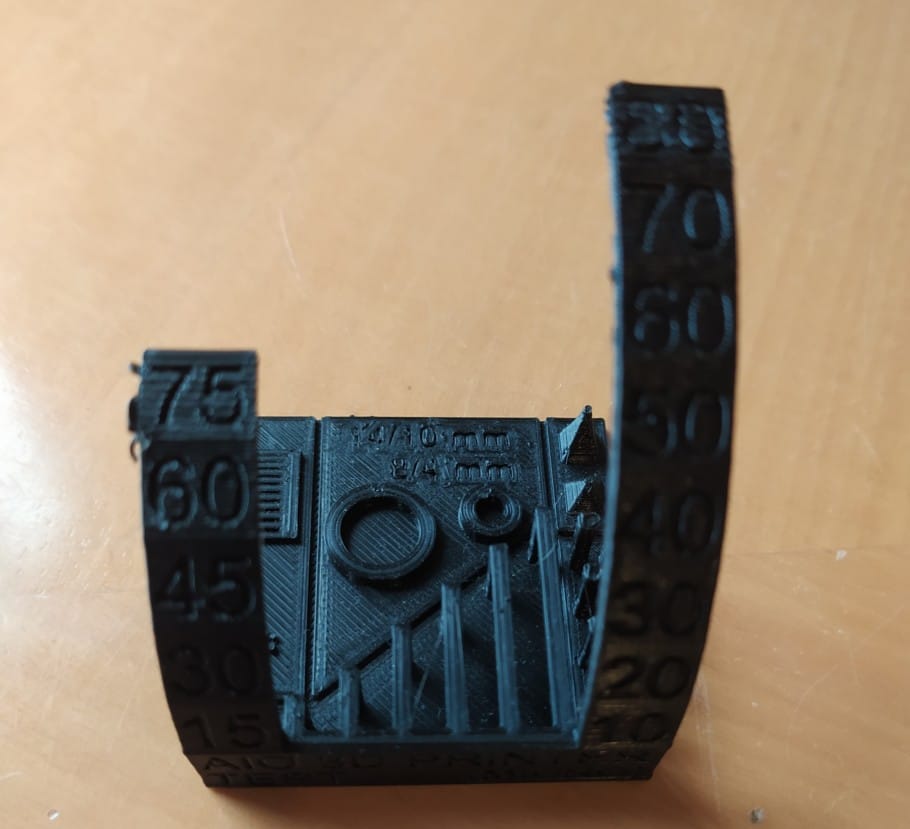
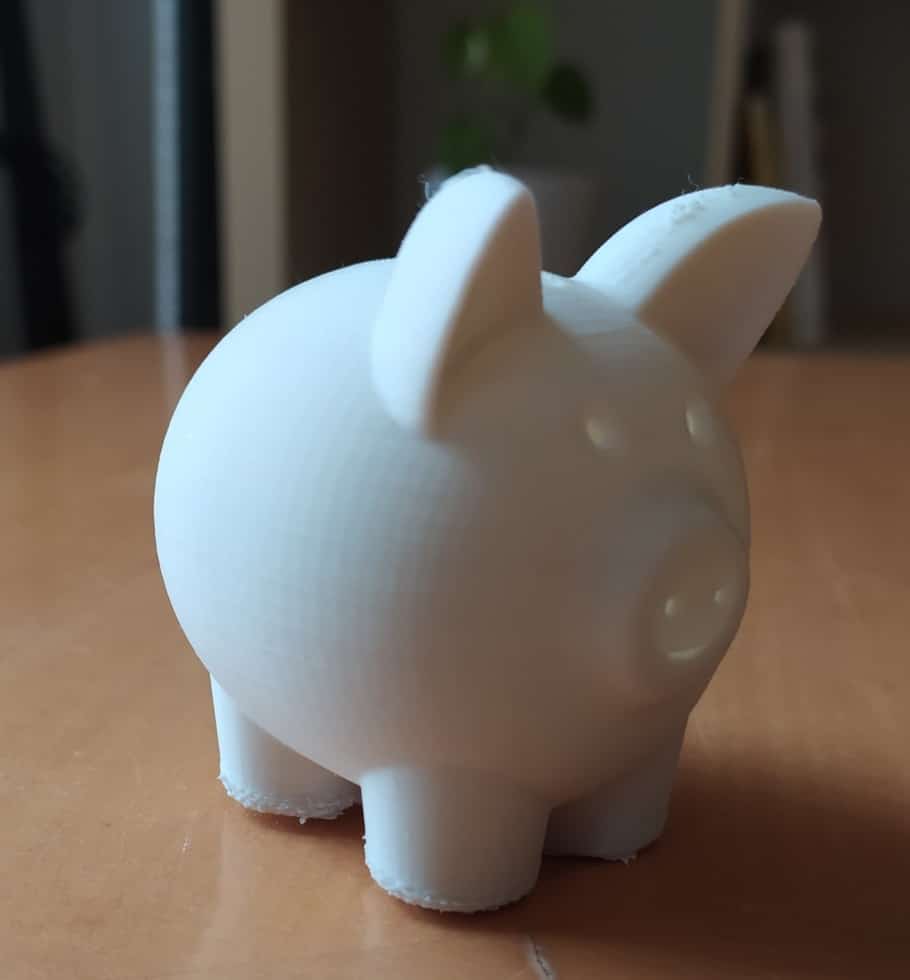
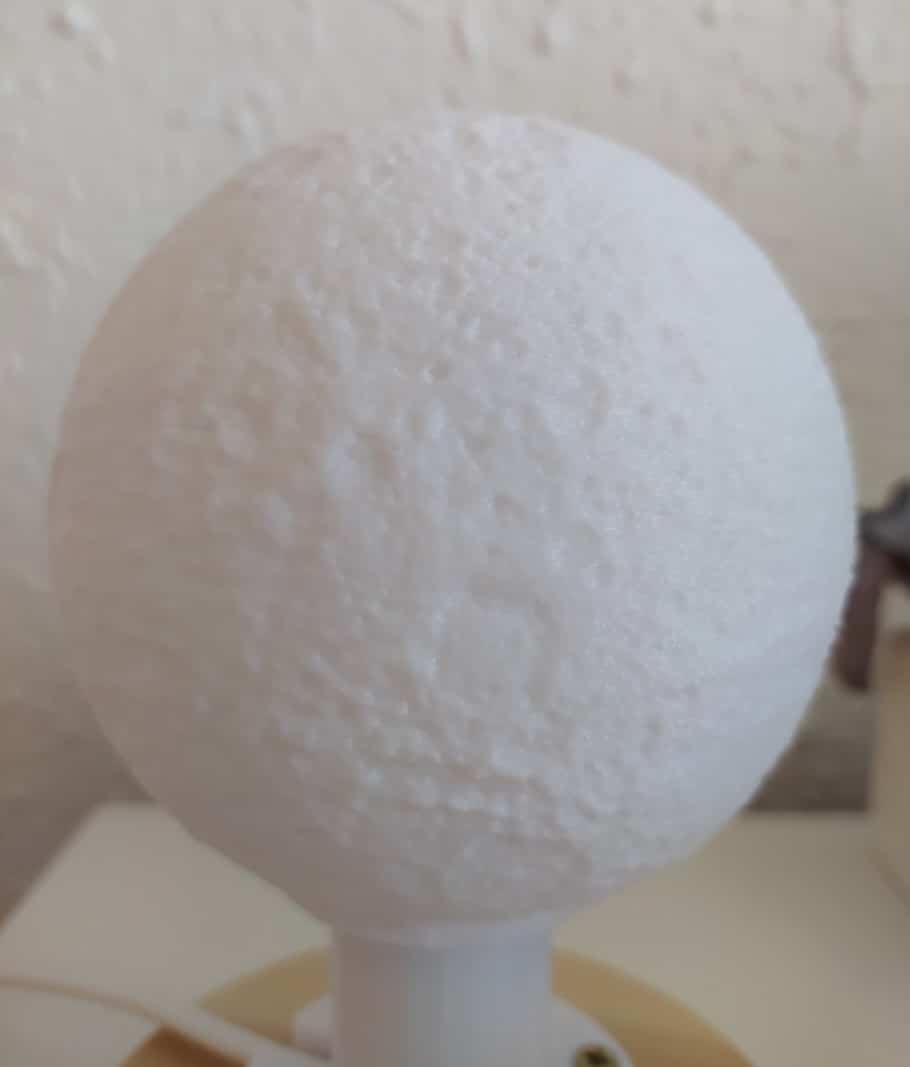
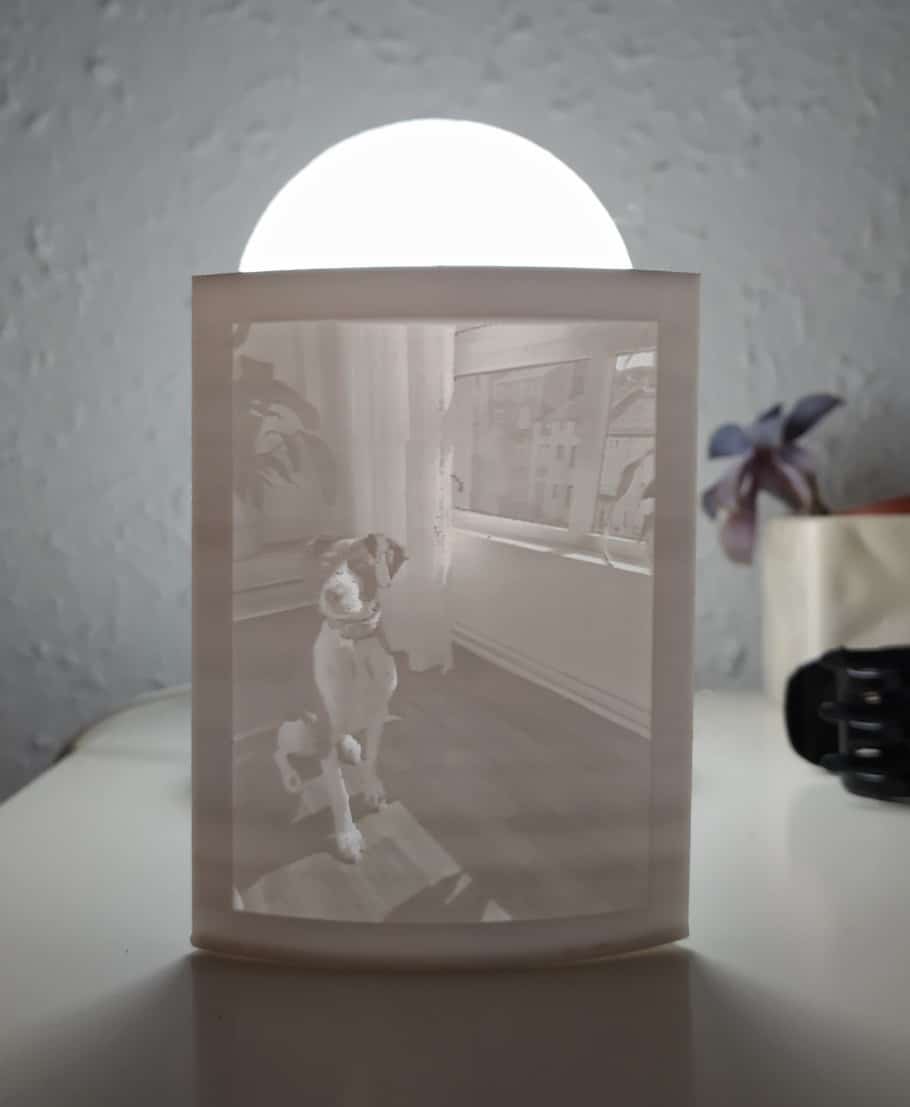
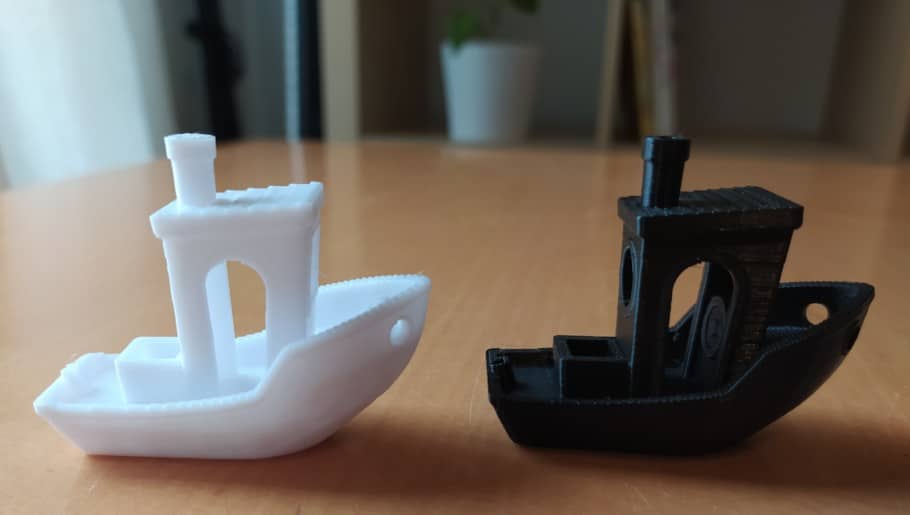
Here are some images of a couple different prints I made:
Reliability
Even though I absolutely love my Ender 3 Pro, I don’t think it’s the most reliable machine out there, I mean, there’s a reason why people prefer Prusa for running a 3D printing farm and that’s not because of their actual print quality or because they include a Gummy bear packet, since a Prusa MK3 doesn’t really have a better print quality than an Ender 3, but rather because they are more reliable, which is the most important factor when running a farm.
Also, the Ender 3 doesn’t come with automatic bed leveling which the Prusa printers do, and if you run a 3D printing farm you really can’t be manually leveling 50 printers all day long.
Materials I was able to print with
The Ender 3 uses a Bowden-Style extruder, which essentially means that the extruder isn’t part of the print head and pushes the filament through the Bowden tube until it reaches the hotend where it gets melted to be printed.
This limits the number of materials the Ender 3 can print with slightly, but with a couple modifications you can definitely print with more abrasive materials, extremely flexible filaments, etc.
With the Stock Ender 3 Pro you can print:
- PLA.
- ABS (You may need to create an enclosure for it so the print doesn’t warp).
- PETG.
- TPU (TPU is flexible. Only Semi-Flexible TPUs can be printed without modifying the printer).
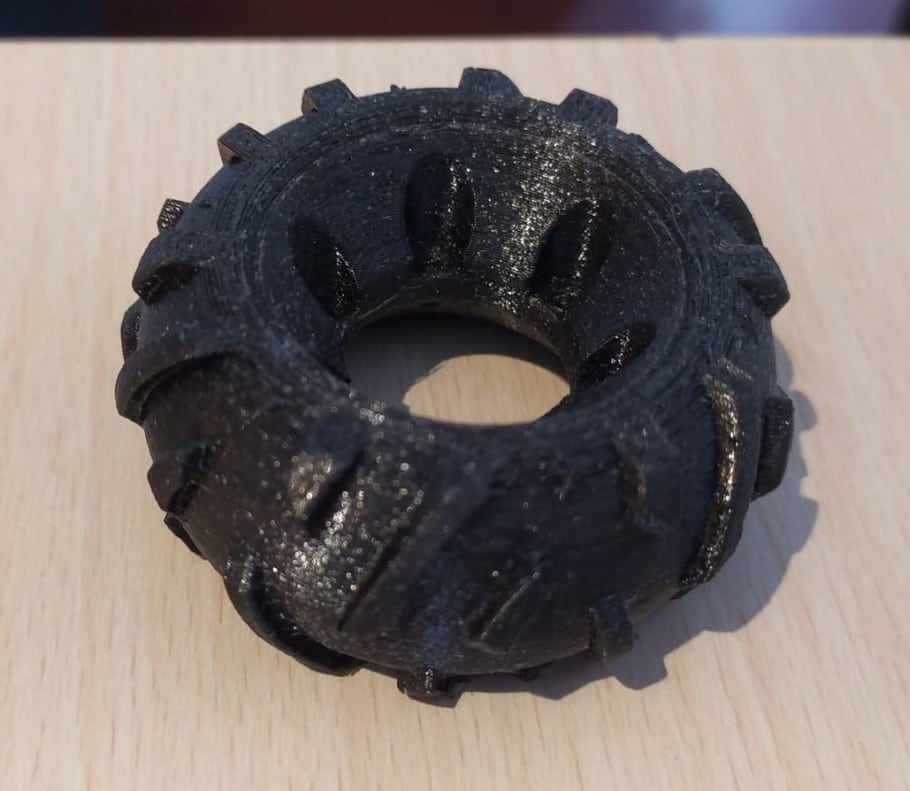
Note: I was able to print NinjaFlex, which is an extremely flexible filament, and I managed this thanks to a printable upgrade you can get on Thingiverse, no need to buy anything. But a Stock Ender 3 won’t be able to print very flexible filaments.
I also wrote an entire post on how you can print super flexible filaments on the Ender 3 that you should check out.
Noise level (Louder than I hoped)
The Ender 3 Pro isn’t particularly quiet and you can hear both the fans, which are quite loud, as well as the stepper motors. I upgraded the mainboard on my Ender 3 Pro to the TMC2208, which is the one that comes in the Ender 3 V2 and makes the machine much more silent, at least as far as the stepper motors are concerned.
The fans still create the same amount of noise which is still quite loud: I generally run my Ender 3 right beside the desk that I work at and it’s not like I barely notice it… In fact, I really can hear it. Luckily, it’s a consistent noise that you no longer pay attention to after a couple minutes, but it’s quite loud.
If you would like to make the printer quieter then you could always swap out the cooling fans for a higher-quality brand, such as the Noctua fans, and you won’t even notice that the printer is running.
Ender 3 Power Loss Recovery; Works but has its flaws
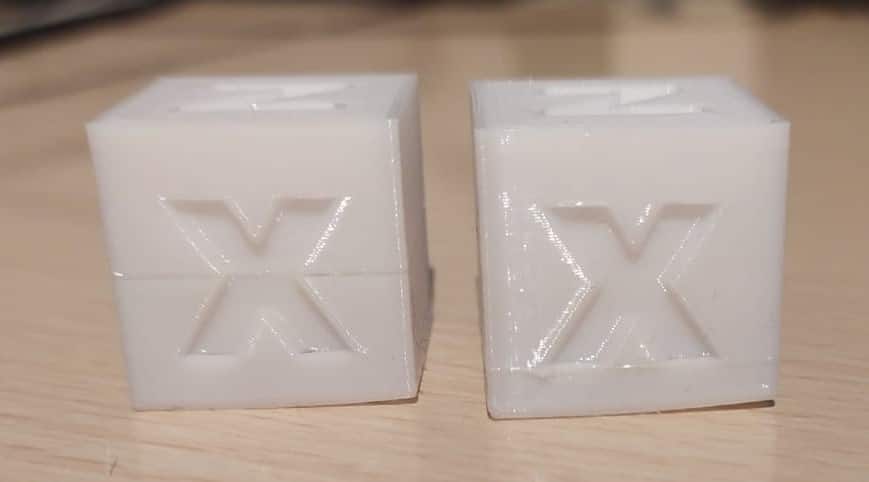
Left Cube: Layer delamination in the middle of the cube.
When printing these test cubes I decided to cut the power to the printer to test if it could recover and keep on printing. I waited for about a minute and turned it back on and it immediately started heating up. However, it didn’t home itself or move out of the way before doing so but rather after heating up, which makes sense since otherwise the filament would be cold and if the nozzle moves it would rip the whole print off the bed.
About one or two minutes after the print resumed at the exact spot where it was once I cut the power. However, it didn’t really work flawlessly as you might be able to see from the image above;
I could see the nozzle oozing a little once the printer was shut down and this caused a blob of filament to be deposited onto the print which apparently created this bulge that you can see on cube to the right.
When looking at the left cube there’s only some layer delamination going on, but that’s about it.
So, yes! Power loss recovery works but the prints will have clear marks that show when that power loss occurred.
Ender 3 and Ender 3 Pro differences
While both machines are nearly identical, have the exact same build volume, print quality, etc., the base Ender 3 comes with a BuilTak-like heated bed that is completely attached to the build plate and can’t be removed (I mean it can, but you won’t be able to keep using that same surface to print).
In addition to this, the aluminum extrusion for the Y Axis (where the bed moves forwards and backwards on) is much thinner than the one on the Ender 3 Pro, which can introduce a bit of wobble.
The Ender 3 Pro, on the other hand, comes with the Magnetic Bed which already is a huge upgrade since it makes removing the prints a breeze, you can swap it out for another one, etc.
The Y Axis extrusion is much sturdier, and it also comes with a Power Supply made by a reputable manufacturer (Meanwell), whereas the Standard Ender 3 has a generic one. This power supply is safer and is also supposed to be quieter, although if you check out the video I linked earlier, the loudest fan is the one of the Power Supply.
The last big difference is the disposition of the print base which is flipped on the Pro version; The issue on the Standard Ender 3 was that the base’s cooling fan used to be on the top and filament could get sucked in, with the Pro version that’s no longer an issue since it sucks air in through the bottom.
Like I mentioned earlier, the Ender 3 Pro is nearly identical to the Ender 3 and only features some quality of life changes over it. I think that the major ones are the Magnetic bed and the improved Y Axis extrusion.
Overall Ender 3 Pro Impressions
I absolutely love my Ender 3 Pro. I think that it’s a fantastic machine considering the $200 price tag and the print quality is just phenomenal, plus printing with different materials is definitely doable (Super Flexible- and abrasive filaments) and all of that with just some minor upgrades ($35 or so and you’re set).
There are some clear quality control issues at Creality since I’m not the only one who got a printer with a warped build plate, and if you do a quick YouTube or Google search regarding that topic, you’ll find hundreds of people complaining about the same thing.
However, if your printer happens to come with this defect, even though it’s not ideal, you can certainly work around it by either using a glass bed, or by using automatic mesh bed leveling with something like the BLTouch, or manual mesh bed leveling, which is firmware only.
I agree that quality control should be improved, but for how little this printer costs I think that you’re already getting a lot for your money.
As long as you assemble it correctly and manage to get the bed leveled, this printer works amazingly well and the quality of the prints is great!
Another thing that is worth noting is the huge community surrounding the Ender 3, since almost everyone who is interested in 3D printing has one, so you should be able to find answers to your questions- and solutions to any problem you might have in no time.
Now, there’s another version of the Ender 3 going around called the Ender 3X which comes with the upgraded mainboard, both the glass- and magnetic bed and some extra nozzles, and since it actually costs less than the Ender 3 Pro, I’d highly recommend getting that one.
Shameless plug here but I wrote a couple articles on how to fix specific issues on the Ender 3, so make sure to check out those posts if you need some help.
If you don’t want to have to go through all the trial and error that we did in order to find the Ideal Settings for creating high-quality prints on your Ender 3, then definitely check out our own Cura Profiles tailored specifically for the Ender 3 Printer Series (You can get all of them for just $7).
Conclusion
I completely get why so many people love and recommend the Ender 3 since it’s an absolute workhorse, and the Pro version features just a couple of quality of life upgrades which, while they won’t improve the print quality, will add to the overall experience, such as the magnetic bed.
There are definitely some other great budget printers out there, like the Artillery Genius, Tevo Tarantula, and others which are definitely worth looking at, but I can definitely say that the Ender 3 Pro works great, especially if you pay special attention during the assembly process and while leveling the bed. If you do those things correctly, it should print incredibly well in no time.
I hope this information was useful!
Have a great day!
Check out our recommended products section

We created a recommended products section that will allow you to remove the guesswork and reduce the time spent researching what printer, filament, or upgrades to get, since we know that this can be a very daunting task and which generally leads to a lot of confusion.
We have selected just a handful of 3D printers that we consider to be good for beginners as well as intermediates, and even experts, making the decision easier, and the filaments, as well as the upgrades listed, were all tested by us and carefully selected, so you know that whichever one you choose will work as intended.
Error processing API data.