Here’s a huge list of some of the best upgrades available for the Ender 3, Ender 3 Pro, V2, and even CR10, CR10 mini, as well as for other printers, that you can print for free as well as purchase.
Make sure to check the compatibility of each upgrade with your printer (information can be found under each listed upgrade on this article).
If you don’t want to have to go through all the trial and error that we did in order to find the Ideal Settings for creating high-quality prints on your Ender 3, then definitely check out our own Cura Profiles tailored specifically for the Ender 3 Printer Series.
Now, without any further ado, let’s get started!
Printable upgrades that Fix Design Flaws
The Ender 3 is an extremely affordable machine, which means that some corners were clearly cut in order to save costs. Luckily, you can print all the necessary upgrades yourself and improve the printer’s performance without spending any money, except on filament, of course.
Ender 3 Board fan guard

The Ender 3 (not the Pro and V2 versions) suffers from a critical design flaw where the board fan is pointed upwards, which allows pieces of filament and other particles to get sucked in which may stop the fan from working.
This board fan guard completely covers the fan and keeps it from getting jammed.
Like I mentioned, this is only an issue with the Ender 3. The Pro and V2 don’t suffer from this.
Compatibility: Ender 3.
Ender 3 and Pro Belt Tensioners

The Ender 3 and Ender 3 Pro don’t come with built-in belt tensioners (the V2 does), which makes adjusting the tension of the belts unnecessarily complicated.
With these simple prints, you can adjust the tension of the X and Y Axis belts with ease by turning a simple screw.
Compatibility: Ender 3, Ender 3 Pro.
Material: PETG.
Download here:
Petsfang Fan Duct

The stock Ender 3, Pro, and V2 fans only blow air from one side onto the hot layers of the print, making the cooling uneven and not ideal.
With the Petsfang fan duct this issue is improved drastically since it allows for better airflow around the entire print. However, it’s not the easiest fan duct to print, but it’s worth making if you want to enhance the airflow between your extruder and your print. It’s also designed to fit with the BLTouch auto-leveling sensor.
Compatibility: Ender 3, Ender 3 Pro, CR-10, Tevo Tornado.
Flexible Filament Extruder Upgrade

You can download and print this Flexible Filament Extruder Upgrade for the Ender 3, CR-7 and CR-10 which should let you print with very flexible filaments since it allows you to use a small PTFE insert to close the gap in the extruder that generally allows the flexible filament to get jammed.
Make sure to get the one I linked which is Called “Improved Flexible Filament Extruder Upgrade” since the other ones available on Thingiverse didn’t work for me and caused a lot of under-extrusion, even when printing with PLA, and the Improved version works wonders with all filament types.
Compatibility: Ender 3, Ender 3 Pro, CR-10, CR-10 Mini, CR-7.
Ender 3 Filament Guide

The Ender 3 printers come with one design flaw which is not having the best filament path from the spool to the extruder, where the filament is usually under tension and turning in sharp angles, as well as being in contact with the Z rod.
The two filament guides I link here solve both of these problems (I’d recommend installing both).
Compatibility: Ender 3, Ender 3 Pro, Ender 3 V2.
Download here:
Ender 3 pressure fitting fix

If you’ve experienced any issues with your PTFE tubing popping out or not staying perfectly in place, you can 3D print this Pressure Fitting Fix to ensure that everything stays exactly where it belongs. This easy print is designed to clip around the pressure fitting of the tubing and it fits in a more tightly manner than the ones that come stock with the Ender 3.
If you’re having problems with your PTFE tube not being held in place perfectly, then try printing one of these pressure fittings.
Compatibility: Ender 3, Ender 3 Pro, Ender 3 V2.
Ender 3 Vibration Damping Feet

The vibrations generated by the Ender 3 while it’s printing can be transferred to the surface that it’s sitting on, which can amplify those vibrations and generate a lot of noise.
Printing these vibration dampening feet ensures that the least amount of vibration is transferred onto other surfaces and reduces the overall printing noise.
Compatibility: Ender 3, Pro, V2.
Material: Semi-Flex TPU (Not too flexible, shore hardness of 98a), PETG.
Ender-3 bed handle

This bed handle lets you move the bed back and forth without touching it. If you’re printing with PLA and have the bed set to 60°, touching the bed isn’t a problem. However, printing with ABS and setting the bed close to 100° or higher makes touching it almost impossible and leveling it properly will be a lot harder.
This handle completely fixes this issue, and there’s also another one available (linked below) that comes with a camera mount.
Compatibility: Ender 3, Ender 3 Pro, Ender 3 V2.
Download here:
Creality Ender-3 Ribbon Cable Clip

This is an organizationally-driven Creality Ender 3 upgrade. This 3D printable Display Ribbon Cable Clip is a quick way to keep the LCD’s cable, or any other thick cable that’s underneath the printer, as unintrusive as possible.
You will need to print two or three for each cable, and that’s it!
Compatibility: Ender 3, Pro, V2.
Non-Essential upgrades that don’t require additional parts
While these prints may not be designed to fix some critical design flaws like the ones I linked above, they can still be very useful and improve the overall printing experience.
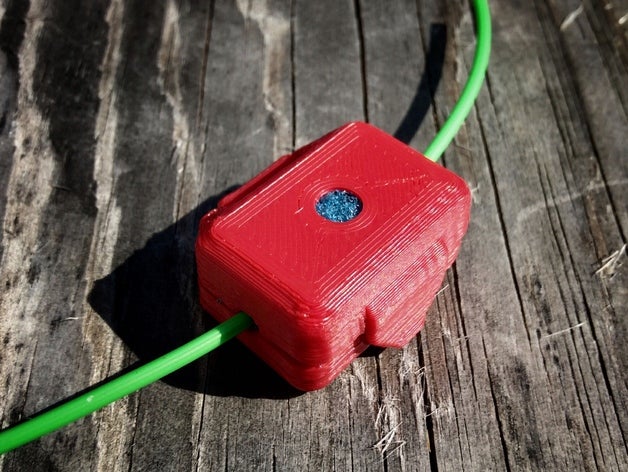
Filament Dust Filter

If you need to prevent dust, dog or cat hair, or any other type of particle from entering the extruder, which may cause issues such as clogs, under extrusion, or wrecking the print entirely, then printing out this dust filter and inserting two pieces of sponge, or any other similar material, may improve the printing conditions.
Compatibility: Any 3D Printer.
Vortex Z Knob for Creality Ender 3

This Z Knob allows you to rotate the z axis threaded rod to move the X gantry/axis up and down easier without having to push it manually or via the Ender 3 firmware, saving you some time every whenever you need to raise or lower it.
Compatibility: Ender 3, Pro, V2 (Any 3D printer where the Z Rod can be accessed from the top).
Extruder Knob/Valve/Wheel

This extruder wheel can help you both identify if the extruder is turning as well as help you push in the filament once you replaced it. Essentially, it makes swapping out the filament on your Ender 3 a lot easier.
Compatibility: Ender 3, Pro, V2.
Ender 3 LCD Cover

Another Ender 3 design flaw, Pro and V2 included, is the lack of protection surrounding the LCD PCB board, which is situated right behind the LCD display and is completely open with no casing to protect it.
This casing covers the back of the board and keeps all the electronics safe from any outside damage.
An additional bonus is that it lowers the amount of light that’s allowed to emanate from the LCD screen through the back.
Compatibility: Ender 3, Pro, V2.
Ender 3 Tool Holder

Owning a 3D printer requires you to have access to a couple different tools which can be used to adjust specific parts of the printer, to more easily remove a print from the bed, or to remove supports from a finished print.
This tool holder gives you quick access to all these tools by allowing them to be hung on the printer itself.
Compatibility: Ender 3, Pro, V2.
Ender-3 tool tray with Handle

If the previous tool holder isn’t enough and you need more space to keep the tools you use with your 3D printer, then print one of these two tool trays. These are designed to fit on the underside of the printer, right beside the LCD screen, and can slide in and out easily.
Compatibility: Ender 3, Pro, V2.
Download Here:
- Tool Tray with Handle.
- Tool Tray printed in vase mode (flimsier but faster print).
Filament Spool Holder

The spool holder that comes stock with the Ender 3 is far from ideal: It’s designed to sit on top of the printer and doesn’t spin, which introduces unnecessary friction on the spool when the extruder pulls on the filament, and this might cause a couple issues.
One solution would be to print the filament guides I linked previously, however, this is a spool holder that rotates when the extruder pulls on the filament, which introduces a lot less friction and which may improve your print quality.
Compatibility: Ender 3, Pro, V2.
Ender 3 Cable Drag Chain

Drag chains are frequently used with 3D printing and CNC machines because they keep the cables from getting tangled and damaged. You can print as many links of the chain as you need and then put them together to keep the cables safe.
Note: The printed chains aren’t perfect (check the comment section on thingiverse) and may come apart at times. If this happens to you then consider buying a simple drag chain like this one which you can find on Amazon.
Compatibility: Ender 3, Pro, V2.
Ender 3 V-Slot covers

While not the most functional print on this list, these V-Slot covers are great for keeping filament, dust, and other particles from getting into those V-slots, plus it can make the printer loot a lot more attractive!
If you’re someone who doesn’t like cleaning their printer too often, then definitely print these covers.
Compatibility: Ender 3, Pro, V2.
Material: PLA, ABS, PETG, TPU.
Upgrades that require additional parts
The printable upgrades that I’m going to list here will require you to purchase some sort of additional component in order for them to work, be it bearings, screws, etc. However, they generally work a lot better than the other upgrades.
Creality Ender 3 Adjustable Z Endstop

Adjusting the Z Offset on a stock Ender 3, Pro or V2 is really important when, for example, changing the bed type, however, it can be quite difficult to do mostly because you need to untighten the screws that hold the Limit Switch in place and move it up or down, then re-check to test the results, etc.
With this printable upgrade you can easily adjust the Z offset of your Ender 3.
Compatibility: Ender 3, Pro, V2.
Required Parts: 2x M3 nuts, 1x M3x25mm or longer bolt, and 1 spring like the same bed springs that I will be listing in the next section.
Ender 3 Filament holder with bearings

Like I previously mentioned, the stock Ender 3 filament holder introduces a lot of unnecessary friction and lowering it may improve the quality of your prints!
This filament holder uses bearings to reduce friction which may improve printing quality, or at least prevent printing issues.
Compatibility: Ender 3, Pro, V2.
Required Parts: Two 608ZZ bearings.
Universal Spool Holder

Here’s another spool holder designed to lower the amount of friction on the spool itself when the extruder pulls on the filament. However, this spool holder isn’t strictly designed for the Ender 3 but rather any regular 3D printer where the spool is kept outside of the printer and that use the same extrusions as the Ender 3.
This spool holder requires 4x 608ZZ bearings, 4x m3 size bolts of about 15mm, and 4x m3 size nuts.
Compatibility: Any 3D printer where the spool is kept outside the printer.
Material: PLA, ABS, PETG.
Required Parts:
Ender 3 Non-printable Upgrades
These are all upgrades that need to be purchased, be it official Creality upgrades or 3rd party ones.
Tempered Glass Bed

Tempered glass beds provide great adhesion and heat distribution, and they also help counteract the effects of a warped plate/bed, since they are thick and don’t adapt to the beds shape, providing you with a completely flat build surface, making first layer adhesion a lot better.
Tempered glass beds are not just great for bed adhesion, but once they cool down the prints pop right off as well.
Neither the Ender 3, Pro or V2 come with a tempered glass bed and you need to buy it separate. There is one model of the Ender 3 called Ender 3X which essentially is the Ender 3 Pro that comes with both the Magnetic and Tempered glass beds as well as the silent main board.
Compatibility: Ender 3, Pro, V2.
Get here: Amazon.
Magnetic Bed

Magnetic beds provide excellent adhesion. However, the main reason for using one is because of how easy it is to remove prints from them, since all you need to do is peel them off the printer’s bed and bend them until the print pops right off.
It’s worth noting, however, that even though magnetic beds may seem far more appealing than tempered glass ones, they aren’t as great for bed adhesion, and if the bed on your Ender 3 is warped, then the magnetic bed will adapt to it and also be warped (usually with the center of the bed lower than the rest of it), making printing the first layer a lot harder.
Compatibility: Ender 3, Pro, V2.
Get here: Amazon.
BLTouch (Bed Leveling Sensor)

The BLTouch is a mechanical bed leveling sensor that can be installed on your Ender 3 and that makes the whole bed leveling process a lot simpler since you’ll never have to manually do it again. It uses a plastic probe to take measurements across the entire build surface before each print to determine the optimal first layer height.
Note: The Installation of the BLTouch isn’t as simple as it may seem since you may need to install a pin 27 board, update the firmware, and more. Still, probably the best upgrade you can get for your Ender 3.
Compatibility: Ender 3, Pro, V2 (and most 3D printers).
Bed Leveling Springs

Levelling the Bed on your new Ender 3 can be hard to get right at first, but what’s even more frustrating is when you manage to properly level it and print one model successfully only to find that when you start the next print the bed isn’t leveled anymore.
This is generally caused by the sprints that are underneath the bed since they are too weak to keep the bed leveled for long periods of time. However, installing firmer springs like the yellow ones I installed on my Ender 3 will keep the bed leveled for much longer.
Compatibility: Ender 3, Pro, V2, CR10.
Get here: Amazon.
Laser Engraver Attachment

The Ender 3 can also be used as a laser engraver by simply installing this upgrade! It enables you to engrave wood, acrylic, paper, etc., and it can also cut wood and acrylic, depending on the wattage, and all of this without having to update the firmware of the printer.
Typically, they can just clip magnetically to the tool head (attached with magnets) and run from the fan port on the machine and are quick to assemble.
While this upgrade may not be strictly related to 3D printing, it’s definitely one of the better ones on this list.
Compatibility: Ender 3, Pro, V2.
Get here: Amazon.
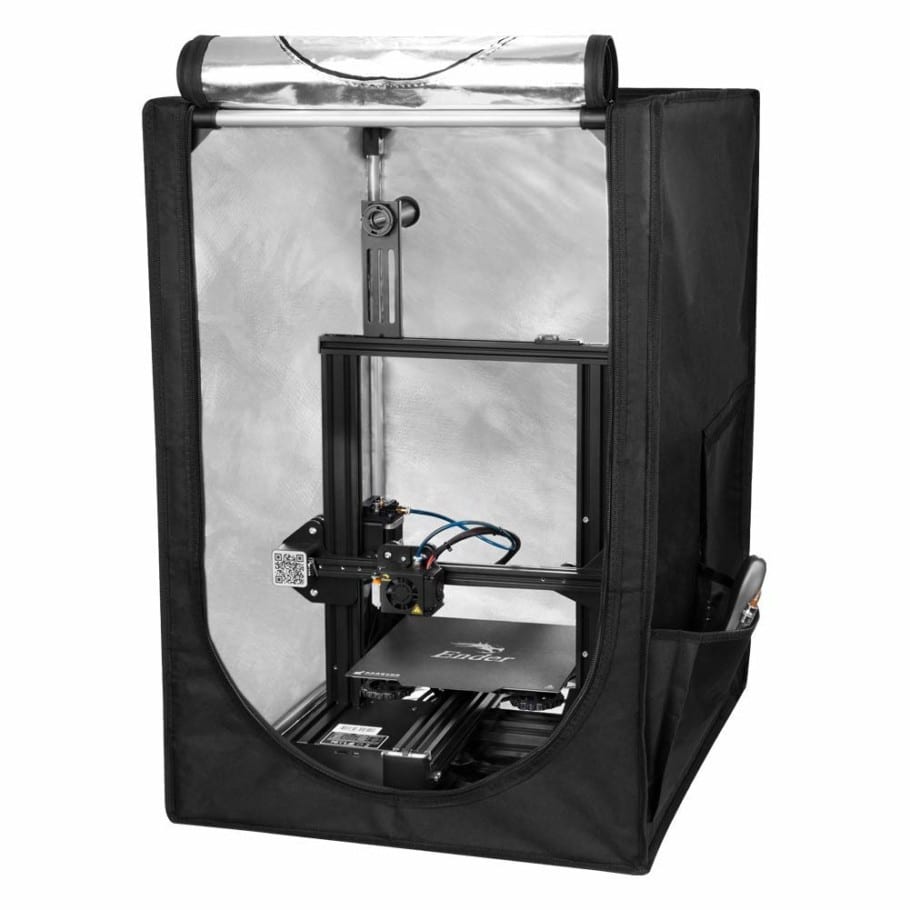
Enclosure

Enclosures are designed to keep the air temperature around the printer consistent and as warm as possible, since this prevents warping when parts cool unevenly, especially with filaments like ABS. If you only print with PLA, then an enclosure isn’t necessary.
Other benefits of using an enclosure are; Fire protection, since some of them are fireproof, and lower printing noise.
If you print with ABS, ASA, or even PETG, then printing with an enclosure will yield much better results and keep the print from warping or even detaching from the build plate.
Compatibility: Any printer that fits inside of the enclosure.
Get it here: Amazon, Creality website.
Direct Drive Extruder

The stock Ender 3 comes with a Bowden extruder, which means that the motor that pushes the filament into the hot end isn’t part of the hot end itself but rather pushes the filament through the PTFE tube into the hot end, which means that the path the filament has to travel until it reaches the hot end is much longer.
The hot end used in a Bowden setup is much lighter than one that uses a direct drive, which reduces ringing, ghosting, and can print at higher speeds. Direct drive, on the other hand, has the advantage of being able to print with really flexible filaments since the path the filament has to travel is much shorter, and they can print at much higher temperatures since the PTFE tube in a Bowden setup can only handle up to 245° before getting damaged.
Generally speaking, direct rive extruders are better and more versatile, especially if you plan on using a vast variety of filaments.
Compatibility: Ender 3, Pro, V2, CR10.
High Quality Direct Drive Extruders:
EZR Struder

The EZR Struder is an upgraded extruder system for the Ender 3 that is designed to let you print extremely flexible filaments, even with a Bowden setup. The installation process is really quick and it can be used to print with any regular filament, such as PLA, ABS, etc., as well as NinjaFlex.
If you don’t want to upgrade to a direct drive extruder but need a way to print flexible filaments, give the EZR Struder a try, or print the upgrade I mentioned previously that lets you print really flexible filaments.
Compatibility: Ender 3, Pro, V2.
Get here: SeemeCNC.
Capricorn PTFE Tube

This might not seem like the most important upgrade you can make to your Ender 3, but the stock PTFE tube may have a slightly varying diameter on the inside and it’s also not able to withstand temperatures over 250°.
The Capricorn PTFE tube is designed to withstand much higher temperatures and has an extremely accurate internal diameter, which makes printing with flexible filaments easier.
Compatibility: Ender 3, Pro, V2 (and any Bowden printer).
Get here: Amazon.
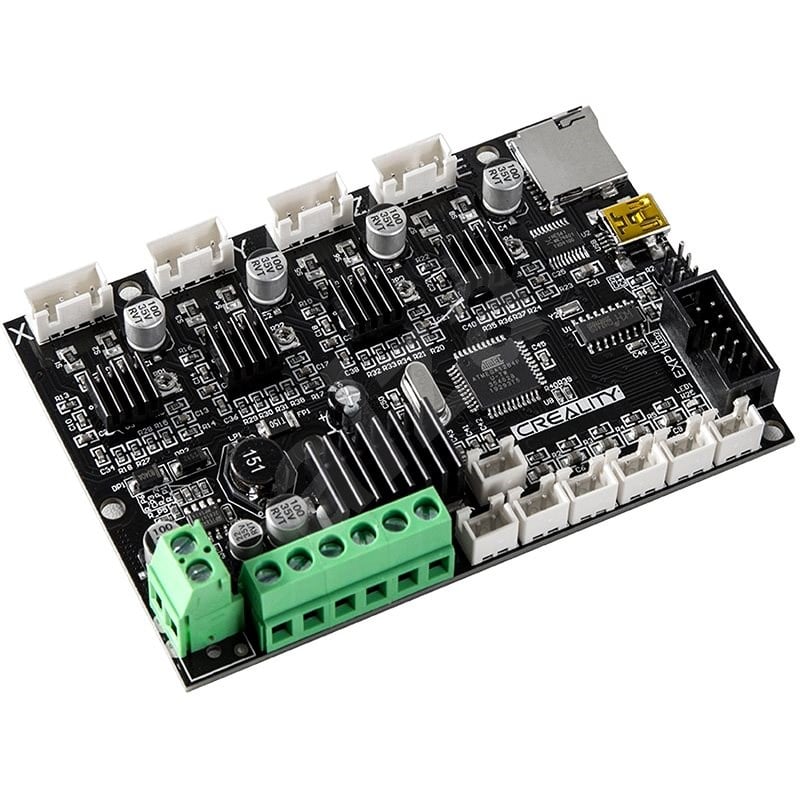
Silent Mainboard

If you’re running your Ender 3 for a couple hours every day, and especially if it’s in the same room that you’re in, the noise it makes can be a bit irritating. However, there is a fix for this issue since you can change the mainboard to a Silent one that makes it so every stepper motor movement is completely silent.
This means that only the fans will be heard, and these can also be replaced with quieter ones.
The silent mainboard doesn’t come stock on the Ender 3 and Pro versions, but it does come built into the V2 and the Ender 3X.
Compatibility: Ender 3, Pro, Ender 5, Ender 5 Pro.
Creality 4.2.7 Mainboard: Amazon, Creality Website, Banggood.
BIGTREETECH 3D Printer Upgrade Motherboard: Amazon.
Silent Cooling Fans

This one requires a bit more work but replacing the old fans on your 3D printer with Noctua fans will quiet it down dramatically, and it only costs about $40 to do so.
Here’s a guide on how to do it and these are the things you need to get:
- 2 x Noctua 40x20mm fan
- 1 x Noctua 40x10mm fan
- Buck Converters (at least 3, and 4 if PSU fan is 24V. I recommend getting the ones with the built-in display to see the voltage)
- Multimeter (if you want to get the cheaper buck converters without the display)
- 10 x 20mm m3 bolts (better to get an entire set of differently sized m3 bolts)
- Heat-shrink cable sleeves
- Heat Gun (optional since you can use a lighter)
- Allen wrenches (The ones that come with the Ender 3)
- Side Cutters/Pliers (included with the Printer as well)
Compatibility: Ender 3, Pro, V2.
If you don’t want to have to go through all the trial and error that we did in order to find the Ideal Settings for creating high-quality prints on your Ender 3, then definitely check out our own Cura Profiles tailored specifically for the Ender 3 Printer Series.
Check out our recommended products section

We created a recommended products section that will allow you to remove the guesswork and reduce the time spent researching what printer, filament, or upgrades to get, since we know that this can be a very daunting task and which generally leads to a lot of confusion.
We have selected just a handful of 3D printers that we consider to be good for beginners as well as intermediates, and even experts, making the decision easier, and the filaments, as well as the upgrades listed, were all tested by us and carefully selected, so you know that whichever one you choose will work as intended.
Error processing API data.

Great list! I’m printing a few of these immediately. Fyi, the link for “Vortex Z Knob for Creality Ender 3” goes to a different page. I’d post the correct link, but I don’t want to trip any comment filters 🙂