To ensure that you’re getting the most bang for your buck when using 3D printing technology, sometimes, calculating printing costs will be needed, especially if the aim is to market the printed pieces.
The printer’s price can vary a lot because of the wide range of applications that exists. But comparing printer prices won’t always tell you the full story about how much your printed piece will cost.
In this article, we will explore many other factors that will end up impacting the final cost of running a 3D printer, such as material costs for different 3D printing technologies, as well as electricity costs, post-processing materials, and costs related to the previous design of the model.
An active 3D printer costs roughly $0.35 per hour. This not only includes filament consumption (15 cents per hour), but also electricity costs (1.58 cents per hour), nozzle replacement (1 cent per hour), and the amortization of the machine ($0.17 per hour). Conservatively, if you operate the machine 8 hours per day during working days (252 days/year), this translates to a yearly cost of $695.
Once you’ve read this article you will be able to calculate the cost of your production ensuring that you have found a balance between lowering costs and keeping high quality.
Price of the 3D Printer
There are different kinds of printers. Fused deposition modeling (FDM) and stereolithography (SLA) are the two most popular and widespread types of 3D printers you can find on the market these days.
While FDM printers work by extruding and depositing layers of melted thermoplastic filament on a print bed, SLA printers use a laser to selectively cure liquid polymer resin, layer by layer, in a process called photopolymerization.
Despite the fact that there exists a wide price range, the lowest cost 3D printers are most often than not FDM ones. This is probably why it is the most widely used 3D printing method among hobbyist 3D printers and for such cases where only relatively simple prototypes in limited numbers are printed. Higher-performance professional and industrial FDM printers are also popular with professionals. Naturally, their costs are significantly higher.
Here are some estimated prices for the different FDM 3D printers categories available:
- DIY 3D printer kits: about $200
- Hobbyist printers: $500-$1,500
- Professional FDM 3D printers: start at around $2,500
- Large-format professional FDM printers: start at around $4,000.
SLA technology used to be available only for the expensive industrial-grade segment, but fortunately, the process has become much more accessible nowadays.
Professional SLA desktop printers start at $3,500 and large-format benchtop printers which offer a bigger build volume are about $11,000. Having said that, it is possible to get high-quality hobbyist SLA printers such as the Elegoo Mars 2 Pro for around $200.
Difference in Print quality between FDM and SLA Printers

FDM printers build pieces by layering molten filament on a print bed. This process makes the resolution defined by the size of the extrusion nozzle since there are voids in between the rounded lines at each layer.
Furthermore, FDM printing produces a mechanical bond between layers. This constructive characteristic affects strength since the interface between layers becomes weak points.
On the other hand, SLA technology uses a different process where liquid resin is cured by a laser to form each layer. This process enables us to achieve much finer details and is more reliable in repeatedly achieving high-quality results. In consequence, we will obtain smooth surfaces, high part precision, and accuracy.
Unlike FDM printers, SLA ones create chemical bonds resulting in fully dense parts which provide high degrees of lateral strength, turning out in isotropic parts.
Costs of Running a 3D Printer
Contrary to what might be thought, the costs of running a 3D printer are not only a matter of how much your 3D printer costs.
This won’t tell you the full story about how much a printed part will cost.
Printing material, electricity consumption, machine maintenance, and post-processing additional materials are some of the factors that will significantly influence the final cost per part.
3D Printing Material Cost (Filament, Resin)
One of the main things to be taken into account when calculating printing costs is the material cost. This, in turn, depends on the cost of the 3D printing material itself, how much material is required to create a given part (including waste), what the shelf life of the material is, and if there are other elements required for printing the parts.
The usual cost for each PLA, ABS, or PETG is about $20 for a 1Kg spool of 1.75 mm filament.
ABS and PETG are characterized by their durability and impact resistance and PLA by its easy way to use, and its multitude of applications.
Unlike SLA printers, where you need to consider many additional costs (like Gloves, Isopropyl alcohol, and more), there are no hidden costs when using an FDM printer.
The resin price can vary anywhere from $15 to $45 for 500ml of material, and for 1000ml the price range is between $28 and $80.
For an extensive comparison between filament and resin costs check out this article I wrote on the subject.
Electricity costs

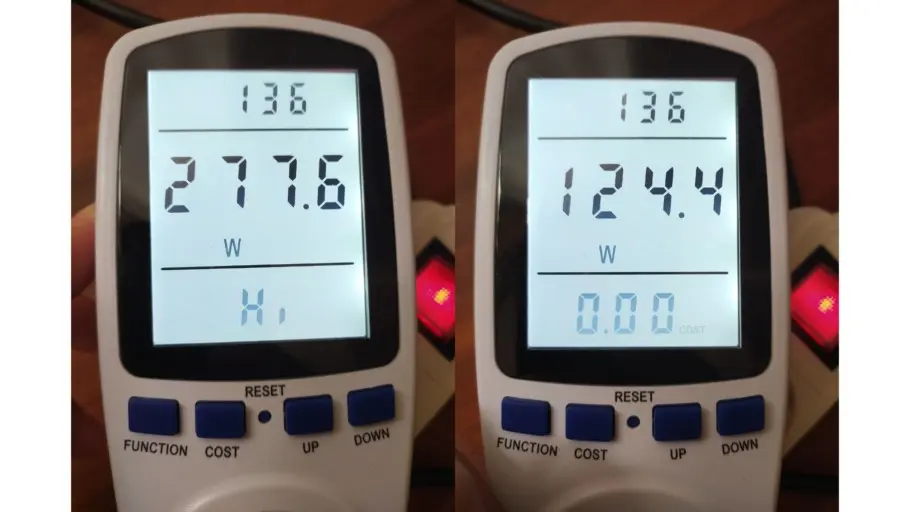
The electric power that a printer uses depends primarily on the printer’s brand and size, the temperature of the heated bed and nozzle, as well as the size of the printed piece. As a reference, the average cost per kWh in North America is 12.69 cents, which is similar to Europe (12.3 cents), Asia (14.65 cents), and South America (15.18 cents). Electricity costs have a greater impact if you’re located in Oceania, where the cost per kWh is 26 cetns.
For instance, printers with larger heated beds or those which can print at higher temperatures, tend to consume more power.
Comparing it with the price of the filament or resin, electricity doesn’t add that much to the overall cost. However, it might become significant in those cases where you need to print batches or you have a larger amount of machines working.
As an example, in this article, you will find an analysis of how much power an Ender 3 consumes, made by using an Electricity Usage Monitor.
General Maintenance
3D printers are no different from other machines; they all need preventive maintenance and eventually the need for some part replacement.
Proper-maintained machines will perform as intended, and periods of downtime can be avoided.
However, you still can’t save some parts from wear and tear.
An example of this is the nozzle. They have a major impact on the print’s quality, this is why it is important to keep them clean and replace them when necessary.
In these articles, you will find information about how often you should replace a nozzle, how to replace it, and how to clean an unclogged one.
Other parts that will need replacing over time might be stepper motors, maybe the mainboard at some point, belts, bed springs, ABL sensors, etc.
Additional Materials
There may be other factors affecting the final cost of a specific part. These aren’t strictly related to printing the model but post-processing.
3D printed parts usually require some post-processing treatment. This can include practices like cleaning or fixing the piece, surface finishing, and coloring.
When calculating costs, you should consider the price of all the materials involved and the time it takes to perform those treatments.
Within post-processing materials, we can count sandpaper, acetone, paint, brushes, spray paint, etc.
Post-processing can become costly, especially when it’s done by hand and it might be unsustainable in large series production because of the time it takes and the fact that costs of part breakage are included here too.
Software Costs (CAD and Slicers)
Slicers such as Cura or Prusa Slicer are generally free, but Simplify3D, for example, isn’t. You will most probably don’t need to acquire Simplify3d, but just as a reference, its license costs roughly $150.
When trying to learn how to slice and print models, free software like Cura is a great way to start learning the basics and they are also capable of producing high-quality prints.
Becoming experienced with this software, you might require a more comprehensive set of features that may justify an investment.
It’s worth noticing that the quality advantage that paid slicers used to have in the past is continuously getting smaller, and nowadays it is only advisable to pay for a license in very specific cases.
Then there’s CAD software to design the models and those can also be free, but the best ones are generally paid (yearly or monthly payments).
In the following articles, you will find information about different slicers and CAD software.
- Best slicers for 3d printing
- Is Tinkercad good for 3d printing?
- Is fusion 360 good for 3d printing?
- How to create models for 3d printing?
- Is Simplify3d worth the cost? Comparing it with Cura and Prusaslicer
Designs you can find online (not always free)
Designing a part from scratch may not always be the best option. There is a large number of digital design files already available online which will save you a lot of time.
Most of them, such as the ones found on Thingiverse (a website dedicated to the sharing of user-created digital design files), are free. You should also check out our own search engine, which aggregates the most relevant results from the most popular sources: https://3dsolved.com
But if you want to print something specific then you might need to pay for the STL file. If this is the case, then consider that the cost per part will be less affected the larger the number of pieces you need to print.
How to calculate the cost of 3D Printing
In this section, we will study an example of how to calculate the cost of owning and running a 3D printer.
Let’s take as an example the Prusa I3 MK3S+ FMD 3D printer whose price is around $1.000. Let’s say you run it for 8Hs a day for two years. Thus, 8 hs * 365 days * 2 years = 5840hs gives us the total number of hours the printer will be running. This is of course a very conservative estimate and does not mean that your printer won’t be usable from there on, but it just serves as a depreciation schedule.
Having done so, you can calculate how much it costs to own the printer per hour (without including electricity, and filament) by dividing the price by the total of hours: $1.000 / 5840 hs= 17 cents/hour
To calculate filament cost for a specific model, use Cura to slice the model and it will tell you how much filament you’re going to need, then just calculate the cost based on how much the spool cost. As a ballpark figure, a 3D printer consumes approximately 7.5g of filament per hour when printing at a 0.2mm layer height and at a conservative speed. Assuming that the filament spool costs $20 for 1Kg, this results in a filament cost of 15 cents per hour.
Nozzles should be replaced about every two months if you’re printing for 8hs a day, so you should include that cost. Each brass 0.4 mm diameter nozzle costs $5.78 (average of a few reliable brands). Following the previous example, you would need 12 nozzles in 2 years, which translates to $69.36. Dividing this by the total of hours, you get a 1 cent cost per hour approximately.
Electricity depends on the country you’re in, and you can check out the full-length article I wrote on the topic. As an example, let’s take the electricity cost in North América which is about 12.69 cents per kWh. This gives us an estimate of 1.58 cents cost per hour and 12.64 cents per day.
General repairs & maintenance depend a lot on the printer, but it shouldn’t be too much unless something like the mainboard gets fried.
The following list sumarises some average 3D printing costs:
- Average 3D printing costs per hour: printer_depr. + fil_cons. + nozzle_repl. + elect_costs = 34.58 cents / hour
- Average 3D printing costs per day: $2.76
- Average 3D printing costs per year: $695
- Cost of 3D printing a small object (10-15g of filament): 67.5 cents
- Cost of 3D printing a Phone Case: 27 cents
Use the Prusa Calculator
This calculator is mostly designed to let you know how much to charge your clients for a printed piece.
You just have to load a gcode file or input the print time and filament weight manually, and it will answer questions like: How much should you charge when 3D printing on demand? Is electricity a major factor in the calculation? What about the return on the total investment and your time?.
How to lower the cost of 3D printing with Slicer Settings
If you’re looking to lower the cost of your prints while also achieving high print quality, you might want to make sure you’re always using the optimal print settings.
Only use Supports when actually needed
In those projects where support structures are needed, you will have to add to the calculation the price of material and the time needed to build those structures, also consider the time and tools that will be needed to post-process the piece.
Sometimes, just reorienting your object inside of the slicing software can help in reducing the need for unnecessary plastic in your print.
Another way of avoiding unnecessary support structures is to increase the angle at which the Slicer starts introducing supports. If you know your printer, you may get by printing 60-degree overhangs without any supports (Cura usually enables them at 45 degrees).
Reduce the infill density
By reducing the infill density, not only will you save more material, but your prints will also finish much faster, which means less printer wear and tear, less electricity consumption, and more output per hour.
You can save material if you completely hollow out the inside of your design. But you must be careful because the printing material you use will require a minimum wall thickness to maintain hull integrity.
Reduce the number of shells/walls
Same as the case of reducing infill density, reducing the number of walls will not only reduce the amount of material used but the processing time too.
Always try to keep a balance between infill and walls number reduction to maintain structural integrity and keep the strength and quality of the piece high.
Print faster
Always trying to avoid neglecting quality and strength printing faster not only will save you time but will also reduce the time that the nozzle and bed are hot, which are the ones that consume the most energy.
Reduce the Bed temperature
Since bed print heating is performed by long traces of cooper acting as a resistor, higher temperatures mean higher amounts of electricity consumption. As seen this will affect the final cost of the pieces.
Then, only if adhesion is not a problem (mainly working with PLA), you should consider reducing the bed temperature.
Costs of Outsourcing the printing process

You might not be interested in buying, operating, and maintaining your own 3d printers. In that case, you might consider outsourcing your prints!
This could be a good option if you’re looking to save some time, or maybe if you just need a once-in-a-lifetime print. Outsourcing also has the advantage of giving you access to industrial printers that you could otherwise most probably not be able to use.
3D printing services can be really expensive because besides all the costs we have already mentioned, they have to account for the industrial printers they use, which are significantly more expensive, and they also have to add profit margin on top of that cost.
Then, if you’re just printing for fun, buying a 3D printer would be the best choice in the long run.
Error processing API data.
