You bought your first 3D printer and already printed the files that came with it as well as some of the free 3D models available on the web.
However, once you’ve done that it’s time to start designing your own prints, but to do that you’re going to have to learn some 3D design.
So, in this article, I will be giving you a full guide on how to start designing your own 3D models to print afterwards, what software to use, where to find courses for those 3D design software, and much more.
So, without any further ado, let’s get started!
Design your Model using a CAD software

CAD software, or Computer Aided Design software, lets you build 3D models on a computer which can then be 3D printed. Of course, these types of software are not only good for designing your prints but are also used for creating any kind of 3D element, be it for video games, animation, and more.
Once you’re done printing the free test prints that come with your printer, you generally download designs that other people made (you can use our own search engine to find amazing designs here). However, the ultimate challenge is to create them yourself using a CAD software, but this is definitely a lot harder to do than it may seem since 3D design can be quite complex.
There are some free CAD alternatives out there that are really simple to learn and use as well as some others that offer way more functionality at the cost of having a steeper learning curve. Of course, if you want to learn how to create your own models via a course, then check out this post I wrote about some of the best online 3D design & 3D Printing courses available (Free and also Paid).
Now, let’s check out some free CAD software!
Free CAD Software
I just want to note that Free software isn’t necessarily worse than their premium counterparts. In fact, Fusion 360, which is the go-to design software used by most 3D printing enthusiasts, offers a free license for personal use with only a couple limitations. However, it’s not the easiest CAD to learn.
Tinkercad

Tinkercad (Link to Review) is a browser-based CAD that is 100% free and that is ideal for absolute beginners since it relies on a drag-and-drop interface where you can select different objects, such as squares, circles, etc., and use those to create the final design.
In addition to this, even though it’s really simple and straight forward to use, it’s also a lot more powerful than it seems and will suit most of your 3D design needs, plus every design you create gets saved in the cloud and you can always access them from any device.
Check out Tinkercad here.
Fusion 360 Personal License

Fusion 360 (Link to Review) is probably the best-known CAD currently being used by 3D printing enthusiasts since it’s extremely powerful and capable of creating every 3D model imaginable.
The learning curve is a lot steeper than the one of Tinkercad, but it’s also a much more professional software capable of creating more complex designs.
It offers a couple different pricing options and let me tell you, it’s not a cheap software, but they offer a personal license that you can use for free for 3 years and that only comes with some minor limitations when compared to the premium version.
If you’re a complete novice when it comes to 3D design, Fusion 360 might not be the friendliest CAD to get you started, but if you follow some courses and if you take the time to learn it, you’ll be able to create much better designs than with something like Tinkercad.
FreeCAD

FreeCAD (Link to Review) is a general-purpose and open-source 3D parametric design software that has a wide range of uses. Its main purpose is for designing mechanical engineering, electrical engineering, and architectural objects.
For that reason, it is best used for geometric designs like accurate replacement parts, detailed technological parts, scale models, and edit gadgets.
FreeCAD (link to website) could be considered a middle ground between Fusion 360 and Tinkercad since it’s a bit more powerful than Tinkercad while also being more beginner-friendly than Fusion 360, and there’s also loads of online resources available where you can learn the ins and outs of FreeCAD to design your own 3D models successfully.
Blender

Blender (link to review) is a 100% free 3D design software and it’s the most used software for 3D printing when it comes to creating organic shapes. Otherwise, it is not the most practical software for designing precise and technical objects for which there are better-suited programs, like Fusion 360.
If you want to model organic shapes such as animals, humans, or monsters, Blender is one of the best options available simply because of the fact that it is free, open-source, has powerful features, and a thriving community that is constantly improving the program.
Paid CAD Alternatives
Most paid CADs are not aimed at hobbyist designers but rather professionals and corporations that use this software for commercial purposes, which is why their licenses are usually very expensive and paid yearly.
For 99% of people reading this, none of these alternatives will be of much use to you since you can definitely get by using Fusion 360’s personal license and achieve astounding results with it.
However, some paid CADs include: AutoCAD, Fusion 360 (not the personal license one), Solidworks, Sketchup Pro, Solidedge, ZBrush, and many more.
Free 3D Design Courses
There are multiple free online 3D printing and Design courses available, but here are some of the ones I found to be the most useful:
- Tinkercad Tutorial Series by Promo Ambitions.
- Fusion 360 for 3D Printing 2021 by Austen Hartley.
- Foundations of Blender: Jewelry Design in 3D (By Gesa Pickbrenner).
These three courses are all completely free and you have one for Tinkercad, one for Fusion 360, and another one for Blender, which should cover 99% of your needs.
Note: The Skillshare courses are not free but you can sign up for the free trial that lasts a month and finish all the courses you want.
In the article I just linked, there are many more free courses as well as paid ones, but there’s also plenty of YouTube tutorials out there that provide excellent information for each of those CADs.
Some 3D modelling tips
Here are some tips I thought of that should improve your chances of success while printing the models you designed, since there are some fairly common mistakes you can make that may end up ruining your print.
Design the parts with a flat base

Right: Flat base, much better adhesion.
Probably the most important factor when it comes to a successful print is achieving a good bed adhesion, which means that the surface of the model that’s contacting with the bed should be as big as possible.
Imagine printing a round sphere where the bottom is rounded as well. In that case, there’s not a lot of surface available to achieve a good bed adhesion, which means that the print will detach from the bed and the printer will continue printing in mid-air, leaving plastic strings all over the print surface.
However, if you change the shape of the bottom of the model so that it’s completely flat, and if possible also with a large surface area, then bed adhesion will be much better and your prints success rate will be much higher.
Avoid Steep Overhangs

3D printing is done layer by layer from the ground up and the printer can print at an angle without any issues or loss in printing quality as long as that overhang angle isn’t too steep.
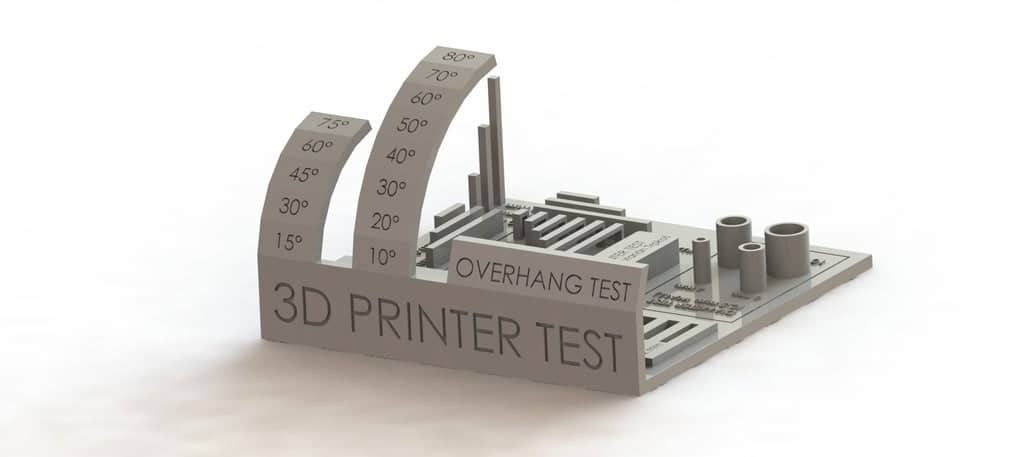
If you look at the image below, you’ll see that it has an angled overhang on the left, a bridge overhang in the middle, and a cantilever overhang on the right. This is an object designed to show you what types of overhangs your printer can deal with as well as which ones it can’t.

The angled and bridged overhangs (left and middle) are no problem for the printer since there’s enough support material available to keep the print from failing. But the right overhang, since the printer would need to print in mid-air, will fail since there’s no support structure for the filament to grab onto.
To circumvent this issue, you should either print using overhangs of no more than 45° or include supports (a setting that is enabled in the slicer) since these will form a support structure under any overhang above a specific angle to keep it from failing.
Consider Layer Line direction (Stronger prints)
Since FDM 3D printing is done in layers from the ground up, we can adjust the position of the model in the slicer before printing it to make it stronger.

Right: Horizontal layer lines.
This works because layer lines are very strong but the adhesion between those layers isn’t. So, if you look at the image above where I sliced the exact same model but one gets printed vertically and the other one horizontally, the one with horizontal layer lines won’t withstand as much of a pulling force while the one with the vertical layer lines will be much stronger.
You should always adjust the position of the model in the slicer so that the layer lines are parallel to the force that the object is going to be subjected to and not perpendicular, this way you aren’t relying on the strength of layer adhesion as much.
Pay attention to size for dimensional accuracy

When first starting out you’ll probably design something that needs to be functional and fit tightly with another object, only to find that the dimensions you set were completely off.
In Tinkercad, as well as every other CAD, you can see the grid (generally in millimeters) which gives you a visual cue of how large the model is going to be. But you can also click on the model and adjust the length, width and height easily by typing it in.
Always make sure to use calipers to take the right measurements and enter those into your CAD to be as precise as possible.
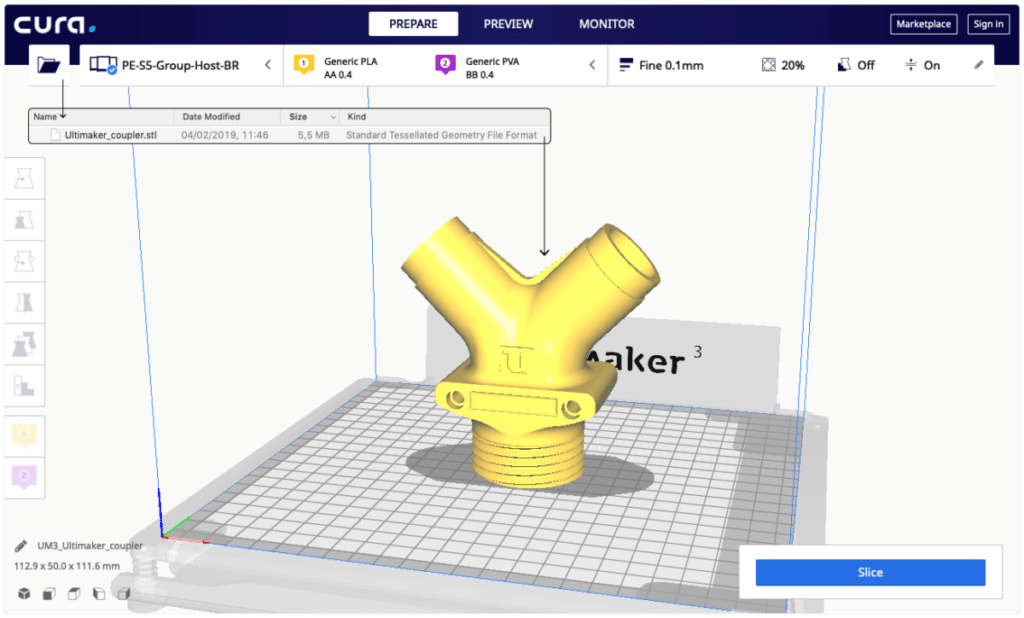
Slice the model using a Slicer
FDM 3D printing works in layers: The printer starts from the very bottom, prints an entire layer and then moves up to the next one, etc. until the printing process is complete. Slicers essentially “slice” the model up in different layers from the bottom up and create a gcode file which contains all the information the printer needs in order to print the object.
Luckily, all free Slicer currently available are absolutely fantastic and work really well, and there’s rarely a case where going with a premium Slicer makes any sense nowadays.
Here’s a list of the best free Slicers:
Free Slicers
There’s probably a dozen different free Slicers out there, however, I’m only going to list two since I think that those will cover all your needs!
Let’s start with the one I use, Cura.
Ultimaker Cura

Cura is the most-used Slicer out there simply because it works, it’s intuitive, it gets consistent updates, and it also feature a huge number of free plugins that you can install and which will make your life a lot easier.
For example: If you are trying to find a way of positioning the model to be sliced so that it uses the least amount of support material possible, well Cura has got you covered.
Definitely check Cura out, it’s a great software.
PrusaSlicer

PrusaSlicer, contrary to Cura, not only works with FDM printers but also SLA (resin printers), which makes it extremely versatile.
However, it doesn’t come with any free plugins that you can install, but it does offer bridge detection and “if-statements”, plus it’s also getting updated regularly, meaning that it’s only going to get better over time.
Premium Slicer Alternatives

I already mentioned that I don’t think that most people will ever need to pay for a premium slicer, especially considering how fast all the free ones are improving.
However, going with something like Simplify3D may make sense if you’re running a 3D printing shop, but I generally recommend going with the free alternatives.
Save the Model to the SD card
This is a very easy and straightforward step, but you need to do it in order to get the information over to the printer if you want to be able to print the model.
Cura automatically lets you save the file to the removable drive and even ejects it for you, but depending on the slicer you might have to do this manually. Make sure to always name the file appropriately so that you know what file you’re selecting from the printer.
However, if you’re running a printing farm or if you want to control the printer remotely, then there’s a more efficient way of doing things.
Use Octoprint as an alternative
OctoPrint is a web interface for your 3D printer that allows you to control and monitor all aspects of your printer and print jobs right from your within your browser.
You can access a webcam feed to make sure the print is moving forward as expected, as well as being able to take a look at temperatures, view reports on the progress of the prints, control the printer itself, create a printing queue, analyze the bed level via the bed level visualizer, and more.
Conclusion
Creating 3D models that can be printed on your 3D printer is a fairly simple process, with the hardest part being designing the actual model itself.
I’d recommend starting with Tinkercad since it’s extremely intuitive and easy to use, and as long as you don’t need to create really complex models don’t upgrade to Fusion 360 since it will take you a lot longer to learn the software.
The rest of the process is extremely simple, really, so I’d mainly worry about learning 3D design.
I hope this was useful!
Have a great day!
Check out our recommended products section

We created a recommended products section that will allow you to remove the guesswork and reduce the time spent researching what printer, filament, or upgrades to get, since we know that this can be a very daunting task and which generally leads to a lot of confusion.
We have selected just a handful of 3D printers that we consider to be good for beginners as well as intermediates, and even experts, making the decision easier, and the filaments, as well as the upgrades listed, were all tested by us and carefully selected, so you know that whichever one you choose will work as intended.
Error processing API data.

This is an amazing article! So concise and answered all of my questions and then some. There aren’t many dumbed-down sources of information out there for us noobs to printing so this made me breathe a huge sigh of relief when I read it. Thank you so much Facundo!